Salvaged LCD Screen Hacking

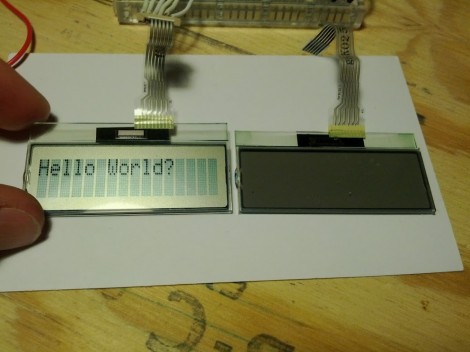
You can find all kinds of LCD screens in broken electronics. But it’s often a chore to figure out how they are controlled if you don’t have a working device that can be used to sniff the communications protocol. [Justin] grabbed this character LCD screen from an old Brother printer and decided to see if he could reuse it in his own projects. Luckily the driver card still worked so he patched into the LCD’s control lines and sniffed the signals when the printer is powered on.

He used the OpenBench Logic Sniffer for this project. It easily captured the data, and also provided analysis tools. The SPI analyzer managed to decode the command signals and message of “Please wait” that pops up at power up. After a bit of folly with the pin out of the display, he is now able to control it thanks to an Arduino library which he wrote. Check out the demo after the break to seem him scrolling through a bunch of different functions for the device.

Continue reading “Salvaged LCD Screen Hacking”

Arduino BASIC Interpreter Using LCD, Keyboard, And SD

This Arduino BASIC interpreter will make a really fun one-day project if you’ve already got the parts on hand. [Usmar A. Padow] put together an Arduino Uno, SD card, four line character LCD, and PS/2 keyboard. but he’s also included alternative options to go without an LCD screen by using a computer terminal, or without the SD card by using only the Uno’s RAM. As you can see in his demo after the break, this simple input/output is all you need to experiment with some ancient computing.

It’s hard for us to watch this and not think back to an orange or green monochrome display. Just like decades past, this implementation of BASIC has you start each line of code with a line number, and doesn’t allow for character editing once the line has been input. The example programs that [Usmar] shows off are simple to understand but cover enough to get you started if you’ve never worked with BASIC before.

Last August we saw another hack which ported Tiny BASIC to the Arduino. You may want to take a gander at that one as well.

Continue reading “Arduino BASIC Interpreter Using LCD, Keyboard, And SD”

Text Adventures For Arduino Starting With Hunt The Wumpus

Let’s be honest, you’re going to have trouble getting kids to play text-based adventure games these days. But this is one way to get them interested. This weekend you should get together with niece, nephew, son, or daughter and help them build their own hardware and program it with an adventure game. One last project before school’s out and the weather’s nice.

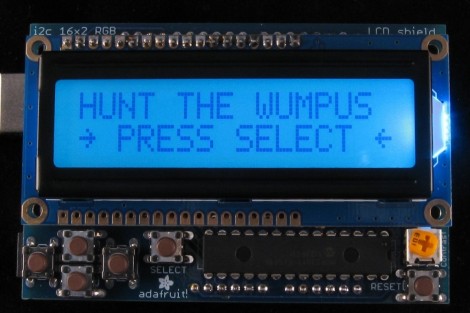
This is [Dan’s] shiny example of Hunt the Wumpus. He used Adafruit’s RGB LCD shield for Arduino. It’s got a character LCD and five buttons. But you can easily breadboard this yourself using a few tactiles plus a screen and uC of your own choosing. One nice touch with this one is the RGB backlight which is used to add an element of danger to the story line. He also mentions a few bugs in the Arduino language which he found while setting up the game.

We’ve been meaning to make our version of Zork using an Arduino, GLCD, and PS/2 keyboard ever since we read “Ready Player One”. This is just a bit more encouragement to get moving on that project.

[Thanks PT]

Over-engineering A Two-zone Thermometer

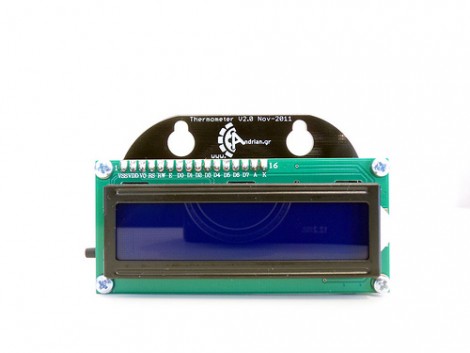
We love the extra touches that [Andrianakis Haris] added to his two-zone electronic thermometer. It includes features that you just wouldn’t find on a mass-market commercial product because of issues like added cost. For example, you can see that the PCB juts up above the LCD display, allowing the module to be mounted on a pair of screws thanks to the keyhole shape that was drilled in the substrate. I increases the board size greatly, but on a small hobby run this won’t usually affect the price of the board depending on the fab house pricing model.

The design uses an ATmega8 microcontroller to monitor sensors in two different places. There is an onboard LM35 temperature sensor for monitoring the space where the unit resides. A remote sensor module uses a DHT-11 chip to gather data about temperature and humidity. That sensor is wired, but there is one wireless option for the device. Data can be pulled down from it via an optional Bluetooth module which can be soldered to a footprint on the back of the board.

Check out the video after the break to see temperature readings pulled down wirelessly. Continue reading “Over-engineering A Two-zone Thermometer”

Full Featured Security Lock Demonstration

[Arshad Pathan] let us know about his latest project, a modular code lock that can be adapted to many different situations.

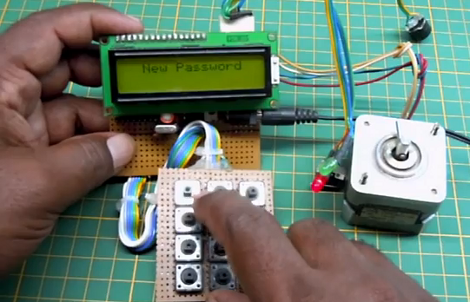
The user interface is made up of a character LCD screen and a 3×4 keypad. For this example [Arshad] is using a stepper motor as the locking mechanism. When the board is first powered up it runs the stepper in one direction until receiving input from a limiting switch. In this way, the microcontroller calibrates itself to ensure the lock is in a known position. From there it waits for user input. An unlocked door can be locked at any time by pressing the * key. Unlocking requires entry of the correct password. And a password can be changed by entering 9999 (followed by the old password when prompted).

In the video after the break [Arshad] does a great job of demonstrating the various modes which he has programmed. This stands on its own, but we always love to have more details so we’ve asked if [Arshad] is willing to share a schematic and the source code. We’ll update this post if we hear back from him.

Update: [Arshad] sent in a couple of schematics which can be found after the break.

Continue reading “Full Featured Security Lock Demonstration”

LCD Backpack: From Arduino Board To Homemade Pcb

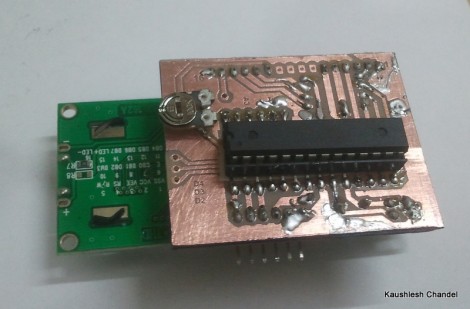
[Kaushlesh Chandel] prototyped a few projects on his Arduino that use an HD44780 Character LCD. Wanting to keep these projects in one piece, but not sacrifice his Arduino board, so he etched his own LCD backpack that is Arduino compatible. If you’ve never made it past the Arduino board to build a module that only uses the parts you need for a project, this is a great source of inspiration for you to give it a try.

The design that [Kaushlesh] drew up is quite simple. It connects directly to the single in-line header of the character LCD. It looks like he’s using the 4-bit mode for addressing that display, which leaves you with quite a few pins (both digital and analog) to work with in the future. The important components rolled into his design are the chip itself, an ATmega8/168/328, the crystal to make sure it is running at the correct speed for Arduino timing, and a trimpot for adjusting the contrast on the display. The final feature you’ll want to be sure to include in your own design is a pin header for programming the chip via an FTDI cable.

Never etched your own PCB before? Give our PCB fab tutorial a try.

XBMC Controller Is An All-in-one Usb Solution For HTPCs

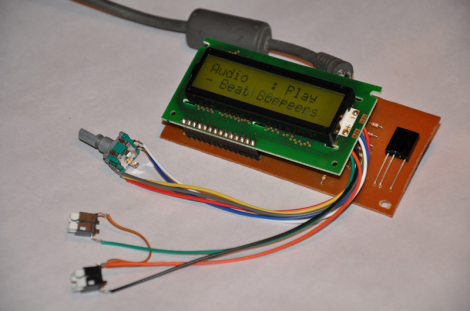
On the original Xbox, XBMC was a software-only solution (assuming you had a chipped or soft-modded console). That’s because the Xbox was already meant to connect to a television and work with an IR remote control. Now that the XBMC software has transitioned to focus on a wider range of hardware, it may be more complicated to get the same functionality on an HTPC. Realizing this, [Dilshan] developed a USB connected XBMC controller that features an IR receiver, character LCD, and a rotary encoder with two buttons.

As long as your HTPC has a way to connect to the audio and video inputs on your TV, this should take care of the rest of the presentation. LCD screens were popular with XBMC from very early on because modchips included an interface. Because of this, XBMC is already setup to provide navigation and media information this way. So you can use XBMC for audio playback without needed to have your TV turned on. Add to that the ability to control your box with either  a remote control or the navigation tools on the front bezel and you’ve got a winning solution.

You can download an archive that includes all the info about this device over at the project repository. For your convenience we’ve embedded the schematic and PDF description of the project, which we found in that package, after the break.

Continue reading “XBMC Controller Is An All-in-one Usb Solution For HTPCs”