E-Ink Photo Frame Is A Simple, Pleasing Design

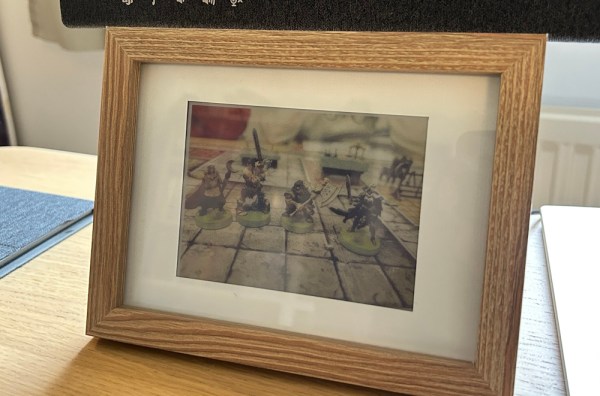
Regular photo frames are good, but they tend to only display a single photo unless you pull them to bits and swap out what’s inside. [Ben] decided to make a digital photo frame using an e-ink display to change things up, and unlike some commercial versions we’ve seen, it’s actually pretty tasteful!

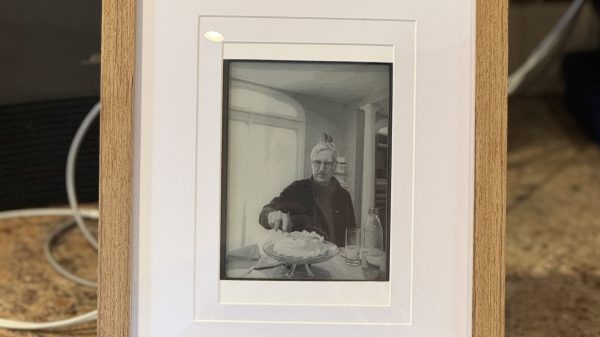
The build is based on a Nook Simple Touch Reader, which can be had pretty cheaply on the used market. It was chosen for the fact it runs Android, which makes it comparatively easy to hack and customize compared to some other e-readers on the market. Once it’s running a custom Android brew, it can be set to run an app called Electric Sign which simply shows a given website fullscreen and updates it at regular intervals. That turns the Nook into a remotely updateable photo frame in one fell swoop. From there, it just took a little trickery to access an iCloud album to update the frame with fresh pics. Then [Ben] just had to customize a nice photo frame to neatly mount the e-reader with room for the cable to subtly snake out the back.

It’s a simple build that relies on some existing tools already laying around the Internet. That’s nice, because it makes it easy for anyone to replicate themselves at home given the same materials. We’ve seen some other great digital photo frames before, too. If you’ve built your own neat and creative way to display your pics, don’t hesitate to drop us a line!

A brown, wooden picture frame with a white matte holds a slightly pixelated photo of gaming miniatures. It is sitting on a wooden table.

A Colorful Take On The E-Ink Photo Frame

Everyone loves sharing photos, and with most pictures being taken on smartphones now, digital frames are more convenient than finding a photo printer. [Wolfgang Ziegler] used an e-ink screen to create a colorful digital picture frame.

Starting with a seven color e-ink HAT he’d forgotten he had, a spare Pi Zero, and analog photo frame, he pieced the parts together into a pretty slick, sunlight readable photo frame. [Ziegler] details how he set up the frame to display new images using the Pimoroni inky library. He set a fifteen minute refresh interval since the color e-ink display takes 30 seconds to refresh to keep it from looking weird too often.

With the holidays coming up, this might make a perfect gift for family that wants to see the latest from your travels without blasting it to the whole internet. We’ve covered a few different options from a lightweight ESP8266 build, to this one that can rotate, and even issues with some of the commercial options.

Retro TV Shows Off Family Memories With Raspberry Pi

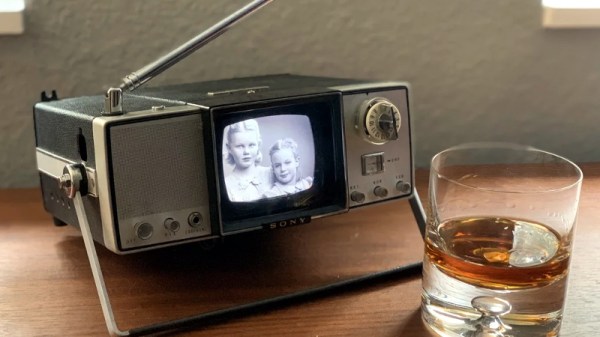
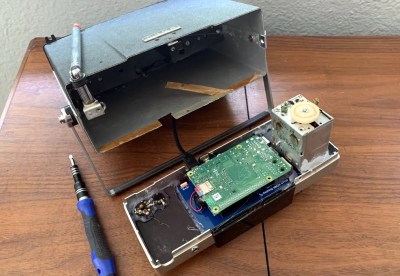
Fascinated by the look and feel of vintage electronics, [Democracity] decided to turn an old Sony Micro TV into a digital picture frame that would cycle through old family photos in style. You’d think the modern IPS widescreen display would stick out like a sore thumb, but thanks to the clever application of a 1/16″ black acrylic bezel and the original glass still installed in the front panel, the new hardware blends in exceptionally well.

Driving the new display is a Raspberry Pi 4, which might sound overkill, but considering the front-end is being provided by DAKboard through Chromium, we can understand the desire for some extra horsepower and RAM. If it were us we’d probably have gone with a less powerful board and a few Python scripts, and of course there are a few turn-key open source solutions out there, though we’ll admit that this is probably faster and easier to setup.

[Democracity] provides some general information on how he took apart the TV and grafted in the new gear, but of course the exact steps will vary a bit depending on which old TV you end up sending to the big parts bin in the sky. We did like that he made sure to keep all the mechanisms for the buttons and knobs intact, so even if they don’t do anything, you can still fiddle around with them.

Otherwise, his steps for setting up a headless Chromium instance are probably more widely applicable. As are the tips about setting up this particular LCD module and getting the display rotated into the proper orientation. If you just follow along for that part of the guide, you can spin up your own stand-alone Raspberry Pi DAKboard endpoint to take the service for a test drive.

It probably won’t come as much of a surprise to hear that this isn’t the first time [Democracity] has upgraded a piece of vintage hardware. Back in 2017, we covered this gorgeous art deco speaker that he outfitted with RGB LEDs and an Amazon Echo Dot. As with the previous post, it’s likely some commenters will be upset that a vintage piece of gear has been gutted for this project. But we’d counter that by saying his family is going to get a lot more enjoyment out of this beautiful piece of hardware now than they would have if it was still collecting dust in a closet.

A Minimal ESP8266 Digital Picture Frame

Over the last few years, the price of a good digital picture frame has dropped to the point that we don’t often see DIY versions anymore. As much as we might hate to admit it, it’s hard to justify building something yourself when the economies of scale have made it so you can buy the final product for less than the cost of the parts themselves. But of course, there are always fringe cases where building it might be the only way to get what you need.

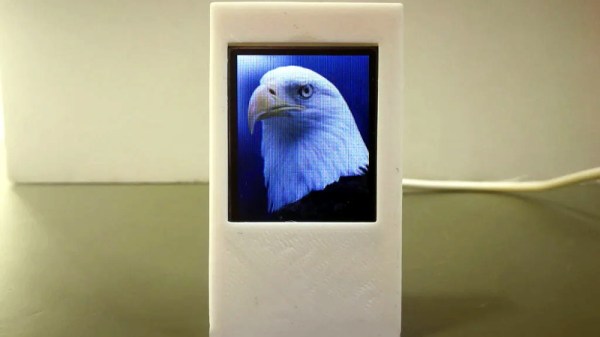
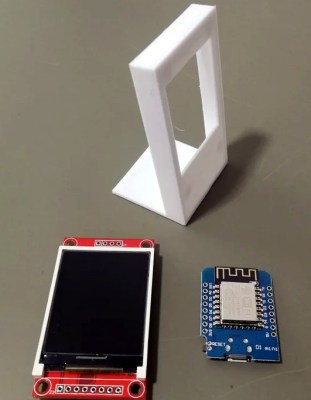
Granted we’re not sure that [Tony Liu] actually needs a 1.8-inch digital picture frame, but we’re sure somebody out there does. The ST7735R display used in this project is a real TFT, so the color and refresh rate is pretty good; but with a resolution of just 128×160, we’d recommend keeping your expectations low in regards to visual fidelity.

What’s really interesting about this project is how low the part count is. All you need is the ST7735R display and the ESP8266 itself (or the development board of your choice, naturally). Even the 3D printed frame is technically optional. The display is driven by SPI, so with the power added in, that’s only eight wires that need to be soldered between the two devices. If you’re looking for an easy way to add a photo slideshow to a small device, say a conference badge, this is about as easy as it gets.

But where are the images coming from? You might think SPIFFS, but in this case [Tony] has converted the images to bitmaps and is loading them into the Arduino Sketch as a header file with PROGMEM. Helpfully, he provides the link for the tool he uses to convert the images into an array the graphics library can understand. This makes adding new images slightly time consuming, but we imagine if you have the need for something like this, it’s probably only showing a pretty specific set of images anyway.

If you’re looking for something bigger, or maybe just an excuse to put that dusty Raspberry Pi to use, you might be interested in one of the more substantial builds we’ve seen over the years.

Continue reading “A Minimal ESP8266 Digital Picture Frame”

Rotating Frame Will Change Your View Of Vertical Images

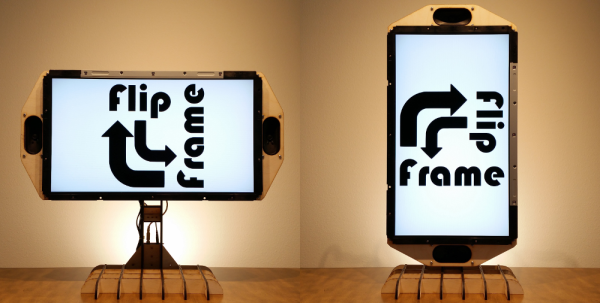
[Tim] was tired of compromising his portrait-oriented digital photos by shoehorning them into landscape-only frames. Unable to find a commercial solution, he built his own rotating digital photo frame from a 27″ LCD TV.

It uses a Raspi 3 to find [Tim]’s pictures on a giant SD card. He originally wanted to have the Pi pull pictures from Google Photos and display them randomly, but the API doesn’t work in that direction. Instead, a Python script looks at the pictures on the SD card and determines whether each is landscape or portrait-oriented. If a picture was taken in portrait-mode, the display will rotate 90 degrees. Rotation is handled with an Arduino, a stepper motor, and some 3D-printed herringbone gears. The first version was a bit noisy, so [Tim] re-printed the motor mount and the pinion gear out of flexible filament.

[Tim] designed the mount and frame himself and laser-cut the pieces out of birch plywood. We like that he accounted for the front-heaviness and that he covered the high voltage circuitry with acrylic to mitigate the risk of shock. All the code and design files are available on his project page. Make the jump to see a brief demonstration followed by a walk-through and stay for the six-minute slide show.

Continue reading “Rotating Frame Will Change Your View Of Vertical Images”

Building A Raspberry PI Digital Photo Frame

photoframe0103

Digital photo frames aren’t very interesting on their own these days, but building one with a Raspberry Pi and strapping it with a bunch of useful features just might motivate you to check out this tutorial on building a ‘living’ digital photo frame.

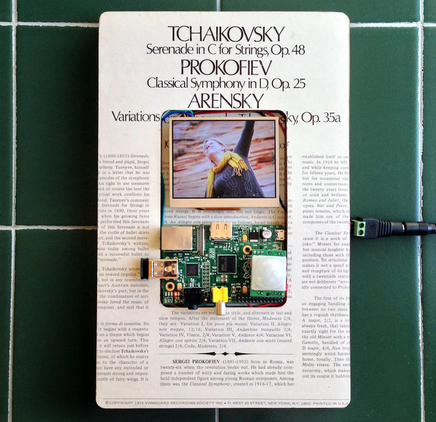
This is [Samuel’s] first project with the Raspberry Pi, so he decided to build a digital photo frame that has the ability to download random pictures from his Flicker account and display them in a slideshow format. With all that extra IO on the Raspi, it was easy to incorporate a status LED and PIR sensor. When motion is detected by the PIR sensor, the photo frame is enabled; after 60 seconds of no movement, the photo frame is disabled by turning off the monitor port.

We love finding detailed write-ups like this because there is so much useful information in here like using the Flicker API, GPIO control, image handling, how to configure scripts to run on boot-up, and even some great troubleshooting code.  If you’d rather ditch the Raspi altogether and take things down a few levels, check out this PIC based 100% DIY digital picture frame.