Tools Of The Trade – Reflow

In our previous issues in this series on making circuit boards, we covered placing solder paste and placing components. Now it’s time to bake our cake!

There are a variety of methods for reflowing a circuit board, but they all rely on a single principle: heat up the solder paste (a mixture of flux and solder) until the flux burns off and the solder becomes liquid, and then cool it down. Accomplishing this once or twice is easy; once you’ve played with a hot plate you’ll swear off through hole. Scaling it up and doing it repeatedly with high yield is extremely challenging, though. Continue reading “Tools Of The Trade – Reflow”

Android-based Reflow Brings Solder Profiles To Your Lab

[Andy Brown] is a prolific hacker and ends up building a lot of hardware. About a year back, he built a reflow oven controller. The board he designed used a large number of surface mount parts. This made it seem like a chicken or egg first problem. So he designed a new, easy to build, Android based reflow controller. The new version uses just one, easy to solder surface mount part. By putting in a cheap bluetooth module on the controller, he was able to write an app which could control the oven using any bluetooth enabled Android phone or tablet.

The single PCB is divided into the high voltage, mains powered section separated from the low power control electronics with cutout slots to take care of creepage issues. A BTA312-600B triac is used to switch the oven (load) on and off. The triac is controlled by a MOC3020M optically isolated triac driver, which in turn is driven by a micro controller via a transistor. The beefy 12Amp T0220 package triac is expected to get hot when switching the 1300W load, and [Andy] works through the math to show how he arrived at the heat sink selection. To ensure safety, he uses an isolated, fully encased step down transformer to provide power to the low voltage, control section. One of his requirements was to detect the zero cross over of the mains waveform. Using this signal allows him to turn on the triac for specific angle which can be varied by the micro controller depending on how much current the load requires. The rectified, but unfiltered ac signal is fed to the base of a transistor, which switches every time its base-emitter voltage threshold is reached.

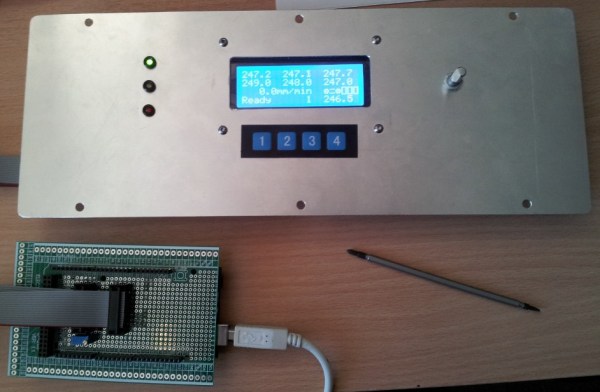
For temperature measurement, [Andy] was using a type-k thermocouple and a Maxim MAX31855 thermocouple to digital converter. This part caused him quite some grief due to a bad production batch, and he found that out via the eevblog forum – eventually sorted out by ordering a replacement. Bluetooth functions are handled by the popular, and cheap, HC-06 module, which allows easy, automatic pairing. He prototyped the code on an ATmega328P, and then transferred it to an ATmega8 after optimising and whittling it down to under 7.5kb using the gcc optimiser. In order to make the board stand-alone, he also added a header for a cheap, Nokia 5110 display and a rotary encoder selector with switch. This allows local control without requiring an Android device.

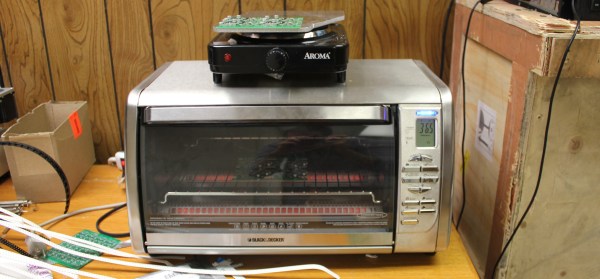
Gerbers (zip file) for the board are available from his blog, and the ATmega code and Android app from his Github repo. The BoM list on his blog makes it easy to order out all the parts. In the hour long video after the break, [Andy] walks you through solder tip selection, tips for soldering SMD parts, the whole assembly process for the board and a demo. He then wraps it up by connecting the board to his oven, and showing it in action. He still needs to polish his PID tuning and algorithm, so add in your tips in the comments below.

Continue reading “Android-based Reflow Brings Solder Profiles To Your Lab”

Overhauling A 3-Zone Reflow Oven

[Ed] owns a 3-zone reflow oven (which he coincidently uses to manufacture reflow oven controllers), but its performance has gotten worse and worse over time. The speed of the conveyer belt became so inconsistent that most boards run through the oven weren’t completely reflowed. [Ed] decided to rip out the guts of the oven and replace it with an Arduino, solving the belt problem and replacing the oven’s user-unfriendly interface

When [Ed] was looking into his belt speed problem, he discovered that the belt motor was controlled by an adjustable linear regulator with no feedback. Although this seems a bit sketchy by itself, the motor also had some mechanical issues and [Ed] ended up replacing it entirely. After realizing that closed-loop speed control would really help make the oven more consistent, [Ed] decided to overhaul all of the electronics in the oven.

[Ed] wanted to make as little custom hardware as possible, so he started out with an Arduino Mega and some MAX31855’s that measure multiple thermocouples in the oven. The Arduino controls the belt speed and runs PID loops which control heating elements in each of the oven’s 3 zones. The Arduino can be programmed with different profiles (stored in EEPROM) which are made up of 3 zone temperatures and a conveyor speed. Don’t have a 3-zone oven of your own to hack? Check out some DIY reflow oven builds we’ve featured before.

Improving The T-962 Reflow Oven

The T-962A is a very popular reflow oven available through the usual kinda-shady retail channels. It’s pretty cheap, and therefore popular, and the construction actually isn’t abysmal. The controller for this oven is downright terrible, and [wj] has been working on a replacement firmware for the horribly broken one provided with this oven. It’s open source, and the only thing you need to update your oven is a TTL/UART interface.

[WJ] bought his T-962A even after seeing some of the negative reviews that suggested replacing the existing controller and display. This is not in true hacker fashion – there’s already a microcontroller and display on the board.

The new firmware uses the existing hardware and adds a very necessary modification: stock, the oven makes the assumption that the cold-junction of the thermocouples is at 20°C. The controller sits on top of an oven with two TRIACs nearby, so this isn’t the case, making the temperature calibration of the oven slightly terrible.

After poking around the board, [WJ] found an LPC2000-series microcontroller and a spare GPIO pin for a 1-wire temperature sensor. The temperature sensor is placed right next to the terminal block for the thermocouples for proper temperature sensing.

All the details of updating the firmware appear on a wiki, and the only thing required to update the firmware is a serial/USB/UART converter. A much better solution than ripping out the controller and replacing it with a custom one.

Toaster Oven Reflow Controllers

With a lot of people who are suddenly too cool for through hole and of course the a few generations of components that are only available in SMD packages, it’s no surprise the humble toaster oven has become one of the mainstays of electronic prototyping. You’re gonna need a controller to ramp up those temperatures, so here are two that do the job quite nicely.

[Nathan]’s Zallus Oven Controller is a bit different than other reflow controllers we’ve seen on Kickstarter. He’s offering three versions, two with different sized touch screen displays, and one that is controlled with a PC and push buttons. The display for these is beautiful, and of course you can program your own temperature profiles.

If Kickstarter isn’t your thing, [Dirk] created his own reflow controller. Like the Zallus, this has a graphical display, but its homebrew lineage means it should be simpler to maintain. It uses a K-type thermocouple, and unlike every other reflow controller we’ve ever seen, [Dirk] is actually checking the accuracy of his temperature probe.

No, reflow oven controllers aren’t new, and they aren’t very exciting. They are, however, tools to build much cooler stuff, and a great addition to any lab.