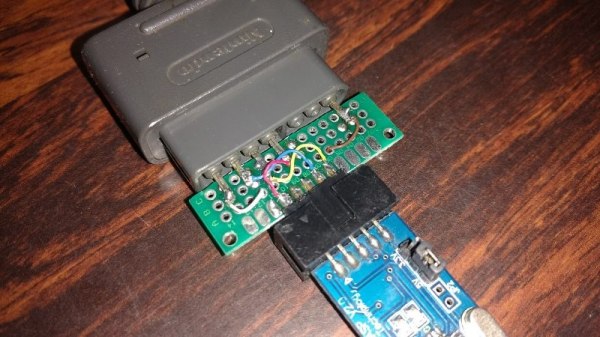
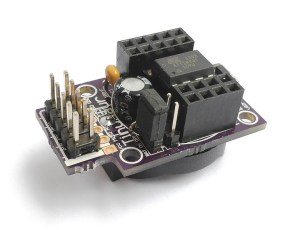
A HVTPI adapter plugged into a USBASP, with a an IDC10 cable plugged into it in turn

HVTPI Primer And Toolkit Equips You For BOM Substitutions

Novel programming interfaces for MCUs might catch us by surprise, but then we inevitably get up to speed with the changes required. Today’s bastion is HVTPI – a “12V reset” addition to the TPI we’ve just started getting used to, and [Sam Ettinger] has shared a simple circuit to teach us all about it, along with PCB files and detailed explanations of how it all works.

HVTPI is an add-on on top of TPI, for which, as Sam explains, you need to hold RST at 12V when TPI would have it be low logic level, and leave it at Vtarget otherwise. For that, he has designed a variety of interposer boards of various complexity and requirements; explaining the choices behind each one and clearing up any misunderstandings that might occur on your way. All of the board files (and the TPI write-up copy) are caringly shared with us in a git repository, too! As a result, if you have an USB-ASP or an Arduino available, now you also have everything to do HVTPI, thanks to Sam’s work and explanations.

We’ve been covering Sam’s exploits before, and can’t help but be grateful for the stop-and-explain detour along the way. HVTPI being used on very small ATTiny parts, we wonder if something new in the vein of his recent FPC board able to fit and function entirely within a Type-C cable end!

With chip shortages, investigating programming interfaces for small and obscure yet in-stock microcontrollers has been, quite literally, paying off, and if you got some projects that need a MCU but won’t consume a whole lot of resources, it could be time to give an ATTiny10 a go. What’s the worst that can happen – you make the smallest chiptunes ever?

Teaching A USBasp Programmer To Speak TPI

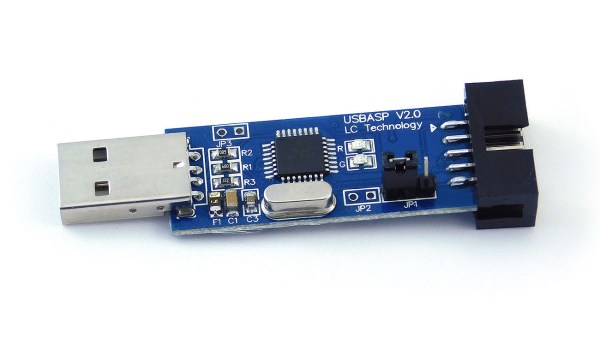
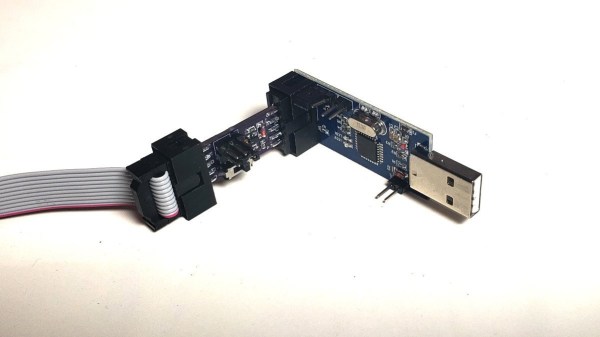
Last Fall [Kevin] wanted to program some newer TPI-only AVRs using an old USBasp he had kicking around his lab. Finding an “odd famine of information” and “forums filled with incorrect information and schematics”, he decided to set the record straight and document things correctly. He sleuthed out the details and succeeded in reprogramming the USBasp, although he did end up buying a second one in the process.

Designers who use AVR microcontrollers have no shortage of programming interfaces — we count at least five different methods: ISP/SPI, JTAG, TPI, PDI, and UPDI. We’re not sure whether this is variety is good or bad, but it is what it is. [Kevin] discovers that for the particular family of Attiny devices he is using, the ATtiny20, TPI is the only option available.

While he normally builds his designs around ARM Cortex-M chips, [Kevin] needed some glue logic and decided to go with an ATtiny20 despite its unique programming requirements. He observes that the price of the ATtiny20, $0.53 last Fall, was cheaper than the equivalent logic gates he needed. This particular chip is also quite small — only 3 mm square (a 20-pin VQFN). We would prefer not to use different MCUs and tool chains on a single board, but sometimes the convenience and economics steer the design in that direction.

If you’re not familiar with the USBasp, our own [Mike Szczys] covered the breaking story over ten years ago. And if you have a lot of free time on your hands, ditch all these nicely packaged solutions and program your chips using an old USB Hub and a 74HCT00 NAND gate as described in this bizarre hack by Teensy developer [Paul Stoffregen].

A Tiny IDE For Your ATtiny

When writing code for the ATtiny family of microcontrollers such as a the ATtiny85 or ATtiny10, people usually use one of two methods: they either add support for the chip in the Arduino IDE, or they crack open their text editor of choice and do everything manually. Plus of course there are the stragglers out there using Eclipse. But [Wayne Holder] thinks there’s a better way.

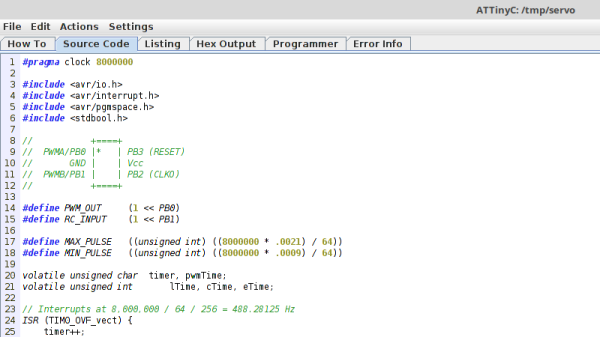
The project started out as a simple way for [Wayne] to program the ATtiny10 in C under Mac OS, but has since evolved into an open source, cross-platform integrated development environment (IDE) for programming a wide range of ATtiny chips in C, C++, or Assembly. Not only does it integrate the source code editor and programmer, but it even bundles in documentation for common variants of the chips including block diagrams and pinouts; making it a true one-stop-shop for ATtiny hacking.

His IDE runs under Java, including OpenJDK, and [Wayne] provides a stable pre-built executable for those who don’t want to clone the whole GitHub repository. He’s included the GNU/AVR toolchains, though notes that testing so far has been limited to Mac OS, and he’s interested in feedback from Windows and Linux users. Assembly is done either with GNU AVR-AS, or an assembler of his own design, though the latter is currently limited to the ATTiny10.

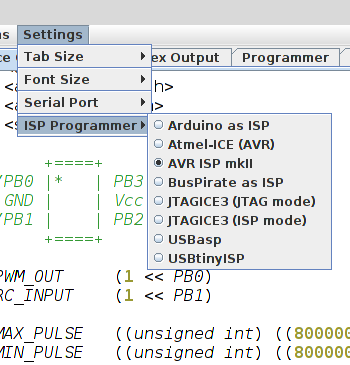
To actually get the code onto the chip, the IDE supports using the Arduino as a programmer as well as dedicated hardware like the BusPirate or the USBasp. If you go the Arduino route, [Wayne] has even come up with a little adapter board which he’s made available through OSH Park to help wrangle the diminutive chips.

The ATtiny10 might have something of a learning curve, but in exchange this family of tiny microcontrollers offers an incredible amount of capability. When you’re working with what’s essentially a programmable grain of rice, the only limit is your own creativity.

Quick And Dirty MIDI Interface With USBASP

[Robson Couto] recently found himself in need of MIDI interface for a project he was working on, but didn’t want to buy one just to use it once; we’ve all been there. Being the creative fellow that he is, he decided to come up with something that not only used the parts he had on-hand but could be completed in one afternoon. Truly a hacker after our own hearts.

Searching around online, he found documentation for using an ATtiny microcontroller as a MIDI interface using V-USB. He figured it shouldn’t be too difficult to adapt that project to run on one of the many USBASP programmers he had laying around, and got to work updating the code.

Originally written for the ATtiny2313, [Robson] first had to change around the pin configuration so it would work on the ATmega8 in the USBASP, and also updated the USB-V implementation to the latest version. With the code updated, he programmed one of the USBASP adapters with a second one by connecting them together and putting a jumper on the J2 header.

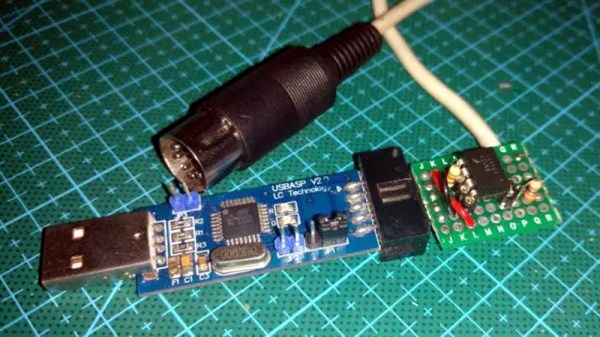
He had the software sorted, but there was still a bit of hardware work to do. To provide isolation for the MIDI device, he put together a small circuit utilizing a 6N137 optoisolator and a couple of passive components on a piece of perf board. It’s not pretty, but it does fit right into the programming connector on the USBASP. He could have fired up his PCB CNC but thought it was a bit overkill for such a simple board.

[Robson] notes that he hasn’t implemented MIDI output with his adapter, but that the code and the chip are perfectly capable of it if you need it for your project. Finding the schematic to hook up to the programmer’s TX pin is left as an exercise for the reader.

If you don’t have a USBASP in the parts bin, we’ve seen a very similar trick done with an Arduino clone in the past.

Interfacing A Retro Controller Using The USBASP

An ISP dongle is a very common piece of equipment on a maker’s bench. However, its potential as a hackable device is generally overlooked. The USBASP has an ATmeg8L at its heart and [Robson] decided that this humble USB device could be used as an interface between his PC and a SNES Joypad.

A SNES controller required three pins to communicate with a host: clock, data and latch. In his hack, [Robson]  connects the controller to the ISP interface using a small DIY adaptor and programs the AVR using the V-USB library. V-USB is a software USB library for small microcontrollers and comes in pretty handy in this instance.

[Robson] does a pretty good job of documenting the entire process of creating the interface which includes the USB HID code as well as the SNES joypad serial protocol. His hack works on both Windows and Linux alike and the code is available on GitHub for download.

Simple implementation like this project are a great starting point for anyone looking to dip their toes in the DIY USB device pool. Veterans may find a complete DIY joystick more up their alley and will be inspired by some plastic techniques as well.

THP Entry: Tinusaur AVR Platform Teaches Noobs, Plays Game Of Life

tinusaur[Neven Boyanov] says there’s nothing special about Tinusaur, the bite-sized platform for learning and teaching the joys of programming AVRs. But if you’re dying to gain a deeper understanding of your Arduino or are looking to teach someone else the basics, you may disagree with that assessment.
Tinusaur is easy to assemble and contains only the components necessary for ATTiny13/25/45/85 operation (the kit comes with an ’85). [Neven] saved space and memory by forgoing USB voltage regulator. An optional button cell mount and jumper are included in the kit.

[Neven] is selling boards and kits through the Tinusaur site, or you can get the board from a few 3rd party vendors. His site has some projects and useful guides for assembling and driving your Tinusaur. He recently programmed it to play Conway’s Game of Life on an 8×8 LED matrix. If you’re looking for the zero-entry side of the AVR swimming pool, you can program it from the Arduino IDE. Be warned, though; they aren’t fully compatible.


SpaceWrencherThe project featured in this post is an entry in The Hackaday Prize. Build something awesome and win a trip to space or hundreds of other prizes.

SquareWear 2.0 A Wearable Opensource Arduino

squarewear2_annotation-1024x577

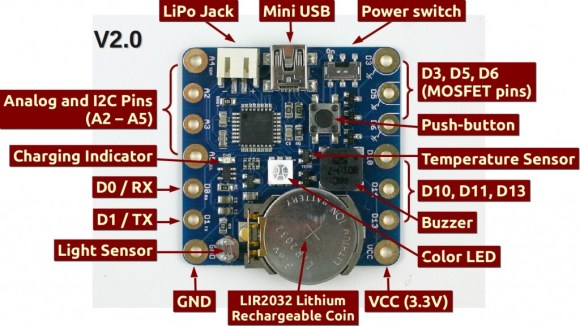
Are you guys tired of redesigned Arduinos yet? Usually we are, but [Ray] just released the SquareWear 2.0, and we have to admit, it’s a pretty slick design.

It’s an update to SquareWear 1.1 which we covered a year ago. That version made use of a 18F14K50 microcontroller, measured a tiny 1.6″ x 1.6″ and could easily be sewn into wearable circuits. But after receiving lots of requests to design a new Arduino based board, [Ray] obliged and made v2.0.

The new SquareWear is slightly bigger, measuring in at 1.7″ x 1.7″, but it packs a much bigger and more functional punch — just check out the image schematic above! The only catch is it doesn’t actually have a USB-to-serial chip on-board, which is why [Ray] was able to get the board so small and inexpensive. Instead it simulates USB in the software using the V-USB library. That method is much slower but still functional. To perform serial communication through the USB port it uses the onboard USBasp bootloader.

The board also features large through-holes to accommodate sew-able pin pads, making it super easy to integrate this into fabric!

For a complete explanation of the SquareWear 2.0, check out the video after the break.

Continue reading “SquareWear 2.0 A Wearable Opensource Arduino”