Dimming Control For An Ikea Solar Desk Lamp

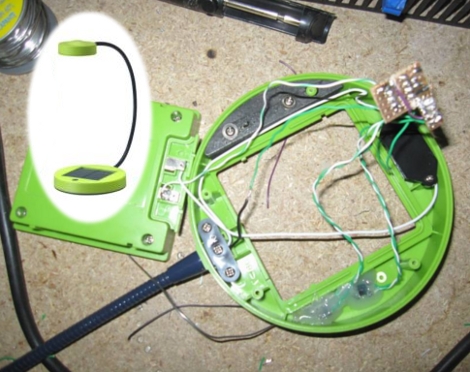
[Frank] decided to augment his desk lamp’s features by adding dimming controls (translated). Since the light source is a triad of LEDs the best method of dimming their intensity is to use Pulse Width Modulation. That’s the method that he went with, and luckily the SUNNAN lamp from Ikea which he’s using as the donor for the project has just enough room to squeeze in the parts necessary for this hack.

You need two main bits to use PWM with a lamp like this; a microcontroller (or possibly a timer chip like the 555) and a transistor to protect that chip from the current necessary to run the LEDs at full brightness. [Frank] went with an ATtiny13 and a 2N2222 transistor, both quite common and very inexpensive (you can even pull the microcontroller from a light bulb if you know where to look). Two buttons were added to the top of the lamp base which allow for up and down controls. There’s even an SOS function which is triggered by pressing both buttons at the same time. [Frank’s] happy to show off the completed project in the clip after the break.

Continue reading “Dimming Control For An Ikea Solar Desk Lamp”

Adding Ethernet Control For A 5.1 Speaker Set

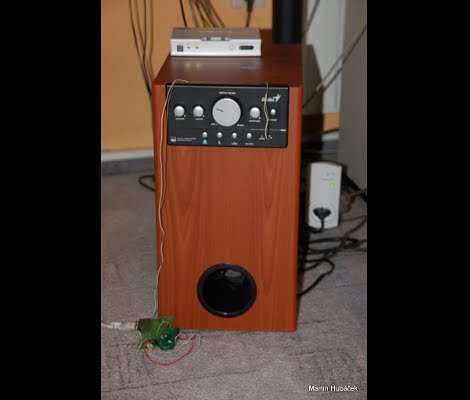
[HuB’s] set of 5.1 surround sound speakers was gobbling up a bunch of electricity when in standby as evidenced by the 50 Hz hum coming from the sub-woofer and the burning hot heat sink on the power supply. He wanted to add a way to automatically control the systems and offer the new feature of disconnecting the power from the mains.

The first part was not too hard, although he used a roundabout method of prototyping. He planned to use the IR receiver on the speakers to control them. At the time, [HuB] didn’t have an oscilloscope on hand that he could use to capture the IR protocol so he ended up using Audacity (the open source audio editing suite) to capture signals connected to the input of a sound card. He used this to establish the timing and encoding that he needed for all eight buttons on the original remote control.

Next, he grabbed a board that he built using an ATmega168 and an ENC28J60 Ethernet chip. This allows you to send commands via the Internet which are then translated into the appropriate IR signals to control the speakers and a few other devices in the room. The last piece of the puzzle was to wrap an RF controlled outlet into the project with lets him cut mains power to the speakers when not in use. You can see the video demonstration embedded after the break.

Continue reading “Adding Ethernet Control For A 5.1 Speaker Set”

Ollie The Socially Awkward Autonomous Blimp

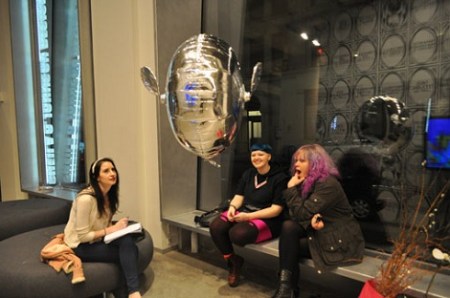
[Pritika] is a user experience design student who just finished up an autonomous blimp project designed to react to voices and communicate, “his friendliness and eagerness to be noticed.”

The instructable [Pritika] posted goes through the build – a 850mAh LiPo battery powers an Arduino Pro Mini, which controls two 3.6 gram servos. While not much in the way of electronics, the real beauty behind this build is the implementation. From watching the video of Ollie interacting with people, we’re pretty sure [Pritika] met her objective of making her pet blimp friendly and unobtrusive.

With quadrocopters getting so much attention as of late, it’s interesting to see development in lighter-than-air robotics. Our back of the envelope math (which is almost certainly wrong) tells us that Ollie’s ‘body’ can lift 60 grams when filled with Helium, and double that with Hydrogen. While this isn’t much lifting capacity, it’s not inconceivable that a slightly larger blimp could have more sensors or a live video feed, especially considering the 16 gram ornithopter we covered last year.

Check out a video of Ollie after the jump.

Continue reading “Ollie The Socially Awkward Autonomous Blimp”

Making The Case For Cool Project Enclosures

luna_mod_case

Quite often, we see project boxes that seem to be constructed more as an afterthought than anything else. That’s not to say there is anything wrong with stuffing your latest creation into a nondescript black box, or even cardboard if it happens to fit your needs. Sometimes however, an enclosure embodies the spirit of a project, making it all that much cooler.

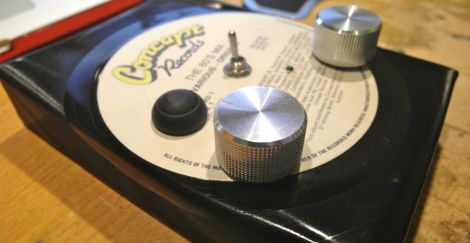
[Adam] recently picked up a copy of Make magazine and decided to build their “Luna Mod”, a sound effects generator and looper based on a PICAXE-08M. Aside from the micro controller the Luna Mod includes a couple of pots, a switch, and a few LEDs – nothing incredibly striking. Once he had everything assembled on a strip of protoboard, he started working on his enclosure.

The enclosure is made from an old record, which after some trial and error, [Adam] got just right. The record was heated and cut, then bent into shape. While it’s not necessarily a hack, we think it looks pretty slick. It really fits the theme of the Luna Mod and is far more attractive than a plain plastic box.

Stick around to see his sound generator in action.

Continue reading “Making The Case For Cool Project Enclosures”

Chemical Wood Burning

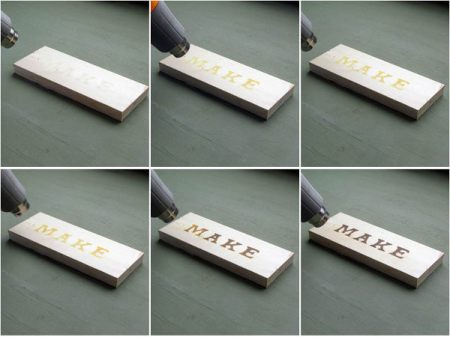
Make: Projects has posted an interesting way to burn designs into wood. Instead of doing the traditional method of using a hot iron to hand draw or trace patterns on the wood, they show us how to use a chemical process to make things easier. They are using a solution of Ammonium Chloride, applied with a foam stamp, then heated. When it is heated it breaks down to ammonia gas and hydrochloric acid, burning the surface. The advantage here is that you can easily use a stamp to create patterns whereas doing it by hand might be difficult.  They do point out that improvements could be made, such as adding something to keep it from soaking into the wood and blurring the edges.

Resurrecting The Optigan Disc Format

optigan

The Optigan and Orchestron were a pair of electronic organs built by Mattel in the 1970s which used swappable optical discs to store instrument information. The discs can still be found today, but the organs are extremely scarce, much to [Gan’s] dismay. After researching the organs for a bit, he decided he could probably build his own MIDI-compatible interface for the audio discs.

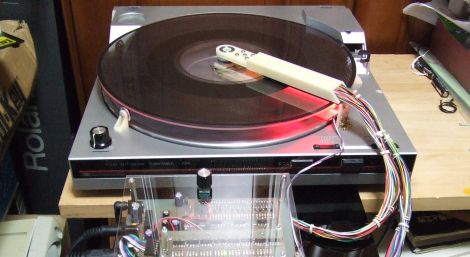
The discs have audio waveform data printed on them, which can be read using an LED on one side of the disc and an optical transistor on another. After successfully prototyping a reader that could interpret one of the disc’s audio tracks, he constructed a device to read all of the tracks simultaneously, just like the original organs.

His makeshift turntable was constructed on top of an old record player using acrylic discs and toy car wheels to keep things steady. Once the disc is placed on the turntable, he sets his reader in place, and via some custom circuitry, he is able to play the discs using his much more modern keyboard. It sounds pretty decent as you can see in the video below, though he does admit he would like to tweak a few things to make it sound even better.

[thanks Bryan]

Continue reading “Resurrecting The Optigan Disc Format”

Google ADK Project Shows Just How Easy It Is To Use

first_adk_project

[yergacheffe] was able to get his hands on a shiny new Google ADK board about a week before it was announced at I/O, and got busy putting together a neat project to show off some of the ADK’s features. His idea was to meld together the ADK and Google’s new music service, two items he says complement each other very well.

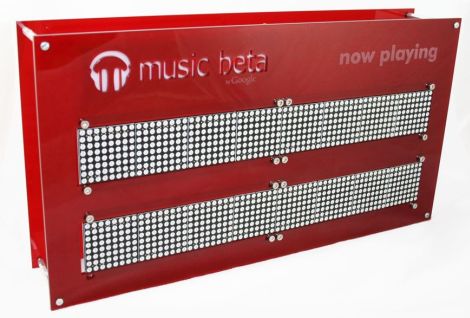
He had a handful of LED matrices left over from last year’s Maker Faire, which he decided to use as a Google music metadata display. The base of the display is made from laser-cut acrylic, with a few spare ShiftBrites lighting up the Google music beta logo.

He says it took literally just a couple lines of code to get his Android handset to talk with the display – a testament to just how easy it is to use the ADK.

Pretty much anyone can walk up, attach their phone, and see their current music track on the display with zero fuss, which you can see in the video demo below.

Continue reading “Google ADK Project Shows Just How Easy It Is To Use”