Dabbling With CPLD Generated VGA Signals

It seems like all the cool kids are leaving the 8-bit hobby microcontrollers in the parts bin and playing with more advanced parts like Complex Programmable Logic Devices. [Chris] is no exception to the trend, and set out to generate his own VGA signal using one of the beefy semiconductors.

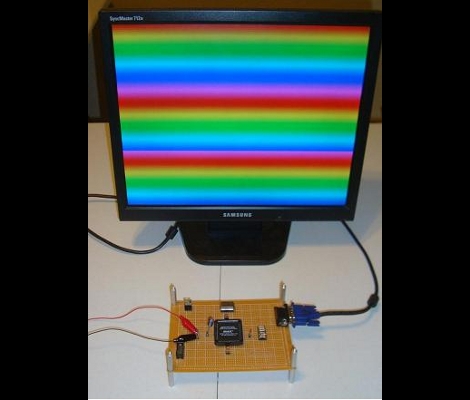
It seems that he’s using the acronyms CPDL and FPGA interchangeable in his post but according to the parts list this setup uses an Altera EPM7128SLC84-7N CPLD. In order to generate the VGA signal he needed a way to convert the digital signals from the chip into the analog values called for in the video standard. He chose to build a Digital Analog Converter for the RGB color values using a resistor network which he calculated using PSpice. The other piece in the puzzle is a 25.175 MHz oscillator to clock the CPLD. As you can see after the break, his wire-wrapped prototype works exactly as designed. The example code generates the rainbow bars seen above, or a bouncing box demo reminiscent of a DVD player screen saver.

Want to know more about programming CPLDs? We did a tutorial on the subject a while back.

Continue reading “Dabbling With CPLD Generated VGA Signals”

Light Painting – Still Shots And Animations

[Kim Pimmel’s] been doing some really interesting light painting with an Arduino. In the past we’ve seen several light painting projects which use long exposures to capture moving LEDs, or moving LCD displays. But [Kim’s] stepping it up a notch, using cold cathode flourescent lamps, electroluminescent (EL) wire, and lasers. The vibrant colors put out by these sources make for some great photos, but that’s not all she’s got up her sleeve. After accumulating a ton of still photographs from various shoots she decided to edit them together into stopped motion videos.

After the break you can see that one method she used to make these images was to spin the light sources on a standard audio turntable. An Arduino is controlled through processing via Bluetooth in order to move the stepper motor-mounted lights while the record player spins. Add some futuristic music thanks to Daft Punk (which is exactly what she did) and you’re in business.

Continue reading “Light Painting – Still Shots And Animations”

Gitbrew Brings OtherOS Back To The PS3

otheros

Instead of simply watching the days pass by while the PSN network continues to be unavailable, why not do something useful with your PS3 console? [MS3FGX] wrote in to share some news regarding efforts to bring the OtherOS option back to the PS3.

The team at gitbrew.org have been diligently working to bring Linux back to the console for a little while now, and have released a dual-boot firmware they are calling OtherOS++. This firmware has two huge benefits over Sony’s original attempt at Linux support for the console. It can be run on the original “fat” PS3s as well as the newer “slim” models – something that was not possible until now. Additionally, it gives the Linux install full access to the PS3’s hardware rather than running the OS inside a virtual machine.

The project is relatively new, so the installation procedures and associated documentation are not suitable for the less experienced individuals out there, so consider yourself warned.

We love that there are people doing all they can to bring this awesome feature back to the PS3 – it’s a huge step in the right direction.

[Image via gitbrew]

Arduino Home Statistics

[Mike] is doing a little series that is about DIY smart homes. While these wont turn your house into a Hal 9000 (and hopefully wont try and kill you), they are fun and fairly easy to carry out. Parts 1 and 2 focus on the bathroom, part 3+ is in the works. Lets go ahead and look at what is done already.

DIY smart home part 1 covers the kings throne. Through the use of an Arduino, ultrasonic rangefinder, Ethernet shield, and twitter account, whenever the toilet is used a counter goes up. Calculate that against your gallons per flush and you now have reasonable water tracker.

Diy smart home part 2 hits the shower with much of the same hardware and goals. Adding on to the Arduino software there is now a PIR sensor and another twitter account. Basing knowledge from a Lady Ada tutorial on PIR sensors, the additional Arduino code slides into place and some loose ends from part one are cleaned up.

We cant wait to see what is in store for the future and wish [Mike] the best of luck.

Automate Repetitive PC Actions With A Foot Pedal

foot_pedal

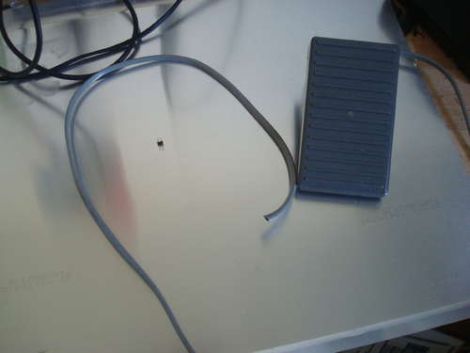
Instructables user [bkovac] was sick of clicking the terminal icon on his desktop whenever he wanted to launch a terminal window. Keyboard shortcuts aside, he figured the easiest way to take the tedium out of the process would be to launch terminal windows with a foot pedal.

He grabbed a pedal that he had sitting around in his workshop and took it apart to ensure the switch contacts were configured for his particular use. The wires were run to an Arduino which talks to the computer over serial using a Python script.

While the setup works just fine, it’s definitely not the most efficient or simplest way of getting the job done. In fact, we have seen other methods that are quite a bit simpler, though they lack the potential versatility of this particular modification.

Rather than simply loading a terminal window on his computer, we would love to see this pedal enhanced to perform multiple functions – at which point the Arduino would be a pretty decent choice. We would probably start out by swapping out the full-sized Arduino for a Teensy, mounting it inside the pedal. Multiple foot presses could be used to trigger different events, based upon the number of presses that occur within a given time period. It could be made even more useful by using it to trigger gesture-based events, similar to those seen in plug-ins for Chrome and Firefox.

How would you enhance [bkovac’s] pedal interface? Let us know in the comments.

Awesome Fan-powered Frankenscooter

fanscooter

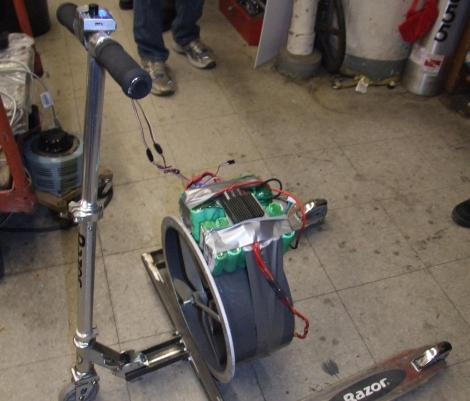
We believe that some of the best things in life are built from half-assed ideas and held together with duct tape. Take this fan-powered Razor scooter [Charles Guan] built, for example – it’s chock full of both.

Having built a ducted fan-powered shopping cart in the past [Charles] is no stranger to ridiculous ideas. After a friend sent him a mockup of a fan powered scooter, he felt that he couldn’t “…take such an absurd image not seriously.”

Determined to make his fan-powered dreams a reality, he hunted around for Razor scooter parts, and managed to scavenge just about everything he needed. Parts of three scooters were welded together, forming the wide-stanced trike you see in the picture above. He mounted a fan and some battery packs onto the scooter, both similar to those found on his Fankart. Once everything was in place, he hit the streets.

As you can see in the video below, the Fanscooter looks as fun as it is loud. [Charles] says they have hit a top speed of about 10 mph thus far, but they should be able to blow past that once they balance the blades and have a victim tester willing to suspend his babymakers over the fan duct. Keep your eyes on his site, we’re sure to see some tweaks and improvements over the coming weeks.

Continue reading “Awesome Fan-powered Frankenscooter”

AppleCrate II Doubles The Cluster Computing Fun

apple_crate_II

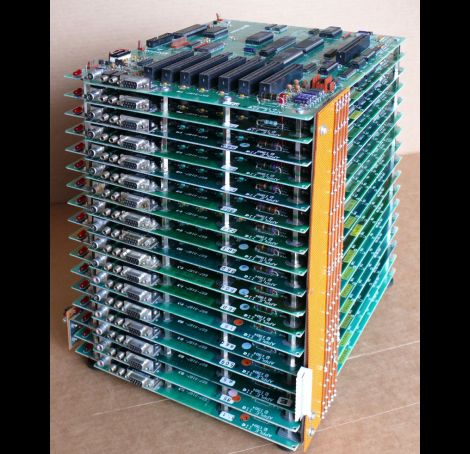
Back in 2004, Apple hobbyist/guru [Michael Mahon] built a cluster of Apple IIe main boards dubbed the “AppleCrate” as an experiment in parallel computing. Now that a few years have passed, he is back with a new iteration of the device, aptly named AppleCrate II.

AppleCrate II was built to address some of the design limits of his first cluster project as well as to expand his parallel computing capabilities. His gripes with the first model were primarily structural in nature. The new system is organized in horizontal layers, using metal standoffs between each main board, rather than relying on a shaky wooden superstructure to keep things together. He also found his previous 8-processor configuration a bit limiting, so the AppleCrate II has 17 nodes – 16 slaves and one main board dedicated to running the operation. The cluster even uses his own homebrew networking stack known as NadaNet to enable communications between the boards.

The project is pretty impressive, so be sure to swing by his site if you want to learn more.  He has a ton of technical details there, as well as copies of all of the software he used to get the cluster up and running.

[via BoingBoing]