Growling Doorbell Lets You Know Guests Have Arrived

wireless_doorbell_hack

[Sean] was screwing around online looking for nothing in particular when he came across a mailbox hacked to notify the homeowner when the mail had been delivered. Since his mail is delivered via a slot in the door, he had no use for the hack as is, but something similar soon came to mind.

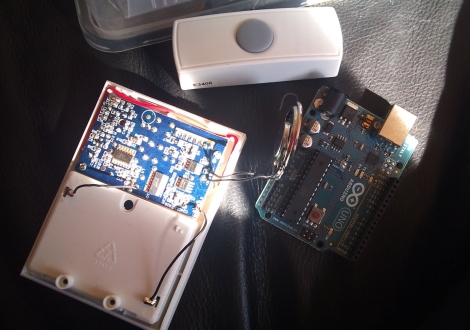
His dog isn’t too keen on visitors, and he figured that he could save himself a bit of grief (and a lot of unnecessary barking) if he were to wire up his doorbell to notify him of guests via his iPhone. He stopped by the local hardware store and picked up a wireless doorbell. It was quickly disassembled and wired up to an Arduino he had set aside for a different project. Tweaking some code he found online, he soon had the doorbell talking with the Arduino and was ready to interface it with his iPhone. He decided that he wanted to deliver notifications to his phone via Growl and found a Perl script online that was close to what he needed. A few tweaks later, and he had a Growling doorbell.

As you can see in the video below, it works, though there seems to be a bit of a delay in the notification. We don’t think that it would be enough to send his visitors packing before he made it to the door, but the lag can likely be reduced with a few small modifications.

As for the post that started this whole thing, we’re pretty sure this is it.

Continue reading “Growling Doorbell Lets You Know Guests Have Arrived”

How Low Can You Go?

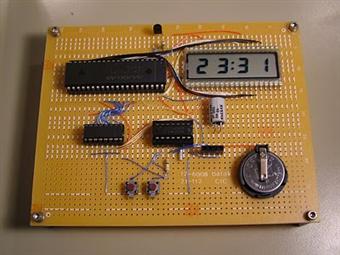
That’s exactly what [Kenneth Finnegan] figured out with his original investigation into low powered MSP430-based circuits. He was able to keep a count-up timer running off of 20F worth of capacitors for over 10 weeks. Although quite impressive by its own merit, many people left comments that questioned whether similar results would be seen in a circuit with functionality more advanced than simply incrementing a single digit on an LCD. Well folks, [Kenneth] has stepped it up again with this ultra low power LCD clock.

The biggest challenge in creating this clock was finding an efficient way to drive the 28 LCD segments off of the limited number of pins on his MSP430G2231 chip while still having open pins for button inputs as well. An ICM7211 LCD driver is definitely up for the task (with a few clever modifications to drive the auxiliary characters such as the center colon), but requires 8 pins to drive it. A standard 74HC595 latching shift register brings this number down to a more manageable number of 3 total pins.

Once completed the total current consumption was found to be around 12μA – low enough for a claimed run-time of approximately two and a half years from the 3V 200mAh CR2032 coin cell used. If true, a set of standard AA alkaline cells in series as found in many clocks would run this little circuit for decades.

Stick around for a short video after the break and make sure to check out the original blog entry for schematics and the complete source code!

Continue reading “How Low Can You Go?”

Bolt Action Pneumatic Spud Gun

No one should ever make a potato cannon. They are wildly unsafe, powerful, and can easily shatter your neighbor’s gaudy bay window, you know the neighbor with the mean dog.

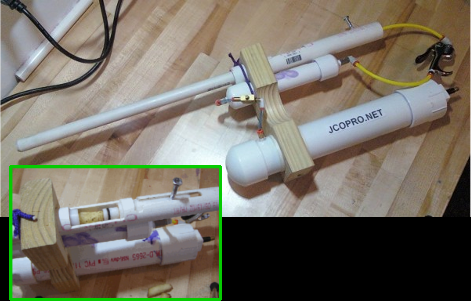
That said, [Jeremy Cook] made a minature bolt action spud gun! Using a custom machined Delrin bolt, a fitted Delrin reducer, and some PVC, the spud gun is capable of quickly loading custom shaved potatoes with the greatest of ease. Pushing the bolt (literally a bolt) forward forces the spud through the reduction coupling and into the barrel. Lock the bolt to the side, pull the trigger (an air blower) and two expansion chambers toss compressed air behind your starchy projectile. The design is reminiscent of  a common bolt action rifle, but all that Delrin reminds us of paintball markers.

[Jeremy] is writing up the project in multiple posts, so check his blog for info. We are also no strangers to the strange, dangerous and wonderful world of potato launching tech.

Stick around for a video of the launcher in action!

Continue reading “Bolt Action Pneumatic Spud Gun”

According To Pete – New Online Video Series

This is [Pete Dokter], the fourth employee that Sparkfun ever had and currently Director of Engineering there. As you can see, they’re not letting [Peter] come out of his hole. Instead of designing new breakout boards they’ve given him a camera that he’ll be using to record his occasional pontifications. ‘According to Pete’ will become a regularly occuring online show where he answers questions from around the Internets. We’ll admit that the first episode, embedded after the break, is a bit content thin – serving only as an introduction. But we think [Pete] has a pleasant manner and we look forward to what blossoms out of this modest beginning.

We’ve long been fans of engineering-oriented online shows such as [Dave Jones’] EEVBlog, [Bill Hammack’s] The Engineer Guy, A collaboration between [Chris Gammell, Dave Jones, and Jeff Keyzer] call The Amp Hour, [Jeri Ellsworth’s] A-Z Videos and her upcoming series, [Ben Heck’s] The Ben Heck Show…. and we could go on.

With offerings like these you don’t need to wait for traditional TV to transition to IP delivery. Just stop watching crap and start watching these interesting shows.

Continue reading “According To Pete – New Online Video Series”

Kequencer 2.0 Is Cheaper And Easier To Build — Still Awesome

[Rich Decibels] decibels received so much interest in his original sequencer build that he decided to make another one that was a bit easier and less expensive to replicate. The original design, called the Kequencer, featured a nicely finished look for the user interface. For the Keyquencer 2.0 he decided that adding a lid to the enclosure meant not spending quite as much for controls (nice looking knobs tend to increase the cost of potentiometers).

A rectangle of protoboard serves as the panel face for the device. It looks like he painted it black on top so that it doesn’t distract from the neatly organized parts layout. He used point-to-point wiring to make most of the hookups, but he did create a board layout which will help to guide you when the number of wires starts to get out of hand. This was made after the fact and he regrets not having it for the initial build. Check out the demonstration video embedded after the break to hear how the second iteration sounds.

Continue reading “Kequencer 2.0 Is Cheaper And Easier To Build — Still Awesome”

Compost Heap Temperature Logger Helps Keep Things Hot

compost_temp_logger

HackHut user [lackawanna] is looking to start his own compost pile, but as many urban composters discover, things can get quite smelly if you don’t manage it properly. The process of composting is broken up into two phases, aerobic and anaerobic decomposition. The former is the first stage to occur and produces plenty of heat, but should be scentless. The latter gives off less heat and is more of a stink due to putrefaction. Carefully monitoring the temperature of the pile and restarting the aerobic phase when necessary helps to keep the process “healthy” and scent-free.

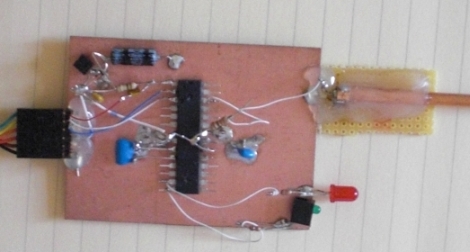
[lackawanna] built a simple temperature monitor that he plans on using to track the status of his compost pile once he gets started. It uses an ATmega328 as the brains of the operation and an old metal can transistor as his temperature sensor. Using relative measurements of the compost pile taken in 10 minute intervals, he can determine when the aerobic phase is underway, as well as when things begin turning anaerobic. At that point, the sensor alerts him that the pile needs to be turned.

The build is pretty simple, but leaves plenty of room for expansion. It should be relatively easy to add a more friendly notification interface as well as install multiple sensors to the pile for obtaining aggregate temperature data.

mobo_salvage

PCB Parts Salvaging Made Easy

Take a moment to think about how many old or damaged computer motherboards you have tossed away over the years. Sure we try to repurpose everything we can, but reclaiming electronic components from complex devices can be overly time consuming if you don’t have the proper means of doing so.

Ideally, if we were to try removing components from a motherboard, an old stove or an unused toaster oven would be great. If you didn’t have either item at your disposal, you could always attack the board with a soldering iron and some braid – but who has the time for that?

[Giorgos Lazaridis] over at PCBHeaven put together a quick video demonstrating his favorite technique for salvaging components after a motherboard has outlived its usefulness. Using a 2000W heat gun, a few hand tools, and couple of metal pans, he had the entire board stripped bare in about 30 minutes time. He talks about some of the best parts he has discovered while salvaging and points out a few hard-to-find items that can be easily obtained by tearing down a motherboard.

Sure his process might not be as easy as inverting a PCB in an oven, but his method is cheap, portable, and takes up very little space.

Keep reading to see [Giorgos’] video demonstration and don’t forget to check out some of the other cool stuff he has done in the past, such as his temperature-controlled soldering station, this acrylic bender, or this bench top function generator.

Continue reading “PCB Parts Salvaging Made Easy”