Converting A Scanner Into A Touchscreen

[Sprite_TM] was cleaning up his hacking workbench when he came across an all-in-one device that had seen better days. After a bit of consideration he decided to tear down the scanner portion of the device and ended up turning it into a multi-touch display.

The scanner relies on a long PCB with a line CCD sensor. This sensor is read in a similar way that information is passed along a shift register. Tell it to take a reading, and then start a clock signal to pulse out each analog value from the pixels of the sensor. In order to scan color images it uses multicolored LEDs to take different readings under different illumination.

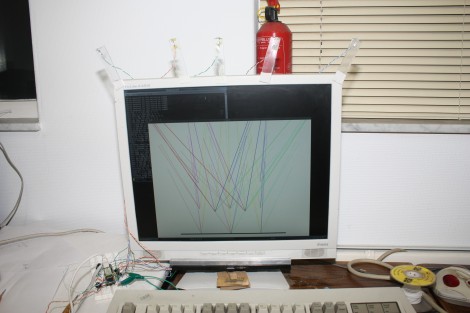
[Sprite_TM] takes advantage of this functionality to turn it into a multitouch sensor. The sensor board itself is mounted below an LCD display along with a shield with a slit in it to help filter out ambient light. Above the screen a series of LEDs shine down on the sensor. When you break the beams with your finger it casts a series of shadows which are picked up by the sensor and processed in software. Watch the clip after the break to see it for yourself. It has no problem detecting and tracking multiple contact points.

Continue reading “Converting A Scanner Into A Touchscreen”

Don’t Buy An Amp, Build One To Suit

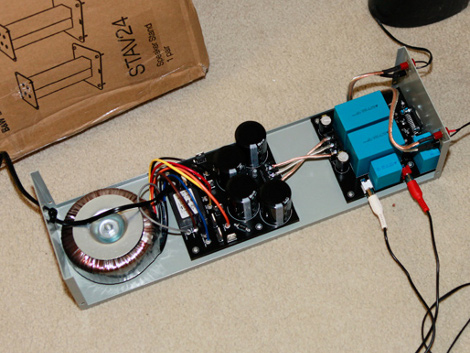
In need of an amplifier for his home entertainment system [Afroman] decided to build an amp rather than buying one. If nothing else, doing it himself allowed for a form factor that can’t just go out and buy.

He designed the project on two separate boards, one for the power supply and the other for the amplifier circuit. Both are of his own design, and although he doesn’t share the schematic, we know he’s based his work on a National Semiconductor reference design for the LM4780 audio amplifier chip. There’s a few other clues, like his mention of the toroidal transformer seen at the left in the image above and hi-res photos of the unpopulated board that has component values printed in the silk screen.

The final design allows him to get great performance out of his speakers with a very clean look. You’ll need to be logged to the forum linked above to view all of the images, but we’ve embedded three more of them after the break to whet your appetite.

Oh, and cost? This gets up there, just sneaking past the $500 mark.

Continue reading “Don’t Buy An Amp, Build One To Suit”

Tricycle Robot Using Omni-wheels

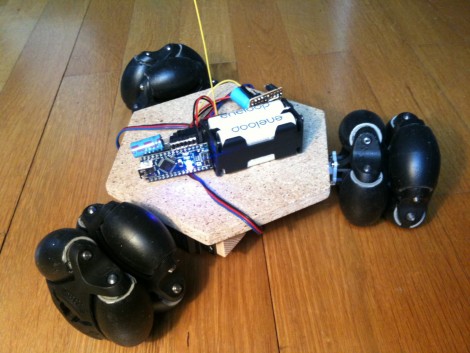
[Markus Gritsch] built this six-wheeled robot using omni-wheels. Two wheels are used on each axis in order to ensure perpendicular rotation is possible no matter where the axis rotation stops. The wheels have also been improved by dipping the elliptical components to give them a rubbery coating.

The robot gets its commands wirelessly from a separate controller unit. That controller, as well as the bot seen above, uses a Teensy microcontroller board. Two analog sticks take input from the operator and transmit commands using an inexpensive RF pair. The wheel movement is facilitated by three servo motors which may seem like an odd choice. But we think that it simplifies the electronic side of the build because you do not need an H-bridge to control a servo motors. It’s a bit loud, as you can hear in the video after the break, but it certainly works quite well.

One of the commenters on the thread above asks why [Markus] didn’t use mechanum wheels. These would have allowed him to use just one wheel on each axis but the omni-wheels were so inexpensive that he went this route instead.

Continue reading “Tricycle Robot Using Omni-wheels”

Kinect, Mouse, And Nerf Gun Combine For House Of The Dead

[Tony Blanch] built his own motion controller for playing House of the Dead. It should work with any shooter that follows the ‘rail’ type of game play (your character is not free walking, but moves along a set path beyond your control).

Two parts come together to make this happen. The first is the Nerf dart gun that you see above. The circuit board fitted into the top portion of the plastic housing is from a five-button wireless mouse. The buttons are used to sense trigger pulls from the player. The second portion of the controller is a Kinect. It has been set up to work with a Windows 7 machine. [Tony] used the Flexible Action and Articulated Skeleton Toolkit (FAAST) to bind and track the gun controller, moving the mouse cursor on the screen to match the movements of the weapon. Check out the video after the break to see how responsive this system is.

This is a very interesting departure from the gun controllers we’ve seen before.

Continue reading “Kinect, Mouse, And Nerf Gun Combine For House Of The Dead”

Hackaday Links: March 20, 2011

SNES Arcade Cabinet

arcade_cabinet

[Daniel] let us know that he finished up a SNES arcade cabinet he has been working on for awhile. It looks so good, he says that his wife has even agreed to let him keep it in the house!

DIY Overhead projector beamer

diy_beamer

[Liquider] sent us some information about a DIY beamer he built using an overhead projector and an old LCD panel. It looks like a great way to get a big-screen wall display set up in no time.

WordClock gets a makeover

wordclock

[Doug] wrote in to share with us some progress he has made on his WordClock. You might remember our coverage of this creative timepiece a little while back. This time around, he has built a new control board, and is using vinyl stencils for a much cleaner look.

Interactive water fountain

interactive_fountain

[Gerry Chu] is well known for his water-based imagery and projects. His most recent project is a water fountain that interacts with passers by. There are no real build details as of yet, but we hope to see some soon.

Sixty Symbols explains why glass is transparent

glass

Do you think you know why glass is transparent, but a brick is not? If you looked it up via Google, you are likely mistaken. A professor from the University of Nottingham explains why the Internet is so, so wrong about this, as well as how energy gap determines if photons of light can make it through a piece of glass. [via i09]

GPS-enabled Bag Allows For Carefree City Roaming

mapbag_lilypad

[Josh] was looking for a way to enjoy exploring the city of Chicago safely, and hacked together a messenger bag navigation system to ensure he always knew where he was going.

While riding, he wanted to embrace the idea of Dérive, but he felt that he was being too overly conscious of time as well as his location, which took all the fun out of his unplanned excursions. Having recently been “doored” by a car, he was also looking for a way to help him navigate the city streets without being overly distracted with finding his way around.

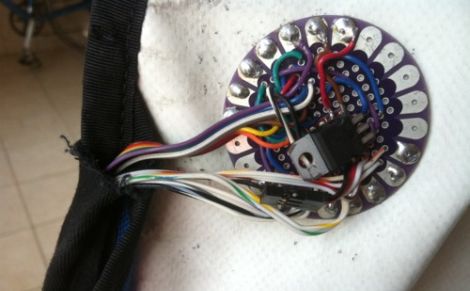
His “Map Bag” solves both of these problems for him, without being obtrusive. He fit a messenger bag with a LilyPad Arduino and a GPS receiver for keeping track of his location. The Arduino can constantly monitor speed, heading, and location, directing [Josh] to his destination by vibrating one of 8 shaftless motors that are installed throughout the bag’s chest strap. Now while he rides, he can take in the city’s atmosphere while also knowing that he will get exactly where he needs to – on time.

He does not have any source code or schematics on his site as of yet, but we hope to see some in the near future. If you are interested, check out the videos of the bag’s construction embedded below.

Continue reading “GPS-enabled Bag Allows For Carefree City Roaming”

Third Time’s A Charm – 512 LED Cube Kicks It Up A Notch With RGB LEDs

rgb_led_cube

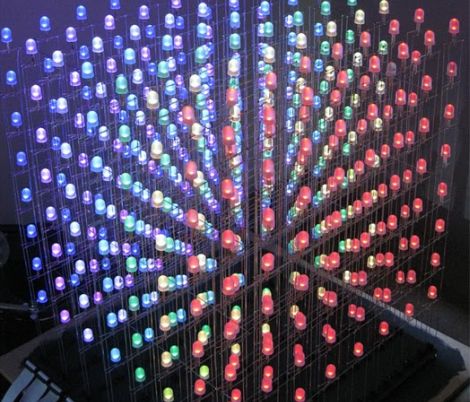
In the comments section of our 512-LED cube post from the other day, several people suggested that to take the project up a notch, building a similar cube using RGB LEDS was the next logical step. It seems that Hack-a-Day reader [vespine] was way ahead of the curve, as he sent us the build details of his 8x8x8 RGB cube shortly after the other story was published.

His cube, which was finished earlier this year, uses 512 10mm RGB LEDs, arranged on top of a simple elevated stand. The stand conceals all of the circuitry he uses to control the cube, the centerpiece of which is a PIC32 MCU. A dozen TLC5940 16-channel PWM drivers are used alongside the PIC in order to adjust the color output of the LEDs, each of which can be addressed and colored individually.

The end result is just about as amazing as you would imagine. He has created several quick demonstration animations, which you can view in the video below. Be sure to stop by his site to see all of his build details – there’s quite a lot there.

Continue reading “Third Time’s A Charm – 512 LED Cube Kicks It Up A Notch With RGB LEDs”