Steampunk CD Player

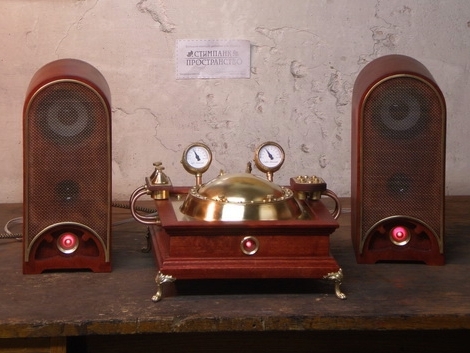
This custom CD-player enclosure may not be your style, but you can’t deny that the fabrication techniques are top-notch (translated). This starts with a portable CD player and a set of amplified speakers. A brass plate serves as the base for the electronics, with the CD player internals mounted from the underside. The brass dome that covers the spinning disk also started as a sheet of metal, with quite a bit of work (translated) going into shaping and smoothing to achieve these results. The base and speaker boxes exhibit some fine woodworking, and there’s even additional electronics for lights, control buttons, and to drive the two analog meters. A lot of thought went into each component of this build and that’s how you put together a masterpiece.

[Thanks Polossatik]

Custom Enclosures Made Of Paper

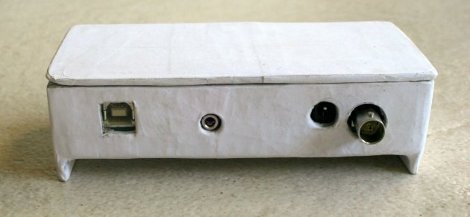
[Sivan Toledo] needed a enclosure for a unique sized electronic project, not finding what he needed in off the shelf solutions, he went to the next best thing, … Papier Mâché!

Using a mold made out of standard corrugated cardboard, he slowly built up layers made of magazine paper, and ordinary “white glue” diluted with water. After getting near the thickness wanted he switched over to typing / copy type paper for a nice clean outer surface. Ports were made in the usual fashion when dealing with soft or thin material, drill a smaller hole, going back with successively larger holes, and then follow up with an appropriate file, all while taking things slow along the way to prevent unwanted results. Finishing up with layers of paper carefully cut into strips to meet the circumferences / edges, along with the final outer surface to make it all even.

The end result is awesome as it stands, but we cant help but wonder what some sanding and paint would look like on a enclosure made like this, though any way you finish it, the idea comes down to custom enclosures that do not need special tools or materials to complete (on the cheap).

Thanks [Drone]

8×8 LED Infinity Mirror

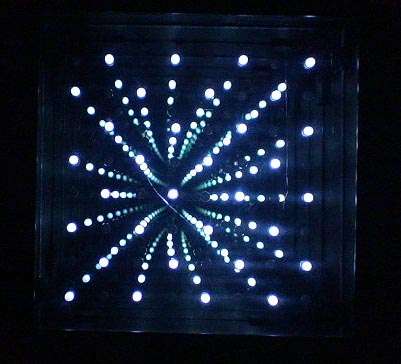
[chromationsystems] put out a couple instructibles on building infinity mirrors. One with an 8×8 array of LEDs and one with a 32 LED ring. These are very well  documented covering the construction of the mirror enclosure as well as the circuit and code. The effect is quite nice. The 8×8 array is interesting, we haven’t seen that before. These would make a fine addition to any geek cave/electronics lab. While it looks like these were basically advertisements for a product he sells, you can definitely make your own from his instructions. We like this kind of advertising.

Homebrew Mp3 Player With Some Bonus Features

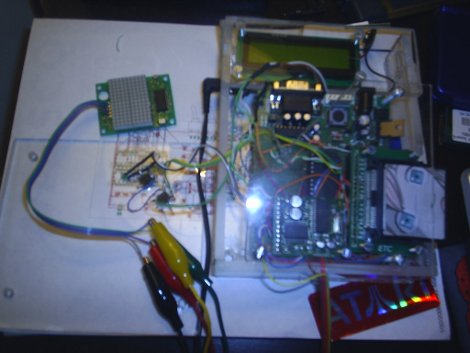
When [falldeaf] set about making his own homebrew Mp3 player, he ended up at the same place we most do while looking into the subject, the wonderful Minty Mp3. Basing the design on [Adafruit Industries] popular board, we are presented The Mp3 Garbler.

First change of the project was to replace the sometimes difficult to find ST013, or the more expensive ST015T Mp3 decoder chip, and the CS4340 digital to analog cconverter with a single vs1001k, which we have checked out before. And while yes VLSI says that the 1001 series is a discontinued product, and it may be a bit hard to find now days, they also offer an updated model on their website, which should suit the application fine.

Next up is a useful LCD display sporting a Sparkfun lcd backpack, that shows us all the important to know music info. And finally there is a 10×14 led matrix display, that can be used to display all sort of user feedback icons, and is driven by a MAX6953, which we think is a pretty spiffy chip.

While there is no schematic, there are brd files, and source code available for your PIC18F452 or similar micro controller to complete your own

Analog Computer Does Math

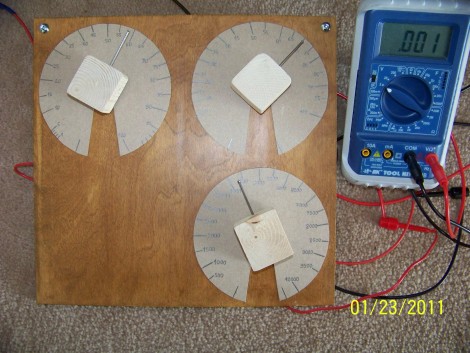
This analog computer can multiply, divide, square numbers, and find square roots. It has a maximum result of ten billion with an average precision of 2-3%. [Miroslav’s] build recreates something he saw in a Popular Electronics magazine. It uses a resistor network made up of three potentiometers with a digital multimeter is an integral part of the machine. To multiply a number you set the needles on the first two knobs to the numbers on which you are operating. To find the result turn the third knob until the multimeter has been zeroed out and read the value that knob is pointing to. It seems much more simple than some of the discrete logic computers we’ve seen, yet it’s just as interesting.

Touch Sensors: Overview, Theory, And Construction

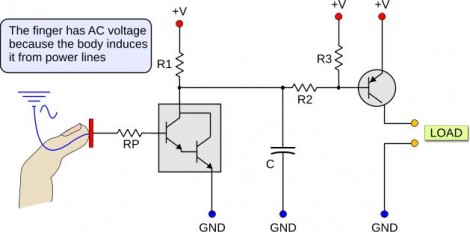
This collection of touch sensor information should be of interest to anyone who liked the simple touch sensor post from Thursday. That was a resistive touch sensor and is covered in detail along with AC hum sensors that trigger based on induced current from power lines around you, and capacitive touch switches like we’ve seen in past hacks. Each different concept is discussed and clearly illustrated like the slide above. [Giorgos Lazaridis] has also put together individual posts that build and demonstrate the circuits. We’ve embedded his resistive sensor demo video after the break and linked to all three example circuits.

Continue reading “Touch Sensors: Overview, Theory, And Construction”

Charging Timer For R/C Batteries

arduino_controlled_socket

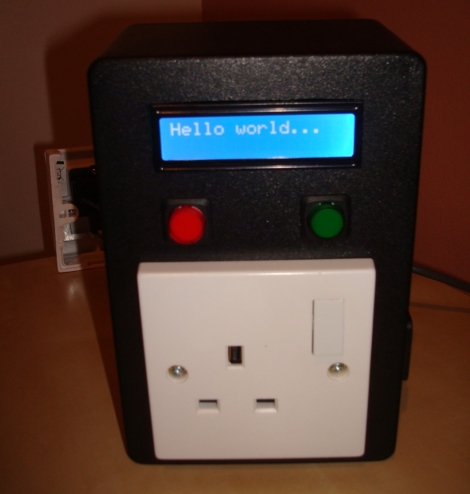
Santa brought [Quinten’s] son a shiny R/C truck for Christmas, but this new toy had one drawback – its batteries could only be connected to the charger for a maximum of 6 hours, lest he turn his house into a pile of smoldering ash.  With grave warnings from the manufacturer dancing in his head, he searched around for a timer that would allow him to cut power to the battery after charging for its allotted time.  Coming up empty, he decided to create his own timed electric socket regulated by an Arduino he had sitting around.  He grabbed a project box and wired up a nice looking socket timer, complete with an LCD status display.  To make things easy for his son, he added two buttons to the front of the controller – one for selecting the amount of charging time, and one to set the timer in motion.  As with his previous hacks, [Quinten] has provided plenty of documentation in the form of pictures, code, and even a video of the timer in action.