3d Printing Saves The Day For Time-lapse Photography

Several of us here at Hackaday have discussed how much we’d like to have some tools, like a 3d printer, but just can’t justify the cost. What would we make? Why do we really need one? Why don’t we just bother [Brian Benchoff] who already has one to make us parts instead. That’s usually how the conversation goes.

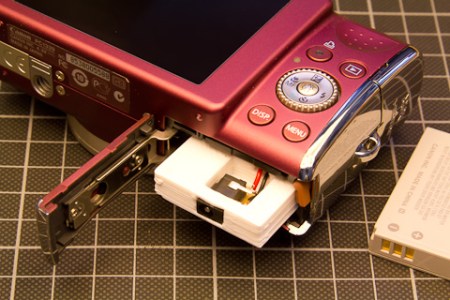
[Alexander Weber] gave us another little reason to drop in our “list of reasons we need a 3d printer” list with this little hack. He wanted to play with CHDK but found the camera’s battery unable to stay alive for longer than 2 hours. There is a commercially available adapter to allow you to plug into the wall, but the cost was outrageous. At least it is outrageous to someone who already owns a 3d printer. We just need a few hundred more dollars worth of reasons to justify that sweet 3d printer we’ve been pining over.

[via Adafruit]

Standalone USB Temperature Logger

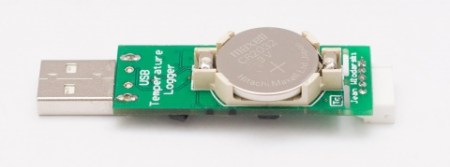
[Jean] wrote in eager to share his latest project, a standalone temperature logger with USB connectivity. Back in November, [Jean] found himself wanting a temperature logger that was roughly the size of a USB memory stick. What he found on the market was not quite adequate in terms of price or size, so he decided to design his own. His would be the size he wanted and wouldn’t require any software or drivers to run. You simply plug it in, edit the configuration text file to set your intervals, and off you go!

You can follow along through the entire design and fabrication on his site. He’s really great about discussing why he made each decision and how he resolved any errors he ran into. You can download the schematics and source code on his site.

Continue reading “Standalone USB Temperature Logger”

You’ll Throw Your Back Out Playing This Analog TV Synth

de-rastra

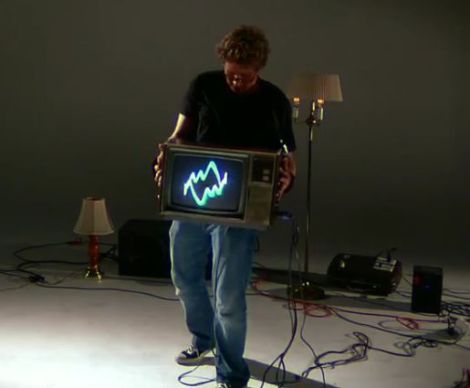
While CRT televisions fall to the wayside as more people adopt flat-panel TVs, the abundance of unused sets gives hacker/artist [Kyle Evans] an unlimited number of analog canvases on which to project his vision. He recently wrote in to share his latest creation which he dubs “de/Rastra”.

The “CRT Performance Interface” as he calls it, is an old analog television which he hacked to display signals created by moving the TV around. Fitted with an array of force sensors, accelerometers, and switches, the display is dynamically generated by the movements of whomever happens to be holding the set.

Signals are sent wirelessly from his sensor array to an Atmel 328 microcontroller with the help of a pair of XBee radios, where they are analyzed and used to generate a series of audio streams. The signals are fed into a 400W amplifier before being inserted into the CRT’s yoke, and subsequently displayed on the screen.

We’re sure [Kyle] is probably trying to express a complex metaphor about man’s futile attempts to impose his control over technology with his project, but we think it simply looks cool.

Check out [Kyle’s] work for yourself in the video below and give us your take in the comments.

Continue reading “You’ll Throw Your Back Out Playing This Analog TV Synth”

Mapping The Surface Of A Video Game Moon

Writing for Hackaday isn’t all fun and games; occasionally I need to actually write posts and reply to emails from builders around the globe. Usually, though, I’m knee-deep in a personal project, or just hanging out playing a few video games. Recently I’ve gone off the deep end with Kerbal Space Program, an awesome little space flight simulator set in an alternate reality where everyone is just slightly incompetent.

As it turns out, there’s actually a lot of fairly technical objectives in this game, from performing orbital rendezvous to mapping the surface of another planet. It didn’t take long for me to go off the deep end and start mapping the Kerbal moon and turning it into a 3D object. Check out how I did this after the break.

Continue reading “Mapping The Surface Of A Video Game Moon”

Your Mug On An Etch A Sketch — Automatically

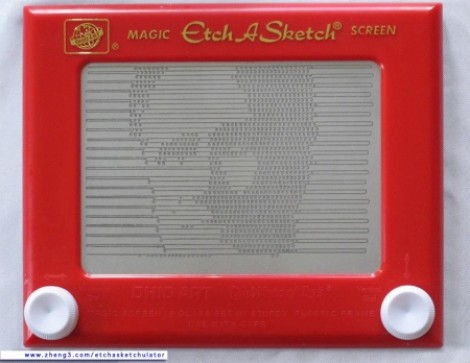
[Jim’s] pretty serious about his Etch a Sketch. He’s gone to the trouble of building a rig that will automatically render a photograph as Etch a Sketch art. Do you recognize the US political figure being plotted in this image? He actually cracks these open and removes all of the internals to preserve the artwork when the reassembled body is ready to be hung on a wall. But we like it for the hacker-friendly interface techniques he used.

He moves the knobs using a pair of stepper motors. They attach thanks to a pair of 3D printed gears he modeled which go over the stock knobs and secure with four set screws. He says he can be up and printing in five minutes using these along with the MDF jig that holds the body and the motors.

He converts photos to 1-bit images, then runs them through ImageMagick to convert them into a text file. A Python script parses that text, sending appropriate commands to an Arduino which drives the motors. The image is drawn much like a scanning CRT monitor. The stylus tracks one horizontal line at a time, drawing a squiggle if the pixel should be black, or skipping it if it should be white.

We wish there was a video of the printing process. Since we didn’t find one, there’s a bonus project unrelated to this one after the break. It’s an Etch a Sketch clock.

Continue reading “Your Mug On An Etch A Sketch — Automatically”

Garden Sensors Measure Soil Moisture And Greenhouse Temperature

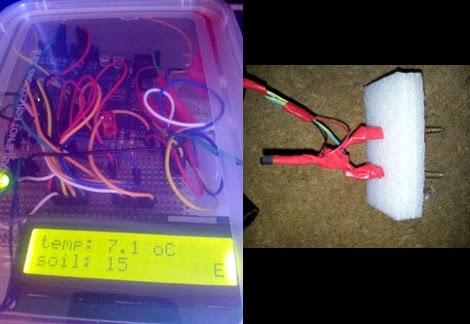
[Andy] is getting his garden up and running. This year it’s been pretty cold so he decided to get small plastic domed tunnel which acts as a mini greenhouse. To help monitor that environment he built this sensor array which displays temperature and soil moisture readings.

Temperature is quite simple. He’s using a TMP36 sensor which is held a few inches above the soil. The moisture sensor is of his own design. It uses two building screws embedded in foam. These are pushed into the soil and a resistance reading indicates moisture level. By driving voltage on one screw, and measuring voltage on the other he gets some useful data. It’s not a standardized value, but observation over time will let him know how the scale relates to dry or wet soil.

During the build process he found that he needed a pull-down resistor on the probe used to take the moisture measurement. He also uses an I/O pin to drive the other screw. This gives him a way to shut off the juice when not taking a reading. We just hope he’s either got a current limiting resistor, or is using a transistor to drive it high.

Graphic Equalizer Display Flashes LED Sign To The Beat

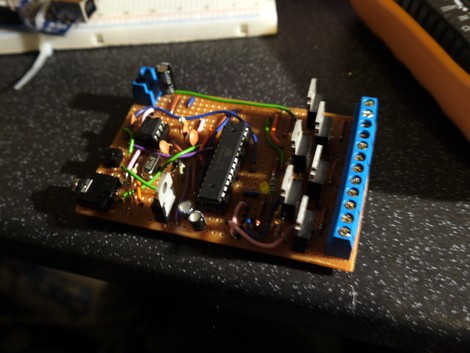
Careful planning and a steady hand let [Leo Rampen] fit everything he needed to build a graphic equalizer display on his LED wall sign. There’s a lot of components that needed to fit on this board, and he decided not use to an etched board for the build.

The idea for the project started off as just an LED sign. After spelling out “Sweat Box” using LED rope lights, he needed a way to switch them on and off. But why stop there? He also decided to use an MSGEQ7 chip in the build since the sign adorns their party-room and adding music-based flashing lights seemed like a good idea.

He laid out the equalizer chip, ATmega328 (running the Arduino bootloader) and a series of N-channel MOSFETS for switching the LEDS out in Eagle. With design in hand he grabbed a medium-sized piece of strip board and used a drill to cut the traces where necessary. In the end he has a very flashy sign as shown in the clip after the break.

Continue reading “Graphic Equalizer Display Flashes LED Sign To The Beat”