Seeed Studio Shows Off Their Wares

Everyone’s favorite Open Hardware store – Seeed Studio – was at Maker Faire this last weekend. They showed off a bunch of cool toys, oscilloscopes, Arduino shields and other hardware goodness, but one of the more interesting products was from their B Squares line.

As [Colin] from Seeed showed us, each B Square is a small plastic enclosure about the size of a drink coaster. The corners of these squares are clad in metal, and each one has magnets inside. The idea behind the B Squares system is to provide power to other B Square boards via magnetic connections.

So far, Seeed has released an Arduino square, battery, solar, and LED squares, as well as iPod docks and prototyping boards. These boards can also be orthogonally, meaning it’s entirely possible to turn six B Squares into a B Cube.

These magnetic connections only provide power connections; there is currently no way to transfer data between different B Squares. We suspect, though, that anyone wanting to replicate the Apple MagSafe power adapter and invent a magnetic I2C bus would find these boards perfectly suited to the task.

Video after the break.

Continue reading “Seeed Studio Shows Off Their Wares”

Building A Tilt Rotor UAV

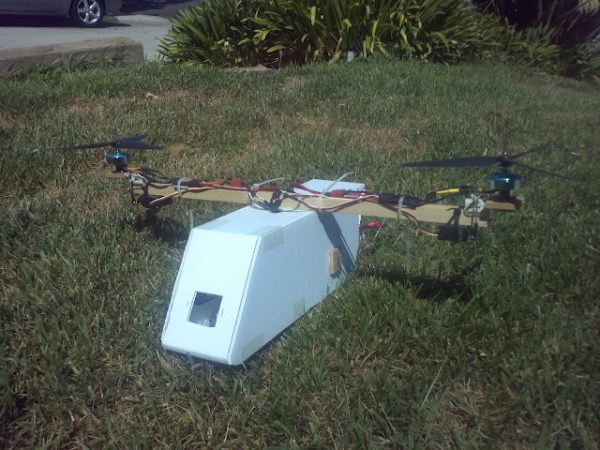
We see a lot of quadcopters, and even the occasional octocopter around here. But this build does it with just two propellers. It’s a tiltrotor build which allows the two upward-pointing propellers to tilt forward and backward. The real world equivalent of this UAV design that pops to mind is the V-22 Osprey.

The motors are mounted on a beam running perpendicular to the direction of travel. Each of them is mounted on a bearing which can be rotated by a servo motor. They rotate independently of each other, which allows for yaw. Of course roll is controlled by driving the propellers at different speeds and pitch is adjusted by tilting both mounts at the same time.

[Stephen] mentions that the tiltrotor design has several advantages over its relatives that use more than two props. This design costs less to build, uses less electricity, and makes for an easier autopilot implementation. If you want to see it in the air, don’t miss the clip after the break.

This is just the second tiltrotor build we remember seeing. The other one was a Halloween prop.

Continue reading “Building A Tilt Rotor UAV”

Light Bulb Efficiency Exhibit Updated With LED Bulb Option

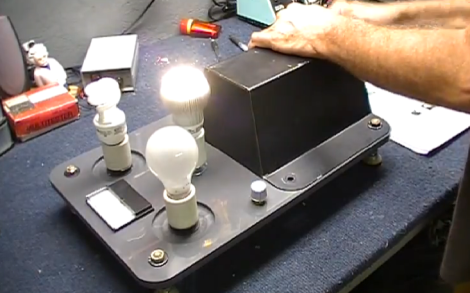
It seems like tinkerers are always being tapped to build or repair exhibit hardware. This time around it’s [Dino’s] turn. He’s been asked to alter a light bulb efficiency demo so that it includes an LED option.

The idea here is that you crank a generator to power different types of light bulbs. There’s an ammeter built in, but possibly the best feedback is knowing how hard you have to crank to illuminate the most inefficient choice. As it stands there is a toggle switch to choose between incandescent and CFL bulbs. [Dino’s] solution is to use a three-position rotary switch. He removes the toggle switch and replaces it with a socket for the LED bulb. A new location for the rotary switch is chosen and he does a bit of work to get it mounted securely. If you haven’t worked with this type of switch before he takes the time in the video after the break to explain how they work.

Continue reading “Light Bulb Efficiency Exhibit Updated With LED Bulb Option”

200 Pound, WiFi Deploying Robot Ran Over My Foot

[Adam Bercu] and [Dan Landers] from Artisan’s Asylum in Somerville, MA brought a very, very cool toy to Maker Faire this year. It’s a two hundred pound WiFi repeater deploying robot able to amble across unforgiving terrain and my foot.

The robot is controlled through a web interface with the help of a front-mounted web cam with pan and tilt controls. All the signals are sent through a WiFi connection to a node.js web server; not the best way to communicate with a robot over long distances, but [Adam] and [Dan] have a few tricks up their sleeve.

On the back of the robot are two Pelican cases loaded up with a battery and a Linksys WRT54G wireless router. When the robot reaches the limits of its range, it activates a solenoid, dropping a WiFi repeater. This repeater has enough battery juice to stay powered for about a day and a half, meaning the robot can make multiple trips to deploy a wireless network through some very hostile terrain. Perfect for disaster and search and rescue operations.

There are two videos after the break: the first is [Dan] going over the capabilities of his tank bot and the second is a short demo of the bot tearing up the grass at Maker Faire.

Continue reading “200 Pound, WiFi Deploying Robot Ran Over My Foot”

Laser-etched LED Zeotrope Looks Like A Circular Monochrome Screen

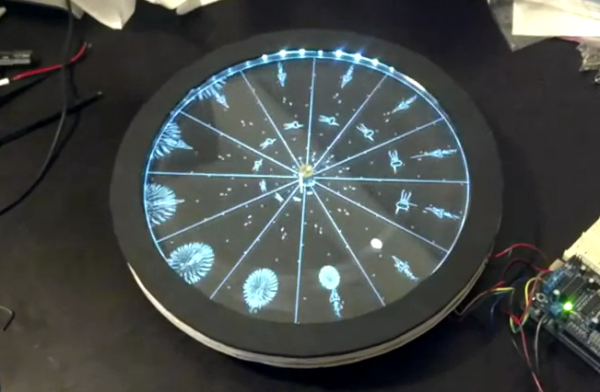
The still image of this animated display really doesn’t do it justice. But you can get an idea of how this really does look like an old monochrome display. It’s actually a zeotrope made from LEDs and etched acrylic. The LEDs blink at a rate that synchronizes with the spinning acrylic to produce an animated image.

You probably already know that a zeotrope uses moving physical models to trick the eye into seeing an animation. In this case the models are etched into a piece of acrylic so that their outline glows when the material is edge-lit. Twelve pie piece shaped panes were designed in Inkscape to look like a scene from the Linux game World War IV. A stepper motor spins the ring which allows for the perfect synchronization seen in the clip after the break.

Continue reading “Laser-etched LED Zeotrope Looks Like A Circular Monochrome Screen”

LVDS On An FPGA Could Make It Possible To Reuse Laptops LCDs And The Like

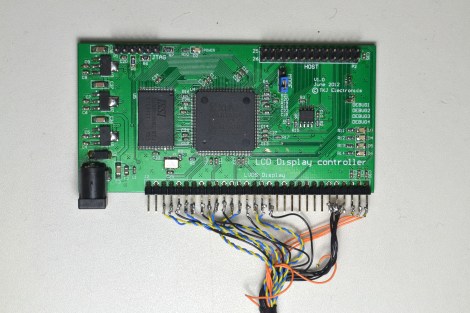
Search around the Internet and you’ll find a landfill of forum threads asking how to drive the LCD screen from a dead laptop. The answer is always that there is just no way to do it. That’s because most of them use a Low-Voltage Differential Signalling protocol that just isn’t available through the hardware used in hobby projects. But the appearance of this board could signal that things are about to change. We don’t want to get your hopes up too much. This isn’t an open source project, but it is a piece of hardware that can make LVDS available for the 8, 16, and 32-bit microcontrollers you’re used to working with.

It’s a derivative of a project [Thomas Jespersen] worked on for a customer. It uses an FPGA to implement the LVDS standard used by high-pixel-count LCD displays. It contains enough memory for a full frame-buffer, and includes a Motorola-8080 communication standard. [Thomas] gives a full description of how the setup works in the video after the break. Demonstrations start about 7:30 into the video with an STM32 F4 Discovery board driving the display.

Continue reading “LVDS On An FPGA Could Make It Possible To Reuse Laptops LCDs And The Like”

Breadboarding With A 144-core Processor

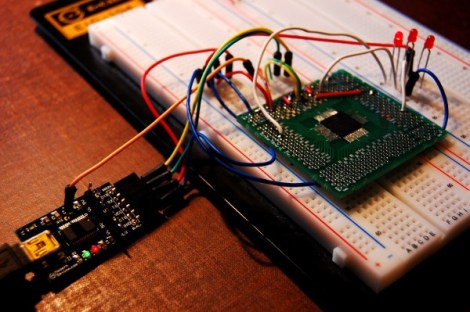
At the center of that green PCB is a tiny little processor with way too many cores. It’s the GA144 which was taken for a test-drive on a breadboard by [Andrew Back]. We saw a multi-core Kickstarter project last month. This will cost a lot less and get you more than twice the number of cores. But as was mentioned in the comments on that post, the drawback is the programming language. This chip’s IDE uses Forth.

There is a dev board available, but [Andrew] went instead with a QFN-to-Through-Hole adapter board which he hand soldered. Once he has access to the pins the chip can be programmed with an FTDI adapter which is compatible with the 1.8V logic levels. The provided Forth IDE (arrayForth) is a Windows only program but it does run under Wine. We followed the project through to see him twiddling I/O pins. But we still have trouble thinking of applications for it. In a world of complex and inexpensive FPGA chips, what would you use this type of processor for?