Hackaday Links: September 28, 2014

hackaday-links-chain

Kyocera is vastly expanding their product lineup with the Shop Sink 3530. The perfect addition to your copiers, fax machines, and laser printers.

About a year and a half ago and with objections from the editorial staff, we did a Top 10 hacking fails in movies and TV post. The number one fail is, “Stupid crime shows like NCIS, CSI, and Bones.” A new show on CBS just topped this list. It’s named Scorpion, and wow. Dropping a Cat5 cable from an airplane doing an almost-touch-and-go because something is wrong with the computers in the tower. Four million adults age 18-49 watched this.

thing
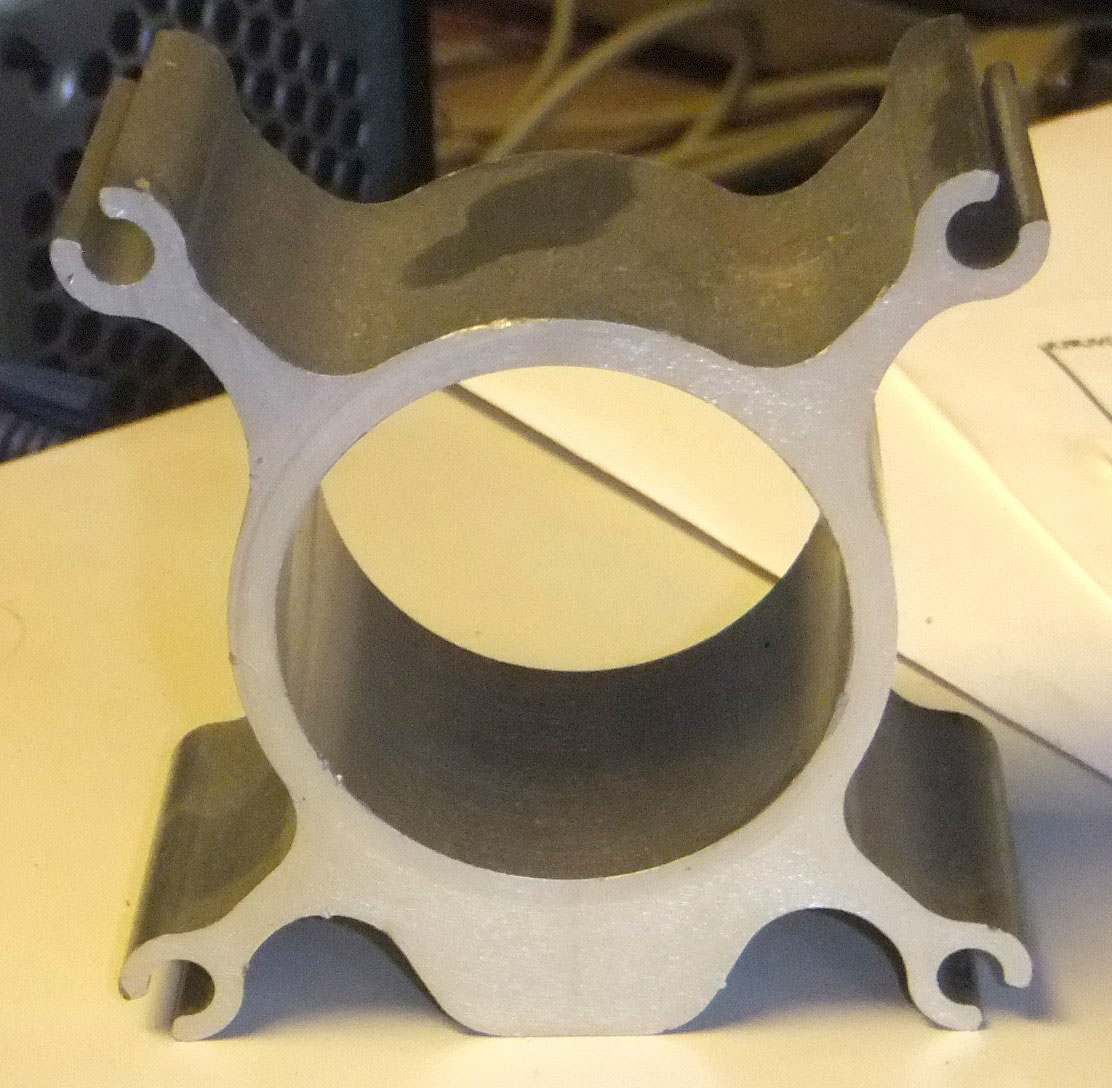
[Derek] found something that really looks like the Hackaday logo in a spacer of some kind. It’s been sitting on his shelf for a few months, and is only now sending it in. He picked it up in a pile of scrap metal, and he (and we) really have no idea what this thing is. Any guesses?

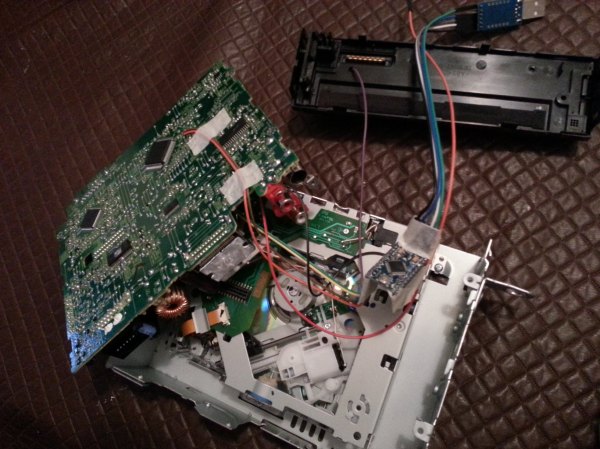
[Sheldon] has a teardown of a vintage voltage and current standard. Just look at those hand drawn traces on a single sided board. Beautiful.

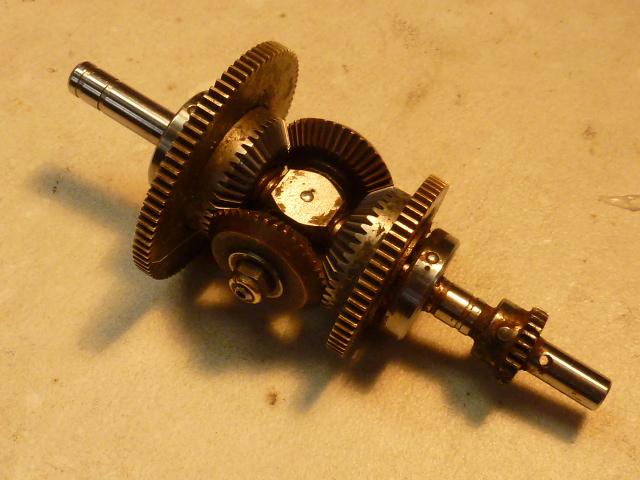
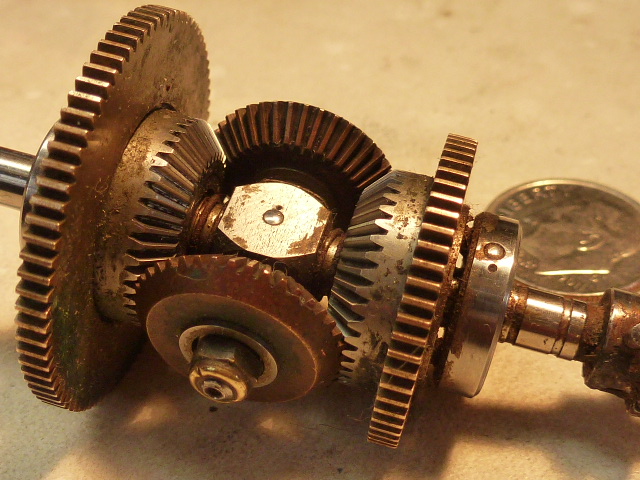
[Art] has another, ‘what is this thing’. He has two of them, and he’s pretty sure it’s some sort of differential, but other than that he’s got nothing. The only real clue is that [Art] lives near a harbor on the N. Cali coast. Maybe from a navigation system, or a governor from a weird diesel?

So you have a Kinect sitting on a shelf somewhere. That’s fine, we completely understand that. Here’s something: freeze yourself in carbonite. Yeah, it turns out having a depth sensor is exactly what you need to make a carbonite copy of yourself.

Tetris on your wrist!

Ardubracelet Lets You Play Tetris On Your Wrist!

Making your own Tetris game is almost a rite of passage for hackers — [Kevin] has stepped up the game a little by making this awesome-flexible-triple-displayed-Tetris-watch dubbed the Ardubracelet.

At the recent Maker Faire SF our head editor [Mike] got a chance to meet with [Kevin] from Arduboy who told us about some of his upcoming projects — this wearable was one of them!

It features three super bright OLED screens on a flexible circuit board with conductive touch buttons to continue with the minimalist design. Instead of a wrist strap he’s actually made the ends magnetic to hold it in place — did we mention the battery also lasts for over 10 hours?

At the heart of the flexible circuit board is an Atmega328p, which is the same chip used in the Arduboy (a credit card sized GameBoy). This is just the first prototype but he’s planning on making it even better in the future complete with Bluetooth and some 3D printed parts to make it look a bit nicer.

Continue reading “Ardubracelet Lets You Play Tetris On Your Wrist!”

DIY Steering Wheel Control Adapter

Arduino Translates Signals Between Steering Wheel Buttons And Aftermarket Head Unit

There is no question that steering wheel mounted controls are super convenient. Reaching all the way over to the dashboard to change a radio station is so 1990’s. An ever-increasing percentage of new cars are coming equipped with steering wheel controls for the stereo, however, you’ll lose the button control if you change out the stock head unit to something a little higher in quality. Sure, there may be an adapter readily available for your car/stereo combination, but there also may not be. [Ronnied] took the DIY road and made his own adapter.

The first obstacle for [Ronnied] was to figure out the wiring on the steering wheel controls. After some poking around he found that there were only two wires used for all of the control buttons, each button only changing the resistance between the two wires. The button states could easily be read by using an Arduino’s analog input. A Pro Mini model was chosen for its small size as it could be housed in the radio compartment of the dash.

The next step was getting the Arduino to control the aftermarket head unit. [Ronnied] did some research regarding JVC’s Stalk digital control interface but came to the conclusion that it would be easier to direct wiring the Arduino outputs to the appropriate spot on the head unit’s circuit board. To do this the button for each function that would also be represented on the steering wheel was traced out to find a common point on the circuit board. Jumper wires soldered to the circuit board simply allow the Arduino to emulate button pushes. To ensure that the head unit buttons still work in conjunction with the steering wheel buttons, the Arduino would have to keep the pins as inputs until a steering wheel button was pushed, the pin changed to an output, the signal sent and the pin changed back to an input. This feature was easily created in the Arduino sketch.

Video below.

Continue reading “Arduino Translates Signals Between Steering Wheel Buttons And Aftermarket Head Unit”

Digital Decade Resistance Box On The Cheap

[Stynus] has finished a unique decade resistance box which doesn’t use conventional rotary switches to select the appropriate resistors. These switches are old fashioned and expensive, so [Stynus] built this decade resistance box that uses a microcontroller and a series of relays to switch the resistors.

Simply selecting a resistance on the screen tells the microcontrollers which resistors need to be switched in order to provide the proper resistance. The box uses relays to do switching instead of transistors because the transistors don’t handle high frequency AC as well as the relays. The device is powered by an 18V transformer and rectifier and, as a bonus, [Stynus] got all of his parts on the cheap which made this a great solution to the expensive resistance decade box problem.

This is a very well-polished piece of test equipment. We’ve featured other decade resistance boxes but never one that was controlled by a microcontroller. All of the PCB layouts and the code for microcontroller are available on the project site if you have a desire to make your own.

Power Glove LED Suit

Prototype LED Light Suit Runs Off Of A NES Power Glove

[Greg’s] been playing around with wearable hacks for quite some time now, and he’s decided to add a new twist for his latest LED light suit (Mk 4) — An ancient NES Power Glove to control it.

He was inspired by the band Hypercrush who had a music video where one of the guys was wearing a laser-shooting power glove — awesome. Having already made light suits before, he thought it’d be fun to do something similar.

The suit is controlled by an Arduino Pro Mini which has been hacked into the Power Glove for ultimate button pushing capabilities. He’s using 5 meter LED strips of the classic WS2812  RGB variety, which allow for individual LEDs to be addressed using a single pin. It’s powered by a 5V 2A USB battery pack, and he’s made all the components very modular, you could even say it’s “plug and play”!

Continue reading “Prototype LED Light Suit Runs Off Of A NES Power Glove”

THP Semifinalist: Solar Energy System

Building a solar power installation isn’t as simple as buying a few panels, wiring them up to a battery, and putting an inverter in the mix. To get the most out of your pricey panels, you’ll want to look at something called Maximum Power Point tracking. Solar panels have an IV curve, and this changes with how much sunlight they’re getting. To get the most out of a set of cells, you need make sure you’re drawing the maximum amount of power out of your cells.

[Nathaniel]’s Solar Energy Generator does just that. It can handle up to 500 Watts, sucks power down from a bank of solar cells and spits that out to a battery. That’s not everything; the project also has a microcontroller for measuring and displaying all the pertinent info, and some terminals to plug in a few DC loads.

While the Solar Energy Generator is designed for off the grid applications, this could easily augment a home installation on the cheap. If you want more than 500 Watts or so, you’ll want to look at a larger controller, but for anything under that, [Nathan] has you covered.

Videos below.


SpaceWrencherThe project featured in this post is a quarterfinalist in The Hackaday Prize.

Continue reading “THP Semifinalist: Solar Energy System”

Voltset Multimeters At World Maker Faire

Many tents at World Maker Faire were divided up into booths for companies and various projects. In one of these tents, we found the Voltset booth. [Tom, Ran, and Michael] were on hand to show off their device and answer any questions. Voltset is essentially a multimeter which uses your phone as a display. It connects to an Android phone via USB or an optional Bluetooth module.

Now we’d be a bit worried about the risk of damaging our phones with a voltmeter electrically connected via USB. However, many people have an old phone or retired tablet kicking around these days, which would be perfect for the Voltset. The Bluetooth module alleviates this problem, too – though it doesn’t fix the issue of what happens to the multimeter when someone decides to call.

Voltset isn’t new; both the Voltset team and the similarly specced  Mooshimeter were also at World Maker Faire last year. In the interim, Voltset has had a very successful Kickstarter. The team is accepting pre-orders to be shipped after the Kickstarter backers are sent their rewards.

voltset-2
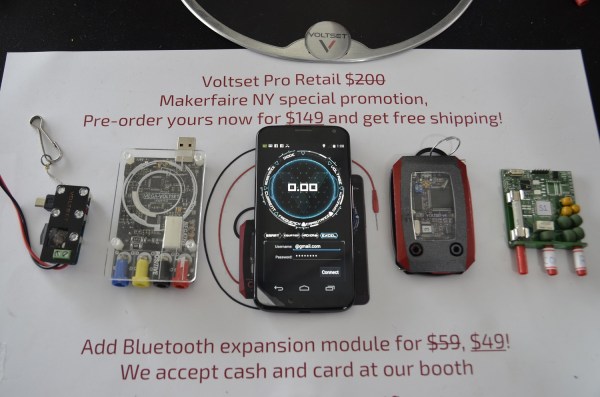
[Tom] told us that the team is currently redesigning their hardware. The next generation prototype board with more protection can be seen in the far right of the top photo. He also mentioned that they’re shooting for 5 digits of accuracy, placing them on par with many bench scopes. We’re skeptical to say the least about 5 digits, but the team is definitely putting their all into this product. We’ll wait until the Kickstarter backers start getting their final devices to see if Voltset is everything it’s cracked up to be.