Entry Is Easy: The Hackaday Prize

[youtube=https://www.youtube.com/watch?v=L1N5oM4hmw8&w=580]


Failing to submit an entry for The Hackaday Prize is a big mistake. The worst you can do is make an awesome contribution to Open Hardware, but you could win a trip to space or hundreds of other prizes. It’s simple to get started:

  1. Sign up for an account on Hackaday.io
  2. Start documenting your project with the tag #TheHackadayPrize
  3. Click the “Submit project to…” button to make it official

Not simple enough? We even made some screenshots to prove how easy it is. Check them out after the break.

Make it connected, make it open, make it awesome, and you could win!

Continue reading “Entry Is Easy: The Hackaday Prize”

Keep Those Filaments Lit, Design Your Own Vacuum Tube Audio Equipment

It was a cold January Saturday night in Chicago and we had big plans. Buddy Guy’s Legends bar was packed. We setup directly under one of the PA speakers less than 15′ from the stage. Time to celebrate. Skip the glass, one pitcher each and keep them coming. We’re about to make bootleg recording history. Conversation evolved into bloviation on what our cover art would look like, certainly it would be a photo of our battery powered tube mic pre-amp recently created in my basement lab. We had four hours to kill before Buddy’s appearance. Our rate of Goose Island and Guinness consumption would put us at three-sheets to the wind by 11. Must focus. It’s time, Buddy was on. Much fumbling about and forgetting how to turn on the Japanese-made 24 bit digital recorder with its nested LCD menus, cryptic buttons, and late 90’s firmware. Make it work. We did, just in time for the bouncers to notice the boom mike and battery packs. Wait, wait… maybe we should talk about why tube amps are worth this kind of trouble first.

Yes, vacuum tubes do sound better than transistors (before you hate in the comments check out this scholarly article on the topic). The difficulty is cost; tube gear is very expensive because it uses lots of copper, iron, often point-to-point wired by hand, and requires a heavy metal chassis to support all of these parts. But with this high cost comes good economic justification for building your own gear.

This is one of the last frontiers of do-it-yourself that is actually worth doing.

Continue reading “Keep Those Filaments Lit, Design Your Own Vacuum Tube Audio Equipment”

Jeep Power Wheels Upgrade Only Reuses Body

Power Wheels Racing Jeep

It is debatable whether [Jamie] upgraded his Power Wheels Jeep or built a beast of a mini vehicle and only added a Power Wheels Jeep body. Either way, this Racing Power Wheels Jeep is awesome. The goal of the project is to race in the Power Racing Series races held at Maker Faires.

This vehicle is no joke. It is still electric but runs on 24volts DC. It has pneumatic rubber tires for traction and disk brakes for stopping. The ‘gas’ gauge is a volt meter mounted into the dash next to the motor temperature gauge. As if that was not enough, the headlights and tail lights work. Take note of that sweet custom frame, it was mostly made from an old bed frame.

Continue reading “Jeep Power Wheels Upgrade Only Reuses Body”

Plater Makes It Easy To Fill Your Bed Plate

plater

If you’re a 3D printing power user, you probably try to fit as many parts onto a single print job as possible. Most printing software has this built in to let you do that, but [Grégoire Passault] and his team thought they could do it better with their program Plater — it’s open source too.

They decided to make Plater after designing Spidey: an open-source 4-legged robot that makes use of 22 3D printed parts. The first few times they printed this took a long time because they had to manually arrange the parts — there had to be a better way!

Plater is a fairly simple program that lets you take in a bunch of STL files, set your print bed size and part spacing and then it creates an STL with as many parts in it as it can, organized on your print bed. Then you just have to load it up into your favorite slicing program and you’re good to go.

Seems like an excellent tool to add to your metaphorical 3D printing tool-belt!

The Un-Digital Robotic Arm

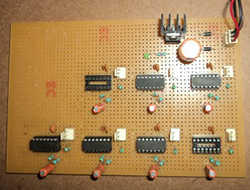
556When you think of a robotic arm, you’re probably thinking about digital control, microcontrollers, motor drivers, and possibly a feedback loop. Anyone who was lucky enough to have an Armatron knows this isn’t the case, but you’d still be surprised at how minimal a robotic arm can be.

[viswesh713] built a servo-powered robotic arm without a microcontroller, and with some interpretations, no digital control at all. Servos are controlled by PWM signals, with a 1 ms pulse rotating the shaft one way and a 2 ms pulse rotating the shaft the other way. What’s a cheap, popular chip that can easily be configured as a timer? Yep, the venerable 555.

The robotic arm is actually configured more like a Waldo with a master slave configuration. [viswesh] built a second arm with pots at the hinges, with the resistance of the pots controlling the signal output from a 556 dual timer chip. It’s extremely clever, at least until you realize this is how very early robotic actuators were controlled. Still, an impressive display of what can be done with a simple 555. Videos below.

Continue reading “The Un-Digital Robotic Arm”

Chocolate Quadrotor Proves You Can Make Anything Fly

Chocolate Quadrotor

With the advancements in quadrotor parts and technology over the years, it’s become possible to make just about anything fly if you can strap some high-speed rotors to it. Introducing the first edible quadrotor!

[Michael] enjoys building and flying quadrotors. His girlfriend enjoys baking and making chocolates. One day she had a crazy idea — what if they made a quadrotor together, combining their unique skill sets? [Michael] was a bit skeptical at first. After all, chocolate doesn’t really compare to aluminum or carbon for a frame material… and chocolate melts at room temperature. Regardless — they were curious enough to try it out and see for sure.

First they built a wooden prototype and then created a silicone mold from it. Using Styrofoam and metal spacers for the electronics mounts they filled the mold with chocolate and let it set. A bit of assembly later and they had a chocolate quadrotor. It flies too.

Continue reading “Chocolate Quadrotor Proves You Can Make Anything Fly”

Raspberry Pi Coin Dozer Won’t Make You Rich

Raspi in a coin dozer case

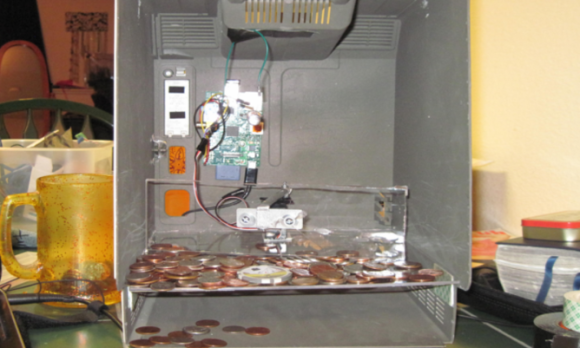
[SoggyBunz] lucked up and scored an Ultimate Raspberry Pi Bundle from Element 14. His idea was to use a Raspberry Pi to make a retro-mechanical arcade Coin Dozer game, and decided to build his first prototype inside a vacant Macintosh Plus shell.

The game is based on a Raspberry Pi running a small Python script. The Raspi operates a small servo that moves a piece of acrylic back and forth in a somewhat random fashion. The coins are inserted into slots cut into the Macintosh shell and eventually pile up. The moving acrylic lever pushes your winnings out of the machine and deposits them on whatever it’s sitting on, unlike this coin dispensing machine.

[SoggyBunz] concedes that the build is a bit rough and a servo is not the best choice of an actuator. But he aims to build a much improved version, and we can only hope he puts it on Hackaday.io and tips us in! Stick around after the break for a video of the Pi Dozer in action.

Continue reading “Raspberry Pi Coin Dozer Won’t Make You Rich”