FPGA Ambilight Clone Packs A Ton Of Features

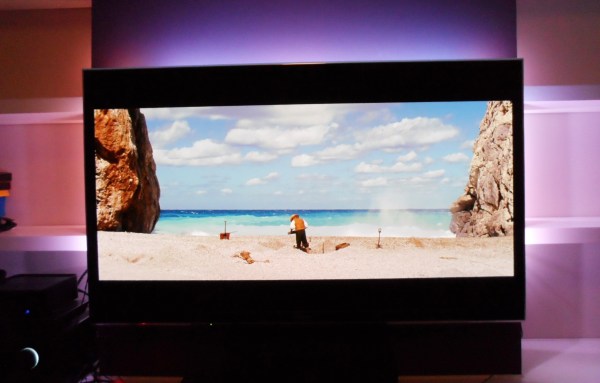
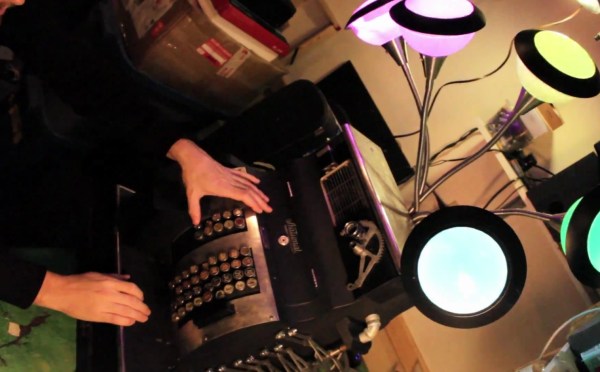
[Stephen] designed a standalone Ambilight clone built around an FPGA and recently added many new features to make his design even better. His original design was based around a Spartan 3-E FPGA, but his new design uses the Papilio One board with a Spartan-6 LX9 FPGA. This gives him dedicated DSP hardware and more RAM, allowing him to add more processing-intensive features.

[Steven]’s new board can drive up to 4096 LEDs total, and each LED is colored from one of 256 segmented screen areas. The output of the LEDs is smoothed over a configurable time period which makes the result a bit more pleasant. [Steven] also added color correction matrices and gamma correction tables to make up for differences in LED coloration and so the output can be fine-tuned to the color of the wall behind the TV.

Finally, [Steven] added multiple configurations which can be stored in Flash memory. The FPGA can detect letterboxes and pillarboxes in the video stream and change to a corresponding configuration automatically, so settings rarely need to be manually adjusted. He also added an extensive serial interface to configure all of the parameters and configurations in Flash. Be sure to check out the video after the break to see his setup in action.

Continue reading “FPGA Ambilight Clone Packs A Ton Of Features”

Create An Inclinometer Using A Raspberry Pi

The latest gizmo that you can make using the cheap and easy Raspberry Pi is here courtesy of [Mark Williams]. He has hooked up an inertial measurement unit (IMU) to the Pi and built an inclinometer to use to measure the various angles of an off-road vehicle.

This particular guide goes through the setup of SDL to control the video output to a small screen. Then, a function is created to rotate the images based on input from the IMU so that the vehicle position can be shown graphically on the screen. Now, when your truck is about to roll over on a hill, you’ll get advance warning!

Of course, this whole project is predicated on installing the IMU and getting it up and running on the Raspberry Pi in the first place. [Mark] has you covered on a guide for setting that up as well. This delves into setting up the IMU over I2C to get it talking to the Raspberry Pi, and then converting the raw data from the IMU into data that is more usable. Be sure to check out [Mark]’s page for all of the code and details!

Boy Off The Grid For Years Writes GUI For DOS

In a hacker version of Jumanji, when [fiberbundle]’s parents divorced, his thrice-fugitive new stepfather took him to a remote location in Australia without any access to technology or the outside world. With him he brought an old 486, a gift from his real dad. Lest the police discover them, [fiberbundle] was forbidden contact from most of society and even restricted in the books he was allowed to read.

The boy spent years trying to get the most he could out of his two-generations-old PC. Using only two textbooks from a decade and a half earlier, DOS 6.0, and QBasic he managed to write his own shell dubbed OSCI (pronounced “Aussie”), a ray-caster 3d engine and lots more. No mentors, no Internet. The computers at school were even more outdated Power Macs.

Eventually life returned him to civilization to be mindblown by modern technology 1000x as powerful. He went from playing text-based adventures he had to write for himself, to seeing Crysis. From QBasic to C++. From ASCII art “shooters” to Half-Life 2. From a 486 to a 4-core CPU. From a rural library to Wikipedia.

Follow the link above to see screens of his projects over the years. As of yet no one has verified the story, but, even if only that it is worth a read.

Thanks [Gustavo] for the tip.

Using Lasers For Hair Growth

HowToLou is back with a rather interesting build: One hundred laser diodes for hair growth.

Before you guffaw at the idea of lasers regrowing hair lost to male pattern baldness, there’s a surprising amount of FDA documents covering the use of laser diodes and red LEDs for hair growth and an interesting study covering teeth regrowth with lasers. Yes folks, it’s a real thing, but something that will never get a double-blind study for obvious reasons.

[Lou] is building his hat with 100 laser diodes, most of which were sourced from Amazon. These diodes were implanted in a piece of foam flooring, a rather interesting solution that puts dozens of diodes in a flexible module that’s pretty good for making a wearable device.

The lasers are powered by three AA batteries, stuffed into a four-slot battery holder that was modified to accommodate a power switch. [Lou] has been wearing a nine-diode hat for a month now, and if the pictures are to be believed, he is seeing a little bit of hair growth. At the very least, it’s an interesting pseudo-medical build that seems to be producing results.

Hats like these are commercially available for about $700. [Lou] built his for about $60. We’re calling that a win even if it doesn’t end up working to [Lou]’s satisfaction. Just don’t look at the lasers with your remaining eye.

Continue reading “Using Lasers For Hair Growth”

diy video microscope

DIY Video Microscope Used For Soldering SMD Parts

Fortunately (or unfortunately), [ucDude] has had the opportunity to try out a high quality video microscope while soldering some small surface mount components. He loved it, the problem was he had a hard time going back to using just his eyes. He wanted a video microscope but the cost for a professional one could not be justified. The solution? Build one!

[ucDude] called on one of his photographer friends to help. After discussing the project they decided to use a webcam and a lens from an SLR camera. Testing with the webcam resulted in an image that could not be zoomed-in enough, plus having to connect it to an external computer proved to be a bulky solution. They next tried a Raspberry Pi, camera module and zoom monocular. It worked great! The entire assembly was then mounted to a camera boom stand making it easy for the camera to be positioned over the work area and out of the way of hands and soldering irons. The Raspberry Pi’s HDMI output is plugged straight into an HD monitor. The result is exactly what [ucDude] was looking for. Now he can quickly and confidently solder his surface mount circuit boards.


Meet Registroid – Mutant Cash Register Music Sequencer

73 years ago WWII was in full swing, the world’s first computer had not yet crunched atomic bomb physics and department store cash registers had to add up your purchases mechanically. Back then, each pull caused the device to whirl and kerchunk like a slot machine. [David] & [Scott] kidnapped one of those clunkers and forced it to sing a new tune. Thus the Registroid was born, a self-described “mutant vintage cash register that is a playable, interactive electro-house looping machine.” Why did no one else think of this yet?

Inside, the adding gears and tumbling counters were gutted to make room for the electronics, amp and speaker. Keys were converted to Arduino inputs that then feed to MAX/MSP which serves as a basic midi controller. On top, five “antennae” lamps with LEDs serve as a color organ where they pulse with the audio as split up by an MSGEQ7 equalizer chip. Each row of latching keys corresponds to a different instrument: drum beats, baselines, synths, and one-shots.

We have seen similar things done to a Game Boy and typewriter before, but a cash machine is new to us. Perhaps someday someone will flip the trend and type their twitter messages from an antique harpsichord.

The Registroid appears quite popular when on display at local events, including some wonder when a secret code opens the cash drawer.

Continue reading “Meet Registroid – Mutant Cash Register Music Sequencer”

Trinket EDC Contest Entry: Shame On You!

[BDM] is helping others keep WiFi safe with “Shame On You!“, his entry in Hackaday’s Trinket Everyday Carry Contest. We all have that family member, friend, or neighbor who just can’t seem to get their WiFi locked down. Shame On You will show them how easy it is to detect such a hotspot, which hopefully will motivate them to correct the issue. [BDM] was a bit worried when he learned that Adafriut already has an open WiFi detector as one of their Pro Trinket example projects. However, we think he has added more than enough features to make his project stand out.

shame2
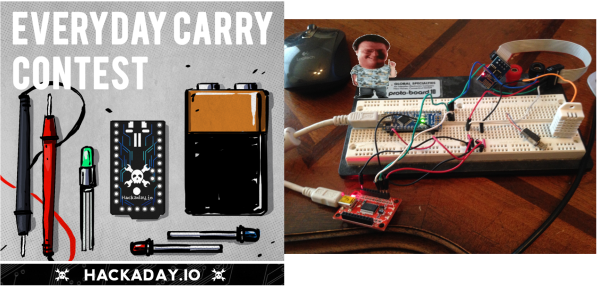
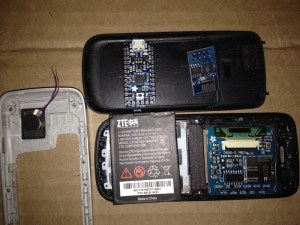
Shame On You is using a Pro Trinket running at 3.3 volts, along with an ESP8266 WiFi module. Power comes from a LiPo battery and is handled by an Adafruit LiPo backpack. Like several other EDC contest entries, Shame On You is using a cell phone shell as a case. The display is a 1.27″ color OLED with an SD card. A disc style vibrator motor will also help get the user’s attention.

[BDM] hasn’t made much progress this last week, as he’s been battling some Christmas light cutting bandits. Logging each week’s work doesn’t always have to be technical, sometimes life intervenes!

We’re heading into our third week here in the Trinket Everyday Carry Contest, but there is still plenty of time to enter! The main contest runs until January 2, but we’re having random drawings every week! Don’t forget to write a project log before the next drawing at 9pm EDT on Tuesday, December 16th. You and all of the other entrants have a chance to win a BusPirate 3.6 from The Hackaday Store!