How To Upgrade Jasper’s Voice Recognition With AT&T’s Speech-to-Text API

Jarvis upgrade

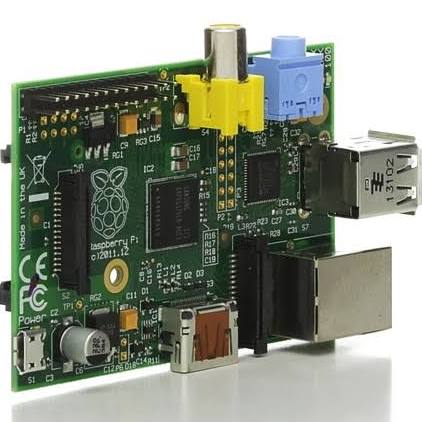
Jasper is an open-source platform for developing always-on voice-controlled applications — you talk and your electronics listen! It’s designed to run on a Raspberry Pi. [Zach] has been playing around with it and wasn’t satisfied with Jasper’s built-in speech-to-text recognition system. He decided to take the advice of the Jasper development team and modify the system to use AT&T’s speech-to-text engine.

The built-in system works, but it has limitations. Mainly, you have to specify exactly which keywords you want Jasper to look out for. This can be problematic if you aren’t sure what the user is going to say. It can also cause problems when there are many possibilities of what the user might say. For example if the user is going to say a number between one and one hundred, you don’t want to have to type out all one hundred numbers into the voice recognition system in order to make it work.

The Jasper FAQ does recommend using the AT&T’s speech-to-text engine in this situation but this has its own downsides. You are limited to only one request per second and it’s also slower to recognize the speech. [Zach] was just fine with these restrictions but he couldn’t find much information online about how to modify Jasper to make the AT&T engine work. Now that he’s gotten it functional, he shared his work to make it easier for others.

The modification first requires that you have at AT&T developer account. Once that’s setup, you need to make some changes to Jasper’s mic.py module. That’s the only part of Jasper’s core that must be changed, and it’s only a few lines of code. Outside of that, there are a couple of other Python scripts that need to be added. We won’t go into the finer details here since [Zach] goes into great detail on his own page, including the complete scripts. If you are interested in using the AT&T module with your Jasper installation, be sure to check out [Zach’s] work. He will likely save you a lot of time.


Not Having The Room Isn’t A Good Reason To Not Have A CNC Router Anymore

PhlatPrinter CNC Machine

Typically, CNC Machines take up a larger footprint than that of the raw material it is cutting. The size of such a machine may have prevented interested makers/hackers from buying or building one for themselves. If you are one of those people then you’d be interested in [Fly3DMon’s] series of CNC Router projects called PhlatPrinter.

A typical CNC Router has a bed that the work piece is mounted to and that work piece stays stationary. The tool then moves in 3 axes, removing material, leaving behind a finished part. The PhlatPrinter works more like a large format plotter, where the work piece is moved back and forth via rollers while the tool only moves in 2 directions. What this allows is a CNC Machine that takes up very little floor space when not in use that can handle any length of material!

Continue reading “Not Having The Room Isn’t A Good Reason To Not Have A CNC Router Anymore”

Micro-Robots Made At Home, Who Needs DARPA Funding?

We love it when this happens. Sometimes we post about cool technology that companies are developing which might start an outcry of “not a hack” — but then, just sometimes, it still inspires a few readers. [Jeroen Domburg] — who everyone knows as [Sprite_TM] and is a judge for The Hackaday Prize] — saw a recent video about micro robots, a project funded by DARPA, and decided to try making his own.

We shared the original story a few months ago about these replicator like micro-robots, which can quite literally swarm over surfaces, use tools, and manufacture micro-sized parts. The robots themselves are actually just dumb little magnets — the magic is in the surface underneath them.

This sparked an interest in several people, and [Mike] made a very simple version of it, capable of 1-dimensional movement. This inspired [Sprite_TM] to step it up a notch, with his own 2-dimensional version. He’s designed his own PCB that allows him to run current in various directions through the traces of the board — this effectively allows him to control a small neodymium magnet to go whichever way he wants.

Continue reading “Micro-Robots Made At Home, Who Needs DARPA Funding?”

DIY Coffee Maker Filters Out Manufacturer Specificity

Coffeemaker made from 3D-printed parts and scrap aluminium

This DIY electric coffeemaker prototype uses an assemblage of 3D-printed parts and cast aluminium. [siemenc]’s main goal with this project was to utilize and demonstrate recycling and re-usability. He used Filabot filament exclusively and melted down scrap aluminium such as cans, foil, and CNC mill waste in an oven he fashioned from an old fire extinguisher. He also cast the aluminium parts himself from 3D-printed positives.

Of course, he had to buy the things that make this a coffeemaker such as the hoses, the fuse, and the heating element. If you’re wondering why he didn’t salvage these parts from yard sale machinery, it’s because he wanted to be able to replace any part of it and have it last as long as he needs it to last. The innards he used are not specific to any model, so he should be able to easily find a replacement.

Just like a pour over set up, [siemenc] has fine control over the strength and quantity of the brew. We particularly like this machine’s exotic bird looks as well; it may be a prototype, but it’s quite stylish. If you’re looking to go all the way with DIY coffee, why not grow your own beans and then roast the beans yourself?


Lathe CNC Upgrade Is Nothing To Shake A Turned Stick At

7x12 CNC Lathe Conversion

We see a lot of CNC Machines here on Hackaday but not too many of them are lathe-based. [Jim] sent us an email letting us know his dissatisfaction regarding the lack of CNC Lathes and included a link to one of his recent projects, converting a small manual lathe to computer control. This isn’t some ‘slap on some steppers‘ type of project, it’s a full-fledged build capable of tight tolerances and threading.

The project is based on a 7×12 Mini Lathe. There are several brands to choose from and they are almost identical. Check out this comparison. [Jim] started with Homier brand.

The first thing to get upgraded was not related to the CNC conversion. The 3″ chuck was replaced with a 5″. Changing it over was easy using an adapter plate made for the task. For the X Axis, the stock ways and lead screw were removed and replaced by a THK linear slide. This slide only has 2.5″ of travel and is perfect for this application. The travel being so short allowed the final eBay auction price to be under $40.

Continue reading “Lathe CNC Upgrade Is Nothing To Shake A Turned Stick At”

A Bicycle Built For One

diyBike

[Bcmanucd] must have been vying for husband of the year when he set out to build his wife a custom time trials bicycle. We’re not just talking about bolting together a few parts either – he designed, cut, welded, and painted the entire frame from scratch. Time trial racing is a very specific form of bicycle racing. Bikes are built for speed, but drafting is not allowed, so aerodynamics of the bike and rider become key. Custom bikes cost many thousands of dollars, but as poor college students, neither [Bcmanucd] nor his wife could afford a proper bike. Thus the bicycle project was born.

[Bcmanucd] created the basic geometry on a fit assessment provided by his wife’s cycling coach. He designed the entire bike in Autodesk Inventor. Once the design was complete, it was time to order materials. 7005 aluminum alloy was chosen because it wouldn’t require solution heat treating, just a trip to the oven to relieve welding stresses. Every tube utilized a unique cross section to reduce drag, so [Bcmanucd] had to order his raw material from specialty bike suppliers.

Once all the material was in, [Bcmanucd] put his mechanical engineering degree aside and put on his work gloves. Like all students, he had access to the UC Davis machine shop. He used the shop’s CNC modified Bridgeport mill to cut the head tube and dropouts.

The most delicate part of the process is aligning all the parts and welding. Not a problem for [Bcmanucd], as  he used a laser table and his own jigs to keep everything lined up perfectly. Any welder will tell you that working with aluminum takes some experience. Since this was [Bcmanucd’s] first major aluminum project, he ran several tests on scrap metal to ensure he had the right setup on his TIG welder. The welds cleaned up nicely and proved to be strong.

The entire build took about 3 months, which was just in time for the first race of the season. In fact, during the first few races the bike wasn’t even painted yet. [Bcmanucd’s] wife didn’t seem to mind though, as she rode it to win the woman’s team time trial national championships that year. The bike went on to become a “rolling resume” for [Bcmanucd], and helped him land his dream job in the bicycle industry.

Echoing the top comment over on [Bcmanucd’s] Reddit thread, we’d like to say awesome job — but slow down, you’re making all us lazy spouses look bad!

A Tweeting Litter Box

SmartLitterBox

How can you not be interested in a project that uses load cells, Bluetooth, a Raspberry Pi, and Twitter. Even for those of our readers without a cat, [Scott’s] tweeting litter box is worth the read.

Each aspect of this project can be re-purposed for almost any application. The inexpensive load cells, which available from eBay and other retailers, is used to sense when a cat is inside the litter box. Typically sensors like the load cell (that contain a strain gauge) this use a Wheatstone bridge, which is very important for maximizing the sensitivity of resistive sensor. The output then goes to a HX711, which is an ADC specifically built for load cells. A simple alternative would be using an instrumentation amplifier and the built-in ADC of the Arduino. Now, the magic happens. The weight reading is transmitted via an HC-06 Bluetooth module to a Raspberry Pi. Using a simple Perl script, the excreted weight, duration, and the cat’s resulting body weight is then tweeted!

Very nice work! This is a well thought out project that we could see being expanded to recognize the difference between multiple cats (or any other animal that goes inside).