A Mini Op-Amp Based Line Following Robot

LineRobot

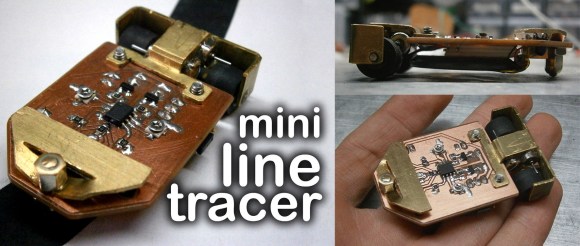
There’s no denying it. Super small robots are just cool. [Pinomelean] has posted an Instructable on how to create a mini line following robot using only analog circuitry. This would make a great demo project to show your friends and family what you’ve been up to.

Analog circuitry can be used instead of a microcontroller for many different applications, and this is one of them. The circuit consists of two op-amps that amplify the output of two phototransistors, which control each motor. This circuit is super simple yet very effective. The mechanical system is also quite cool and well thought out. To keep things simple, the motors drive the wheel treads, rather than directly through an axle. After the build was completed, the device needed to be calibrated by turning potentiometers that control the gain of each op-amp. Once everything is balanced, the robot runs great! See it in action after the break.

While not the smallest line follower we have seen, this robot is quite easy to reproduce. What little robots have you build lately? Send us a tip and let us know!

[via Embedded Lab]

Continue reading “A Mini Op-Amp Based Line Following Robot”

An Etch-A-Sketch To Fetch The Time

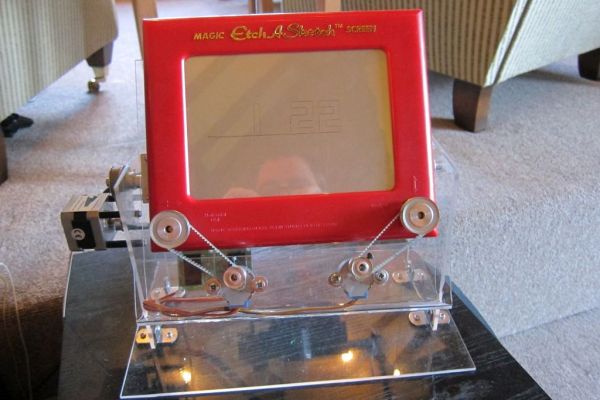
For someone who has never used stepper motors, real-time clocks, or built anything from scratch, [Dodgey99] has done a great job of bending them to his will while building his Etch-A-Sketch clock.

He used two 5V stepper motors with ULN2003 drivers. These motors are mounted on the back and rotate the knobs via pulleys. They are kind of slow; it takes about 2 1/2 minutes to draw the time, but the point of the hack is to watch the Etch-A-Sketch. [Dodgey99] is working to replace these steppers with Nema 17 motors which are much faster. [Dodgey99] used an EasyDriver for Arduino to drive them. He’s got an Arduino chip kit in this clock to save on the BOM, but you could use a regular Arduino. He left out the 5V regulator because the EasyDriver has one.

[Dodgey99] has published three sketches for the clock: one to set up the RTC so that the correct time is displayed once the Etch-A-Sketch is finished, some code to test the hardware and sample the look of the digits, and the main code to replace the test code.

The icing on this timekeeping cake is the acrylic base and mounting he’s fashioned. During his mounting trials, he learned a valuable lesson about drilling holes into an Etch-A-Sketch. You can’t shake an Etch-A-Sketch programmatically, so he rotates it with a Nema 17. Check it out after the jump.

If you’re paying attention, you’ll realize we just saw the exact opposite of this project a few hours ago: a CNC tool (laser cutter) controlled by turning Etch-A-Sketch knobs.

Continue reading “An Etch-A-Sketch To Fetch The Time”

RiotNAS: Mobile Storage For Street Photography

riotnas1

You’re likely aware of the protests and demonstrations happening throughout Venezuela over the past few months, and as it has with similar public outcries in recent memory, technology can provide unique affordances to those out on the streets. [Alfredo] sent us this tip to let us know about riotNAS: a portable storage device for photos and videos taken by protesters (translated).

The premise is straightforward: social media is an ally for protesters on the ground in these situations, but phones and cameras are easily recognized and confiscated. riotNAS serves up portable backup storage via a router running OpenWRT and Samba. [Alfredo] then connected some USB memory for external storage and a battery that gives around 4 hours of operating time.

For now he’s put the equipment inside a soft, makeup-looking bag, which keeps it inconspicuous and doesn’t affect the signal.  Check out his website for future design plans—including stashing the device inside a hollowed out book—and some sample photos stored on the riotNAS system. If you’re curious what’s going on in Venezuela, hit up the Wikipedia page or visit some of the resources at the bottom of [Alfredo’s] site.

Laser Cutter Becomes An Etch A Sketch

etch

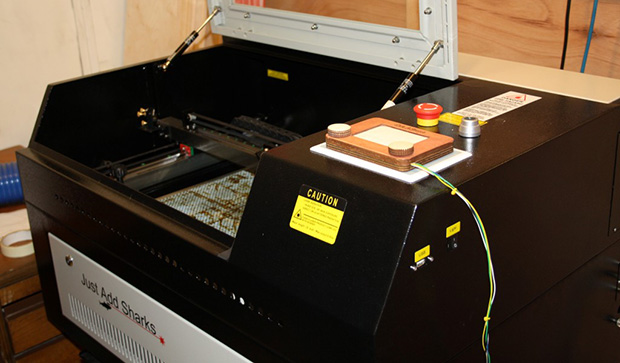
The mirror in a laser cutter moves along an X Y axis. An Etch A Sketch moves its stylus along an X Y axis. Honestly, this laser cutter with Etch A Sketch controls is so obvious, we’re shocked we haven’t seen it before.

The Etch A Sketch interface is extremely simple – just two rotary encoders attached to laser cut knobs set inside a small, laser cut frame. The lines from the encoders are connected to an Arduino Pro Mini that interfaces with the controller unit on the laser cutter, moving the steppers and turning on the laser only when the head is moving. There’s an additional safety that only turns on the laser when the lid is closed and the water pump is running.

The circuit is extremely simple, and with just a few connections, it’s possible to retrofit the Etch A Sketch controller to the laser cutter in just a few minutes.  Just the thing for a weekend hackerspace project.


Continue reading “Laser Cutter Becomes An Etch A Sketch”

Developed On Hackaday: Need Card Art — Who Likes To Draw?

Our offline password keeper project (aka Mooltipass) is quite lucky to have very active (and very competent) contributors. [Harlequin-tech] recently finished our OLED screen low level graphics library which (among others) supports RLE decompression, variable-width fonts and multiple bit depths for fonts & bitmaps. To make things easy, he also published a nice python script to automatically generate c header files from bitmap pictures and another one to export fonts.

[Miguel] finished the AES encryption/decryption schemes (using AES in CTR mode) and wrote an awesome readme which explains how everything works and how someone may check his code using several standardized tests. We highly encourage readers to make sure that we didn’t make any mistake, as it was one of you that suggested we migrate to CTR mode (thanks [mate]!).

On the hardware side, we launched into production the top & bottom PCBs for Olivier’s design. We’re also currently looking for someone that has many Arduino shields to make sure that they can be connected to the Mooltipass. A few days ago we successfully put the Arduino bootloader inside our microcontroller and made the official Arduino Ethernet shield work with it.

Finally, as you may have guessed from the picture above our dear smart card re-sellers can pretty much print anything on them (these are samples). If one of you is motivated to draw something, please contact me at mathieu[at]hackaday.com!

On a (way) more childish note, don’t hesitate to give a skull to the mooltipass on HaD projects so it may reclaim its rightful spot as “most skulled“.

Designing A WakeUp Light

[Akhil] and his wife recently finished their WakeUp Light project. As the name suggests, this kind of morning alarm uses light to wake you up in the morning. The main constraints when starting this relationship-strengthening adventure were cost, ability to work with any table lamp, and having a simple but effective control interface, all while keeping all the design open. The created platform (put in the wooden box shown above) is built around a Stellaris Launchpad (ARM Cortex M4 based) and uses an AC dimmer circuit found in this instructable. For our readers interested in those, [Akhil] mentions two very interesting articles about their theory of operation here and here.

An Android application has been made to set up all the alarm parameters, which uses the phone’s Bluetooth to communicate with the (well-known) HC-05 Bluetooth transceiver connected to the Launchpad. For safety, the current design also includes an LM4876 based audio amplifier connected to the microcontroller’s PWM output. The next revision will integrate a Digital to Analog Converter and an SD-Card slot for better quality and music diversity. A presentation video is embedded after the break and you can find the official repository at GitHub.

Continue reading “Designing A WakeUp Light”

Fail Of The Week: Secret Agent-Style Book Hideaway

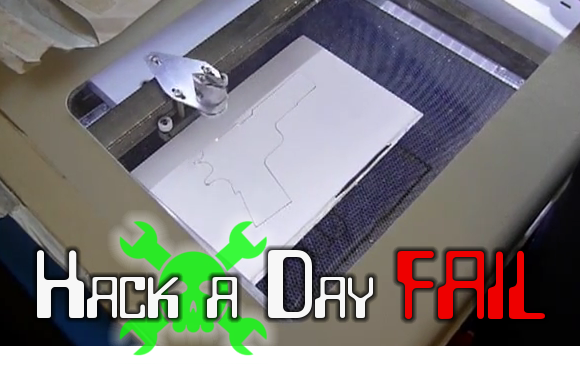
Ah, the movies are an inspiration for so many projects. How many times have you seen a spy movie where a cutout in the pages of a book are hiding something? This was the inspiration which led [Paul] and his crew to try using a laser cutter to remove a handgun-shaped cutout from the pages. The fail began before the project even got started. The sacrificial book they had chosen was too thick to cut directly so they tore it in thirds for the cutting process.

The hijinks are portrayed well in the clip after the break. The infectious giggling as this first trace of the laser cuts the outline makes the video worth watching. As they try to go deeper, the success falls off rapidly. This makes for a great Fail of the Week discussion: Why can’t you cut through multiple layers of a book with a laser cutter? Is this merely a focal length issue that would be solved with a higher-end cutter or is there something else at play here. Let us know what you think by leaving a comment below.


Continue reading “Fail Of The Week: Secret Agent-Style Book Hideaway”