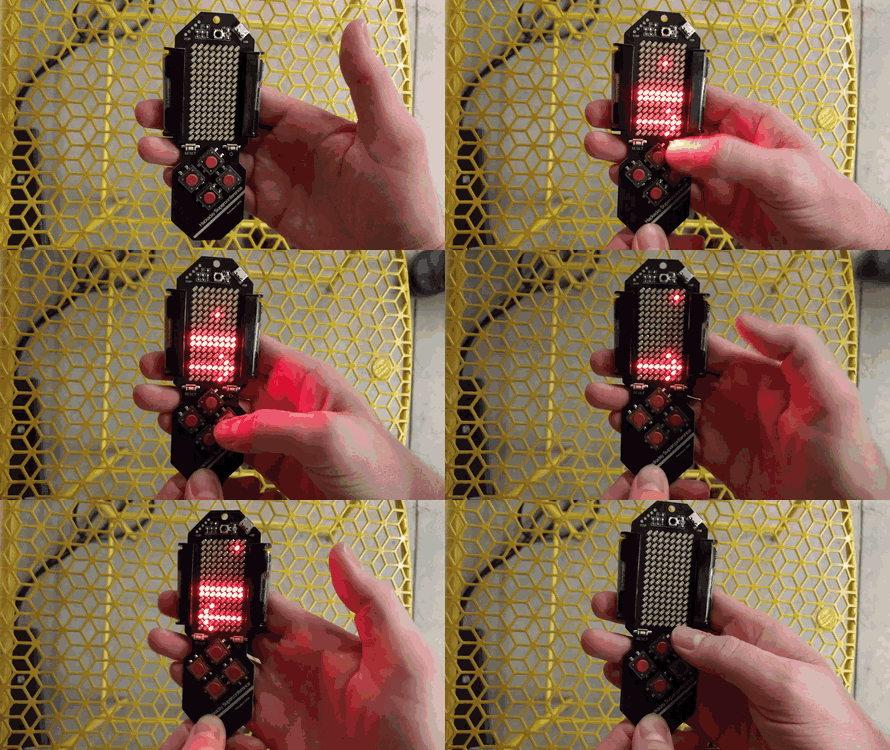
Hackaday SuperConference begins tomorrow and every ticketed attendee will get their hands on this sexy piece of hardware which is the conference badge. Yes, it looks fantastic hanging around your neck, you can play a wicked game of Tetris on it, and it runs a crypto challenge. But badge hacking is a thing and this post is the most concise information you’ll find on hacking on the firmware. Whether this is your first time blinking an LED, or you cut your teeth on PIC assembly, you can make this badge do your bidding with minimal effort.
Continue reading “The Fastest Path To SuperCon Badge Firmware Hacking”
Day: November 4, 2016
Tools Of The Trade — Injection Molding
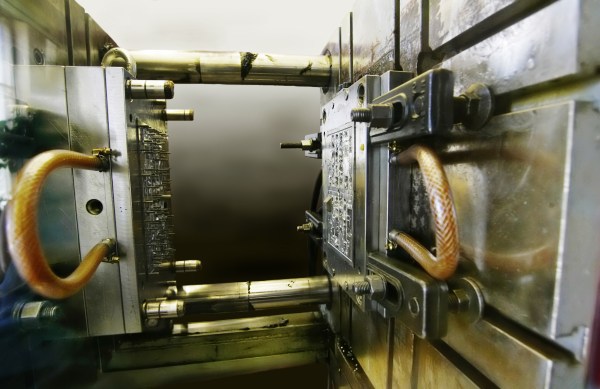
Having finished the Tools of the Trade series on circuit board assembly, let’s look at some of the common methods for doing enclosures. First, and possibly the most common, is injection molding. This is the process of taking hot plastic, squirting it through a small hole and into a cavity, letting it cool, and then removing the hardened plastic formed in the shape of the cavity.
The machine itself has three major parts; the hopper, the screw, and the mold. The hopper is where the plastic pellets are dumped in. These pellets are tiny flecks of plastic, and if the product is to be colored there will be colorant pellets added at some ratio. The hopper will also usually have a dehumidifier attached to it to remove as much water from the pellets as possible. Water screws up the process because it vaporizes and creates little air bubbles.
Next the plastic flecks go into one end of the screw. The screw’s job is to turn slowly, forcing the plastic into ever smaller channels as it goes through a heating element, mixing the melted plastic with the colorant and getting consistent coloring, temperature, and ever increasing pressure. By the time the plastic is coming out the other end of the screw, and with the assistance of a hydraulic jack, it can be at hundreds of tons of pressure.
Finally, the plastic enters the mold, where it flows through channels into the empty cavity, and allowed to sit briefly to cool. The mold then separates and ejector pins push the part out of the cavity.
Probably The Simplest Electronic Temperature Controlled Soldering Iron
We’re all used to temperature controlled soldering irons, and most of us will have one in some form or other as our soldering tool of choice. In many cases our irons will be microprocessor controlled, with thermocouples, LCD displays, and other technological magic to make the perfect soldering tool.
All this technology is very impressive, but how simply can a temperature controlled iron be made? If you’re of an older generation you might point to irons with bimetallic or magnetic temperature regulation of course, so let’s rephrase the question. How simply can an electronic temperature controlled soldering iron be made? [Bestonic lab] might just have the answer, because he’s posted a YouTube video showing an extremely simple temperature controlled iron. It’s not the most elegant of solutions, but it does the job demanded of it, and all for a very low parts count.
He’s taken a ceramic housing from a redundant fuse holder, and mounted it on a metal frame to make a basic soldering iron holder into which the tip of his unregulated iron fits. To the ceramic he’s fitted a thermistor, which sits in the gate bias circuit of a MOSFET. The MOSFET in turn operates a relay which supplies mains power to the iron.
Temperature regulation comes as the iron heats the ceramic to the point at which the thermistor changes the MOSFET and relay state, at which point (with the iron power cut) it cools until the MOSFET flips again and restarts the process. You may have spotted a flaw in that it requires the iron to be in the holder to work, though we suspect in practice the thermal inertia of the ceramic will be enough for regulation to be reasonably maintained so long as the iron is returned to its holder between joints. Nobody is claiming that this temperature controlled iron is on a par with its expensive commercial cousins, instead it represents a very neat hack to conjure a useful tool from very few components. And we like that. Take a look at the full video below the break.
Continue reading “Probably The Simplest Electronic Temperature Controlled Soldering Iron”
VR Feels More Real With Leap Motion And This Rotation Sensor
You could have said this at any time in the last couple of decades: the world of virtual reality peripherals does not yet feel as though it has fulfilled its potential. From the Amiga-powered Virtuality headsets and nausea-inducing Nintendo Virtual Boy of the 1990s to today’s crop of advanced headsets and peripherals, there has always been a sense that we’re not quite there yet. Moments at which the shortcomings of the hardware intrude into the virtual world may be less frequent with the latest products, but still the goal of virtual world immersion seems elusive at times.
One of the more interesting peripherals on the market today is the Leap Motion controller. This is a USB device containing infra-red illumination and cameras which provide enough resolution for its software to accurately calculate the position of a user’s hands and fingers in three-dimensional space. This ability to track finger movement gives it the function of a controller for really complex interactions with and manipulations of objects in virtual worlds.
Even the Leap Motion has its shortcomings though, moments at which it ceases to be able to track. Rotating your hand, as you might for instance when aiming a virtual in-game weapon, confuses it. This led [Florian Maurer] to seek his own solution, and he’s come up with a hand peripheral containing a rotation sensor.
Inspired by a movie prop from the film Ender’s Game, it is a 3D-printed device that clips onto the palm of his hand between thumb and index finger. It contains both an Arduino Pro Micro and a bno055 rotation sensor, plus a couple of buttons for in-game actions such as triggers. It solves the problem with the Leap Motion’s rotation detection, and does not impede hand movement so much that he can’t also use his keyboard and mouse while wearing it. Sadly he does not yet seem to have posted any code, but he does treat us to a video demonstration which we’ve posted below the break.
Continue reading “VR Feels More Real With Leap Motion And This Rotation Sensor”


