Running Way More LED Strips On A Raspberry Pi With DMA

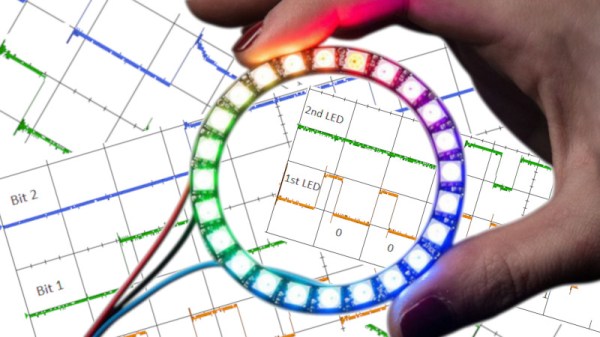
The Raspberry Pi is a powerful computer in a compact form factor, making it highly useful for all manner of projects. However, it lacks some of the IO capabilities you might find on a common microcontroller. This is most apparent when it comes to running addressable LED strings. Normally, this is done using the Pi’s PWM or audio output, and is limited to just a couple of short strings. However, [Jeremy P Bentham] has found a way to leverage the Pi’s hardware to overcome these limitations.

The trick is using the Raspberry Pi’s little-documented Secondary Memory Interface. The SMI hardware allows the Pi to shift out data to 8 or 16 I/O pins in parallel using direct memory access (DMA), with fast and accurate timing. This makes it perfect for generating signals such as those used by WS2812B LEDs, also known as NeoPixels.

With [Jeremy]’s code and the right supporting hardware, it’s possible to run up to 16 LED strips of arbitrary length from the Raspberry Pi. [Jeremy] does a great job outlining how it all works, covering everything from the data format used by WS2812B LEDs to the way cache needs to be handled to avoid garbled data. The hack works on all Pis, from the humble Pi Zero to the powerful Pi 4. Thanks to using DMA, the technique doesn’t overload the CPU, so performance should be good across the board.

Of course, there are other ways to drive a ton of LEDs; we’ve seen 20,000 running on an ESP32, for example.

[Thanks to Petiepooo for the tip!]

Ask Hackaday: With Landline Use In Decline, What’s To Be Done With The Local Loop?

Walking is great exercise, but it’s good for the mind too: it gives one time to observe and to think. At least that’s what I do on my daily walks, and being me, what I usually observe and think about is the local infrastructure along my route. Recently, I was surprised to see a number of telephone company cabinets lying open next to the sidewalk. Usually when you see an open box, there’s a telephone tech right there, working on the system. But these were wide open and unattended, which I thought was unusual.

I, of course, took the opportunity to check out the contents of these pedestals in detail. Looking at the hundreds of pairs of brightly colored wire all neatly terminated and obviously installed and maintained at great expense, I was left wondering why someone would leave such a valuable asset exposed to the elements. With traditional POTS, or plain old telephone service, on the decline, the world may no longer have much use for the millions of miles of copper cable feeding back to telco central offices (COs) anymore. But there’s got to be something this once-vital infrastructure is still good for, leading me to ask: what’s to be done with the local loop?

Continue reading “Ask Hackaday: With Landline Use In Decline, What’s To Be Done With The Local Loop?”

HALWOP Recreates Retro Style With The Raspberry Pi

Modern computers are incredible feats of engineering, but there are many that still yearn for the simpler times. When keyboards clacked and a desktop computer quite literally dominated the top of your desk. There’s a whole community of folks who scratch that itch by restoring vintage computers, but not everyone has the time, money, or skill for such pursuits. Plus, even the most lovingly cared for Apple II isn’t going to help you watch YouTube.

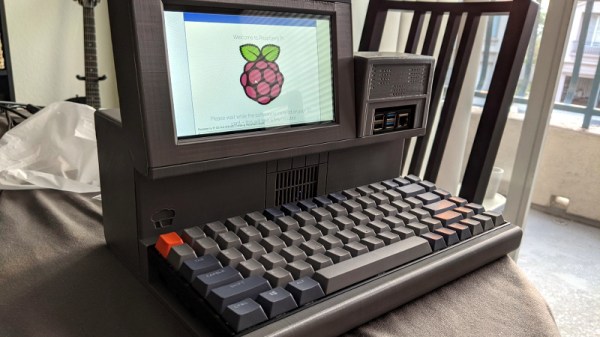
Those who wish to recreate the look and feel of a vintage computer with modern internals will certainly be interested in the HALWOP by [Maz_Baz]. While its 3D printed case isn’t a replica of any one computer, it does draw inspiration from iconic machines like the Apple Lisa and IBM XT. It’s an amalgamation of design ideas that seemed like a good idea circa 1982 or so, with plenty of 90° angles and air vents to go around.

Considering the size of the Raspberry Pi 4 that powers the HALWOP, most of the case is just hollow plastic. But of course, the whole idea depends on it being almost comically large. On the plus side, [Maz_Baz] says you can use one of those empty compartments to hold a Anker PowerCore 26800 battery pack. At least in theory that makes it a “luggable” computer, though good luck trying to move it around.

In addition to the Pi 4 and battery pack, the HALWOP also uses a seven-inch touch LCD and Keychron K2 Bluetooth mechanical keyboard. Since everything is so modular, assembly is about as simple as it gets. Outside of the USB cables that power everything, you just need a long enough ribbon cable to connect the LCD to the Pi.

We know the purists don’t like the idea of a “retro” computer based on the Raspberry Pi, but of course, such projects aren’t about maintaining historical accuracy. They are a way to bridge the gap between modern technology and the unique aesthetics of a bygone era. Designs like the HALWOP allow a new generation to experience a taste of what computing was like in the early days, without giving up the ground that’s been gained in the intervening years.

Spin The Video Track With A Mechanical Flair

One of the most difficult user interfaces to get right is video editing. It is complex and fiddly with large amounts of precision required even after four or five hours of straight editing. Seeking to bring some of that interface out into the real world, [Zack Freedman] built a mechanical video editing keyboard.

The keyboard in question features popular shortcuts and keys to breeze through different parts of editing. The biggest feature is, of course, the large scrubbing knob, allowing [Zack] to fly through long video with precision. We’ve seen our fair share of mechanical keyboards that aren’t traditional keyboards on Hackaday before, such as this number pad or this macro pad.

One of the unique constraints of this project was the fact that Zack had a deadline of two days. This self-imposed deadline was to help focus the work and drive it towards completion. This meant that it had to be designed in such a way that roadblocks or troublesome features could be designed around or cut out altogether. At its heart, this project is just 14 mechanical switches, 4 potentiometers, and a Teensy to drive it all. It is the design, prototyping, and thought that went into this project that makes it noteworthy. There are plenty of lessons here about how to manage a project’s timeline and advice about how to actually finish it.

Code, STL’s, diagrams, and instructions are all on his GitHub.

Continue reading “Spin The Video Track With A Mechanical Flair”