Fujitsu Proprietary Keyboard Goes PS/2 With A Pico

One of our favorite retro-computing YouTubers, [Clint] from LGR, found himself a very interesting Fujitsu keyboard while thrift store shopping. It was a beautiful unit, but confusing, as this keyboard comes with an 8-pin DIN connector. A 5-pin DIN plug or 6-pin Mini-DIN would be easy to work with, but what was this odd connection? Turns out the Fujitsu N860-2500-T111 came with an Olympus CV-100 Video Processor, which was designed for medical imaging, potentially among other uses. And as often happened with old specialized hardware, the keyboard used a proprietary protocol for sending keystrokes.

[Clint] put out a call for anyone that could help him build an adapter, and [Andy] from Element14 answered the call. But this problem requires more than an adapter, mainly because the Fujitsu doesn’t have key rollover. It’s one key at a time, and that just doesn’t work for the sort of things [Clint] shows off on LGR. So, the electronic guts of the keyboard were removed, to be replaced with a Raspberry Pi Pico, wired directly to the keyboard matrix.

Continue reading “Fujitsu Proprietary Keyboard Goes PS/2 With A Pico”

A CVT For Every Application

When the subject of CVTs or continuously variable transmissions comes up, the chances are that most readers will think of the various motor vehicles they’ve appeared in. Whether it’s a DAF, a Ford, a FIAT, or a Chevrolet, most major manufacturers have tried one at some point or another with greater or lesser success. The automotive ones inevitably use a variation on a V-belt or metal band between variable separation conical pulleys, but this is by no means the only CVT configuration. Serial tinkerer [Robert Murray-Smith] takes an in-depth look at the subject as part of his ongoing fascination with wind turbines.

What caught our eye about this video isn’t so much the final 3D-printed design he selects for his experiments, but the history and his look at the different CVT designs which have appeared over the years. We see the V-belts, as well as the various cone configurations, the disk transmissions, the hydrostatic ones, and even magnetic versions. His transmission uses two cones with a rubber coating, with of all things a movable golf ball between them. We’re guessing it will appear somewhere in his future videos, so watch out for it.

Meanwhile, this isn’t the first time we’ve seen a CVT, [James Bruton] used a hemisphere to make one on a robot.

Continue reading “A CVT For Every Application”

Hackaday Prize 2023: Throwaway Temperature Logger To Useful ARM Dev Board

The global supply chain is a masterpiece of containerized logistics that allows a container to leave a factory in China and arrive on a British forecourt after only a few weeks, but along with the efficiency it brings a traceability and monitoring problem. If you are shipping perishable items such as medicines or foodstuffs, how can you be sure that they’ve remained refrigerated the whole journey through?

The answer comes in digital temperature loggers, and since these are throwaway devices [arduinocelentano] decided to look inside and see if they could be reused. The answer is positive, in that many models have the potential to be useful dev boards for very little money.

These devices usually take the form of a bulky USB dongle with an LCD display and a few buttons. Inside they invariably have a low-power ARM microcontroller and a battery as well as the temperature sensor and some flash memory to store the readings. The data is read by the customer through the USB port, and they’re single use with manufacturers paying only lip service to recycling, because the data must by necessity be impossible to erase or alter. Happily for all that, many of them appear to be well-designed internally, with the relevant debug and programming ports exposed and the ability to access the microcontroller. We look forward to seeing what comes of these boards, because while the worst of the chip shortage my now be receding it’s always good to find a new source.

Shall We Hack A Game?

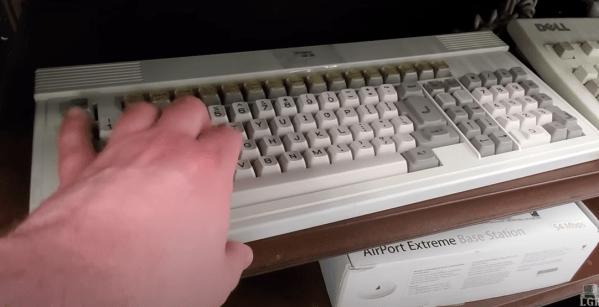
A fantastic summertime game has consumed many of the kids in my neighborhood. It’s basically a treasure hunt, but the treasures are all shoebox-sized NFC readers that are “easily” findable on a map. Players all have a smart card and run around from box to box, collecting points that depend on how far apart the boxes are from each other. Walk, skate, or bike 1 km between check-ins, and ten points show up on the e-paper screen.

It’s been going on for a few weeks now, and it’s not uncommon to see a line of two or three kids at any given box, all with the purple lanyards and smart cards around their necks. So far, the highest-rated plausible single efforts have 450 km (280 miles) under their belt. My son’s grade-school average is 45 km (28 miles) over three weeks. The goal is getting kids out on the early summer afternoons, and that seems to be working!

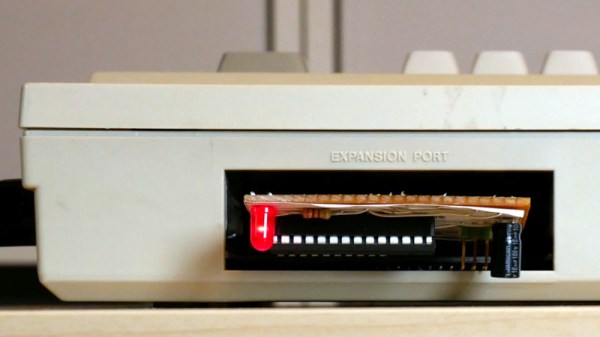
Of course I had to reverse engineer the infrastructure, so here’s what I started with. Each box knows your point standing as soon as you tap the card, with a small delay. Scores appear online about every four hours. And the boxes are all ~1 km from each other or less.

My first thought was some kind of mesh network – that would be by far the coolest solution. Each box could simply report your card number to a central database, and the rest is a simple matter of software. LoRa radios rounded out my fantasy design.

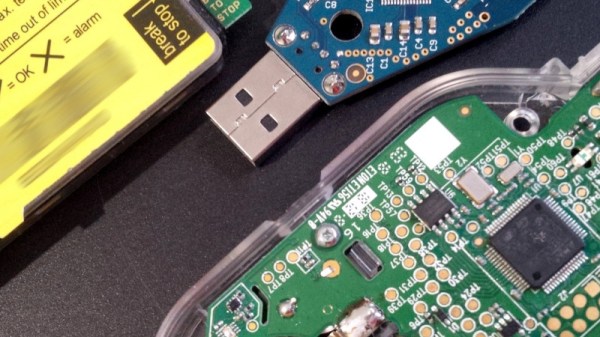
But the length of time between getting the points and their appearance online suggests otherwise. And, a little bit of playing around with my cellphone’s NFC reader gives up the juice – they are MiFare Classic cards with data storage. So I got my own card, ran around town, and diffed the results. I haven’t cracked the location/time-stamping yet, but I know exactly where my total points are stored.

I’m going to keep observing until I’ve got it figured out completely, but I’m so tempted to tweak the points and see what happens. Are some of the digits in what I think are a timestamp in reality a checksum? Will I get disqualified? Or worse, what if I make a mistake and get myself publicly into first place? OK, better to sit this one out on the sidelines – I really don’t want to be the jerk who crashes a fantastic kid’s game. Sometimes you’ve gotta know when not to hack.

An All Sky Camera To Watch The Night Sky

If you have any astronomer friends you’ll soon discover that theirs is a world of specialist high-quality optical equipment far ahead of the everyday tinkerer, and for mere mortals the dream of those amazing deep space images remains out of reach. It’s not completely impossible for the night sky to deliver impressive imagery on a budget though, as [David Schneider] shows us with a Raspberry Pi powered whole sky camera.

The project was born of seeing a meteor and idly wondering whether meteorite landing sites could be triangulated from a network of cameras, something he quickly discovered had already been done with some success. Along the way though he found the allsky camera project, and decided to build his own. This took the form of a Raspberry Pi 3 and a Pi HQ camera with a wide-angle lens mounted pointing skywards under an acrylic dome. It’s not the Hubble Space Telescope by any means, but the results are nevertheless impressive particularly in a timelapse. We wish there were less light pollution where we live so we could try it for ourselves.

Long-term readers may remember that this isn’t the first Pi sky camera we’ve brought you, for example this one is from 2020.

Continue reading “An All Sky Camera To Watch The Night Sky”

Exploring The Tech Behind Concert LED Wristbands

LED wristbands are now a common feature of large arena concerts and events, with a variety of capabilities and technical implementations. In the video after the break, Wall Street Journal does a fascinating deep dive into these wearable light shows.

The three main control technologies are IR light, RF radios, and Bluetooth. The IR-controlled ones are the simplest, and we’ve covered a teardown, a reverse engineering effort and reflash of the Pixmob IR armbands.

Finally, we get a good behind-the-scenes look at how they are controlled. Using pan-tilt IR emitters mounted on lighting towers, the operators can sweep across the audience controlling color and light levels or activating pre-programmed sequences.

The full control setup for RF wristbands, with transmitter on the left.

RF armbands have the simplest control setup, only requiring a single portable transmitter connected to a computer running the control software. It does however require some pre-planning for more complex light displays, to ensure each section of the audience is individually addressable.

The most advanced and expensive versions are handheld light sticks controlled via Bluetooth from an app on the users smartphone, and are popular at K-Pop concerts. Each device is linked to the users seat number, making them individually addressable and allowing the lighting operators to produce complex patterns, and even text, in the crowd.

While each of these devices is simple and underwhelming on its own, tens of thousands working together produce impressive effects and probably hide some hard-earned engineering experience.

Continue reading “Exploring The Tech Behind Concert LED Wristbands”

Creating A Commodore 64 Cartridge On Single-Sided Stripboard

The DIY Commodore 64 cartridge. (Credit: Linus Åkesson)

When you want to write software for a system like the Commodore 64, the obvious and safe choice is to create an image that can be used with a tape or floppy drive emulator. Yet these come with the obvious disadvantage of loading time and manual steps, much like with the original hardware. Unfortunately, if you crave that instant-on experience that cartridges offer – courtesy of them being plugged directly into the system’s CPU bus – you better get an EE diploma to figure it all out. Or maybe not, as [Linus Åkesson] found out when he created a custom cartridge to boot his Commodordian project from.

For the core of the cartridge a bit of stripboard was sufficient to interface with the C64’s cartridge slot. Despite being single-sided, all the required signals were on one side of the slot. These include the EXROM line that informs the system that a cartridge is present, the ROML line that informs the cartridge when the system is trying to read from it, and of course the data bus. After this the interaction gets somewhat interesting, due to the use of the single-sided stripboard, as the address bus and other signals are on the non-connected side.

Working around this was the biggest challenge, but by creatively using the ROML and DotClk lines and by disabling the display output, the ATmega88 and 74HC541-based cartridge a working solution was created. There is still room for improvement here, naturally, but it would appear that if the goal is simply to autoload software on boot, this is definitely a workable solution. One could also splurge on double-sided stripboard, but that would strip away most of the fun of this solution.