We (well, some of us) are complete suckers for things that are both much smaller and much larger than life. And if that thing actually does what its supposed to? Squee! So naturally, we rushed to bring you news of this mini NUC rack designed by [Jeremy Weatherford].
Inspiration comes from a lot of places, often times from stuff that lives on your desk. [Jeremy] had a pile of NUCs and thought they resembled a mini rack already, so why not build them one to live in? It was the perfect excuse to learn CAD, so off [Jeremy] went. Although this is a mini rack, the parts were too big to print. Another opportunity presented itself, and [Jeremy] tried out an online service to get the acrylic cut.
Assembly may have been fiddly with super glue all over the nice black acrylic, but [Jeremy] learned an important tip: excess glue can be removed with vegetable oil. Once it was built, he decided to make it into a control system lab and even found a perfect little five-port switch to top it off. The logo plate, of course, is the icing on this cake.
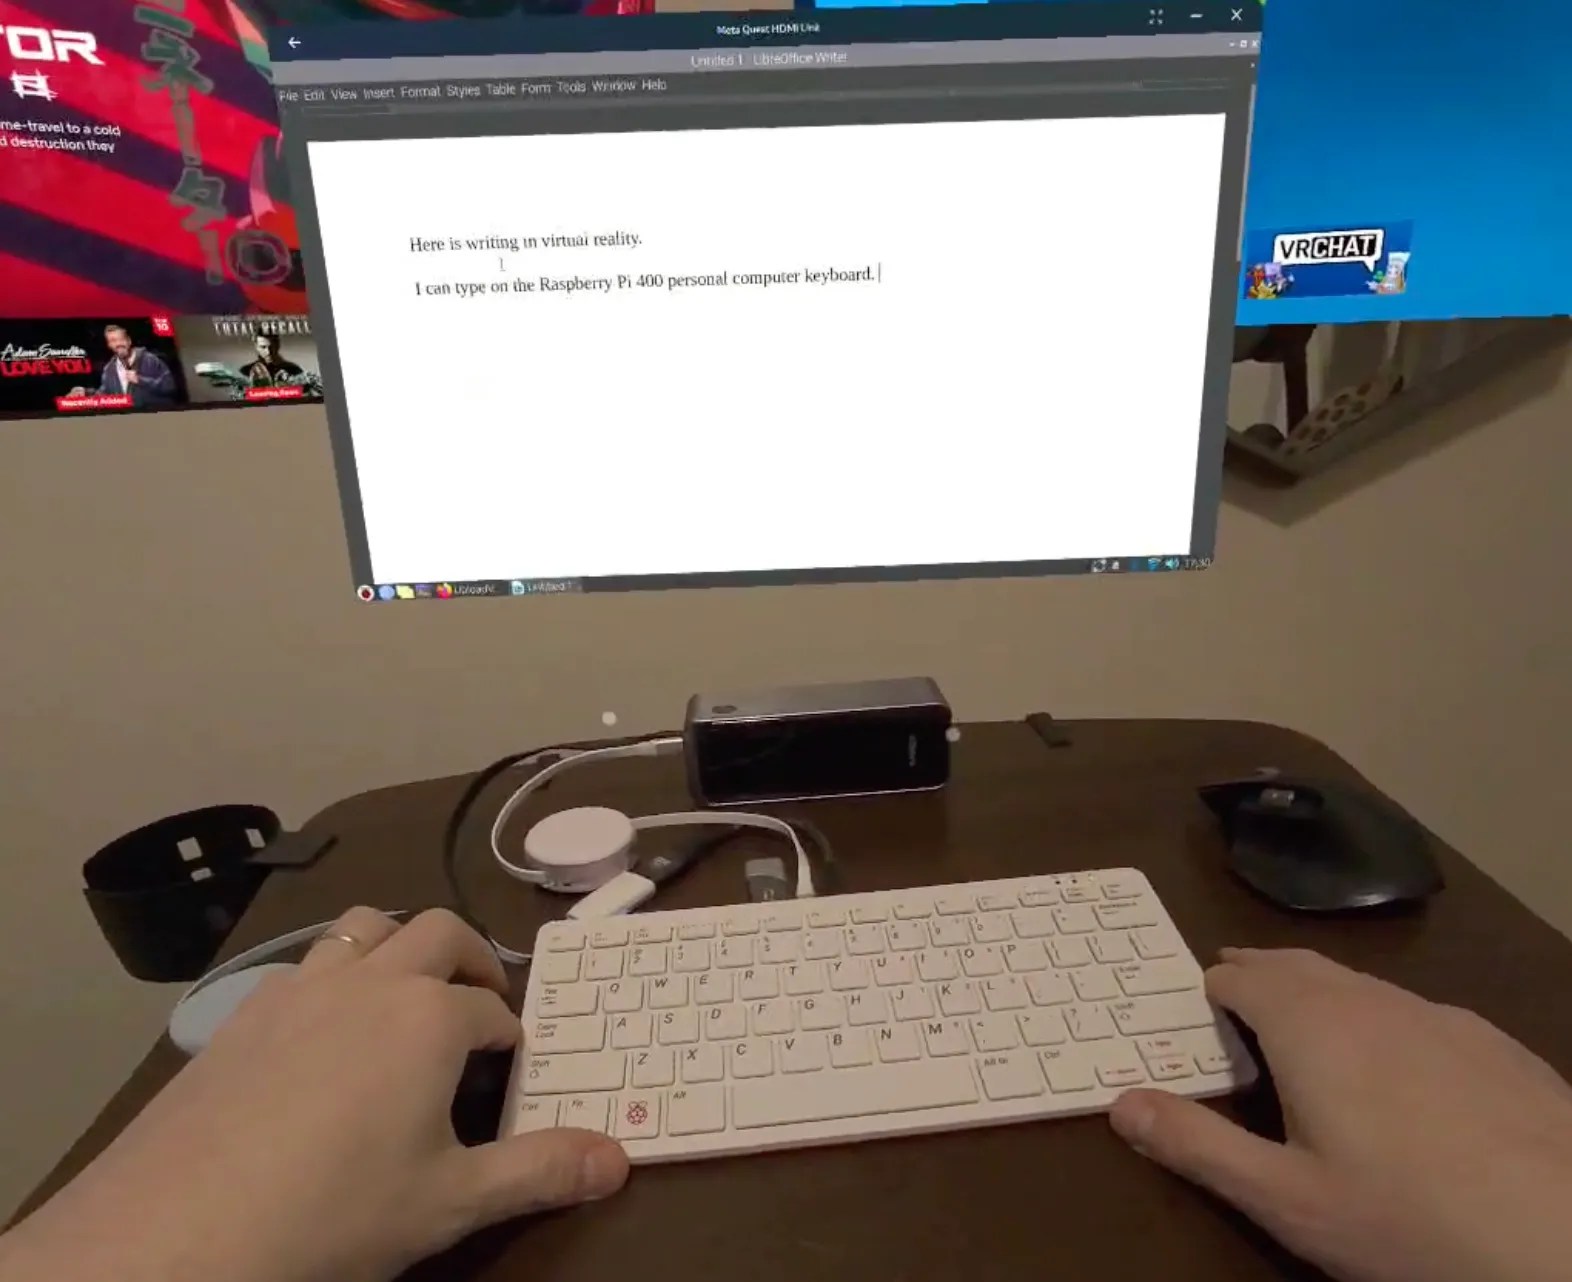
Meta’s Quest VR headset recently got the ability to accept and display video over USB-C, and it’s started some gears turning in folks’ heads. [Ian Hamilton] put together a quick concept machine consisting of a Raspberry Pi 400 that uses a VR headset as its monitor, which sure seems like the bones of a new breed of cyberdeck.
With passthrough on, one still sees the outside world.
The computer-in-a-keyboard nature of the Pi 400 means that little more than a mouse and the VR headset are needed to get a functional computing environment. Well, that and some cables and adapters.
What’s compelling about this is that the VR headset is much more than just a glorified monitor. In the VR environment, the external video source (in this case, the Raspberry Pi) is displayed in a window just like any other application. Pass-through can also be turned on, so that the headset’s external cameras display one’s surroundings as background. This means there’s no loss of environmental awareness while using the rig.
[Note: the following has been updated for clarity and after some hands-on testing] Video over USB-C is technically DisplayPort altmode, and both the video source and the USB-C cable have to support it. In [Ian]’s case, the Raspberry Pi 400 outputs HDMI and he uses a Shadowcast 2 capture card to accept HDMI on one end and outputs video over USB-C on the other.
Here’s how it works: the Quest has a single USB-C port on the side, and an app (somewhat oddly named “Meta Quest HDMI link”) running on the headset takes care of accepting video over USB and displaying it in a window within the headset. The video signal expected is UVC (or USB Video Class), which is what most USB webcams and other video devices output. (There’s another way to do video over USB-C which is technically DisplayPort altmode, and both the video source and the USB-C cable have to support it. That is not what’s being used here; the Quest does not support this format. Neither is it accepting HDMI directly.) In [Ian]’s case, the Raspberry Pi 400 outputs HDMI and he uses a Shadowcast 2 capture card to accept HDMI on one end and output UVC video on the other, which is then fed into the Quest over a USB-C cable.
As a concept it’s an interesting one for sure. Perhaps we’ll see decks of this nature in our next cyberdeck contest?
Why is it always a helium leak? It seems whenever there’s a scrubbed launch or a narrowly averted disaster, space exploration just can’t get past the problems of helium plumbing. We’ve had a bunch of helium problems lately, most famously with the leaks in Starliner’s thruster system that have prevented astronauts Butch Wilmore and Suni Williams from returning to Earth in the spacecraft, leaving them on an extended mission to the ISS. Ironically, the launch itself was troubled by a helium leak before the rocket ever left the ground. More recently, the Polaris Dawn mission, which is supposed to feature the first spacewalk by a private crew, was scrubbed by SpaceX due to a helium leak on the launch tower. And to round out the helium woes, we now have news that the Peregrine mission, which was supposed to carry the first commercial lander to the lunar surface but instead ended up burning up in the atmosphere and crashing into the Pacific, failed due to — you guessed it — a helium leak. Continue reading “Hackaday Links: September 1, 2024”→
For all the advances in digital photography, there remains a mystique for photographers and filmmakers about chemical film. Using it presents an artistic and technical challenge, and it lends an aesthetic to your work which is difficult to find in other ways. But particularly when it comes to moving pictures, how many of us have ever ventured beyond the Super 8 cartridge? If you’re not lucky enough to have a Spielberg budget, [Stand-Up Maths] is here with a video taking the viewer through the various movie film formats. He claims it’s the first video shot for YouTube in 35mm, and given that his first point is about the costs involved, we can see why.
In particular it serves as an introduction to the various film terms and aspect ratios. We all know what full frame and IMAX are, but do many of us know what they really mean in camera terms. A particularly neat demonstration comes when he has two cameras side by side with the same stock as a split screen, one 35mm and the other 16mm. The cheaper smaller framed format is good quality, but using a profession resolution chart you can see some of the differences clearly. The full film is below the break, and we’d suggest you watch it in the full 4K resolution if you are able to.
Additive manufacturing (AM) has been getting a lot of attention over the years, with its use in construction a recurring theme. Generally this brings to mind massive 3D printers that are carted to construction sites and assemble entire homes on the spot. That’s the perspective with which a recent ZDNet article by [Rajiv Rao] opens, before asking whether AM in construction is actually solving any problems. As [Rajiv] notes, the main use of such on-site AM construction is for exclusive, expensive designs, such as ICON’s House Zero which leans into the extruded concrete printing method.
Their more reasonable Wolf Ranch residential homes in Texas also use ICON’s Vulcan II printer to print walls out of concrete, with a roof, electrical wiring, plumbing, etc. installed afterwards. Prices for these Wolf Ranch 3 to 4 bedroom houses range from about $450,000 to $600,000, and ICON has been contracted by NASA to work a way to 3D print structures on the Moon out of regolith.
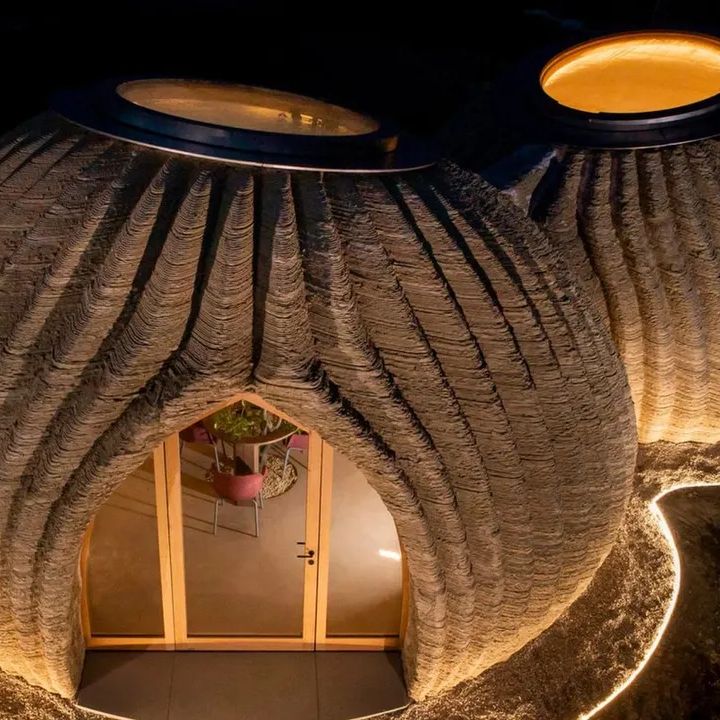
3D printed home by WASP out of clay. (Credit: WASP)
Naturally, none of these prices are even remotely in the range of the first-home buyers, or the many economically disadvantaged who make up a sizable part of the population in the US and many other nations in the Americas, Africa, etc. To make AM in construction economically viable, it would seem that going more flatpack and on-site assembly is the way to go, using the age-old pre-fabrication (prefab) method of constructions.
This is the concept behind the University of Maine’s BioHome3D, which mainly uses PLA, wood fiber and similar materials to create modules that contain insulation in the form of wood fiber and cellulose. These modules are 3D printed in a factory, after which they’re carted off to the construction site for assembly, pretty much like any traditional prefab home, just with the AM step and use of PLA rather than traditional methods.
Prefab is a great way to speed up construction and already commonly used in the industry, as modules can have windows, doors, insulation, electrical wiring, plumbing, etc. all installed in the factory, with on-site work limited to just final assembly and connecting the loose bits. The main question thus seems to be whether AM in prefab provides a significant benefit, such as in less material wasted by working from (discarded) wood pulp and kin.
While in the article [Rajiv] keeps gravitating towards the need to use less concrete (because of the climate) and make homes more affordable through 3D printing, AM is not necessarily the panacea some make it out to be, due to the fact that houses are complex structures that have to do much more than provide a floor, walls and a roof. If adding a floor (or two) on top of the ground floor, additional requirements come into play, before even considering aspects like repairability which is rarely considered in the context of AM construction.
If you follow the world of clean energy, you will probably have read all about the so-called hydrogen future and the hydrogen economy. The gas can easily be made from water by electrolysis from green solar electricity, contains a lot of stored energy which is clean to recover, and seems like the solution to many of our green energy woes. Sadly the reality doesn’t quite match up as hydrogen is difficult to store and transport, so thus far our hydrogen cars haven’t quite arrived. That hasn’t stopped researchers looking at hydrogen solutions though, and a team from ETH Zurich might just have found a solution to storing hydrogen. They’re using it to reduce iron oxide to iron, which can easily release the hydrogen by oxidation with water.
Their reactor is simplicity itself, a large stainless steel tank filled with powdered iron ore. Pump hydrogen into it and the iron oxide in the ore becomes water and iron which forms the storage medium, and retrieve the hydrogen later by piping steam through the mixture. Hydrogen generated in the summer using solar power can then be released in the winter months. Of course it’s not perfectly efficient, and a significant quantity of energy is lost in heat, but if the heat is recovered and used elsewhere that effect can be mitigated. The hope is that their university might be benefiting from a pilot plant in the coming years, and then perhaps elsewhere those hydrogen grids and cars might become a reality. We can hope.
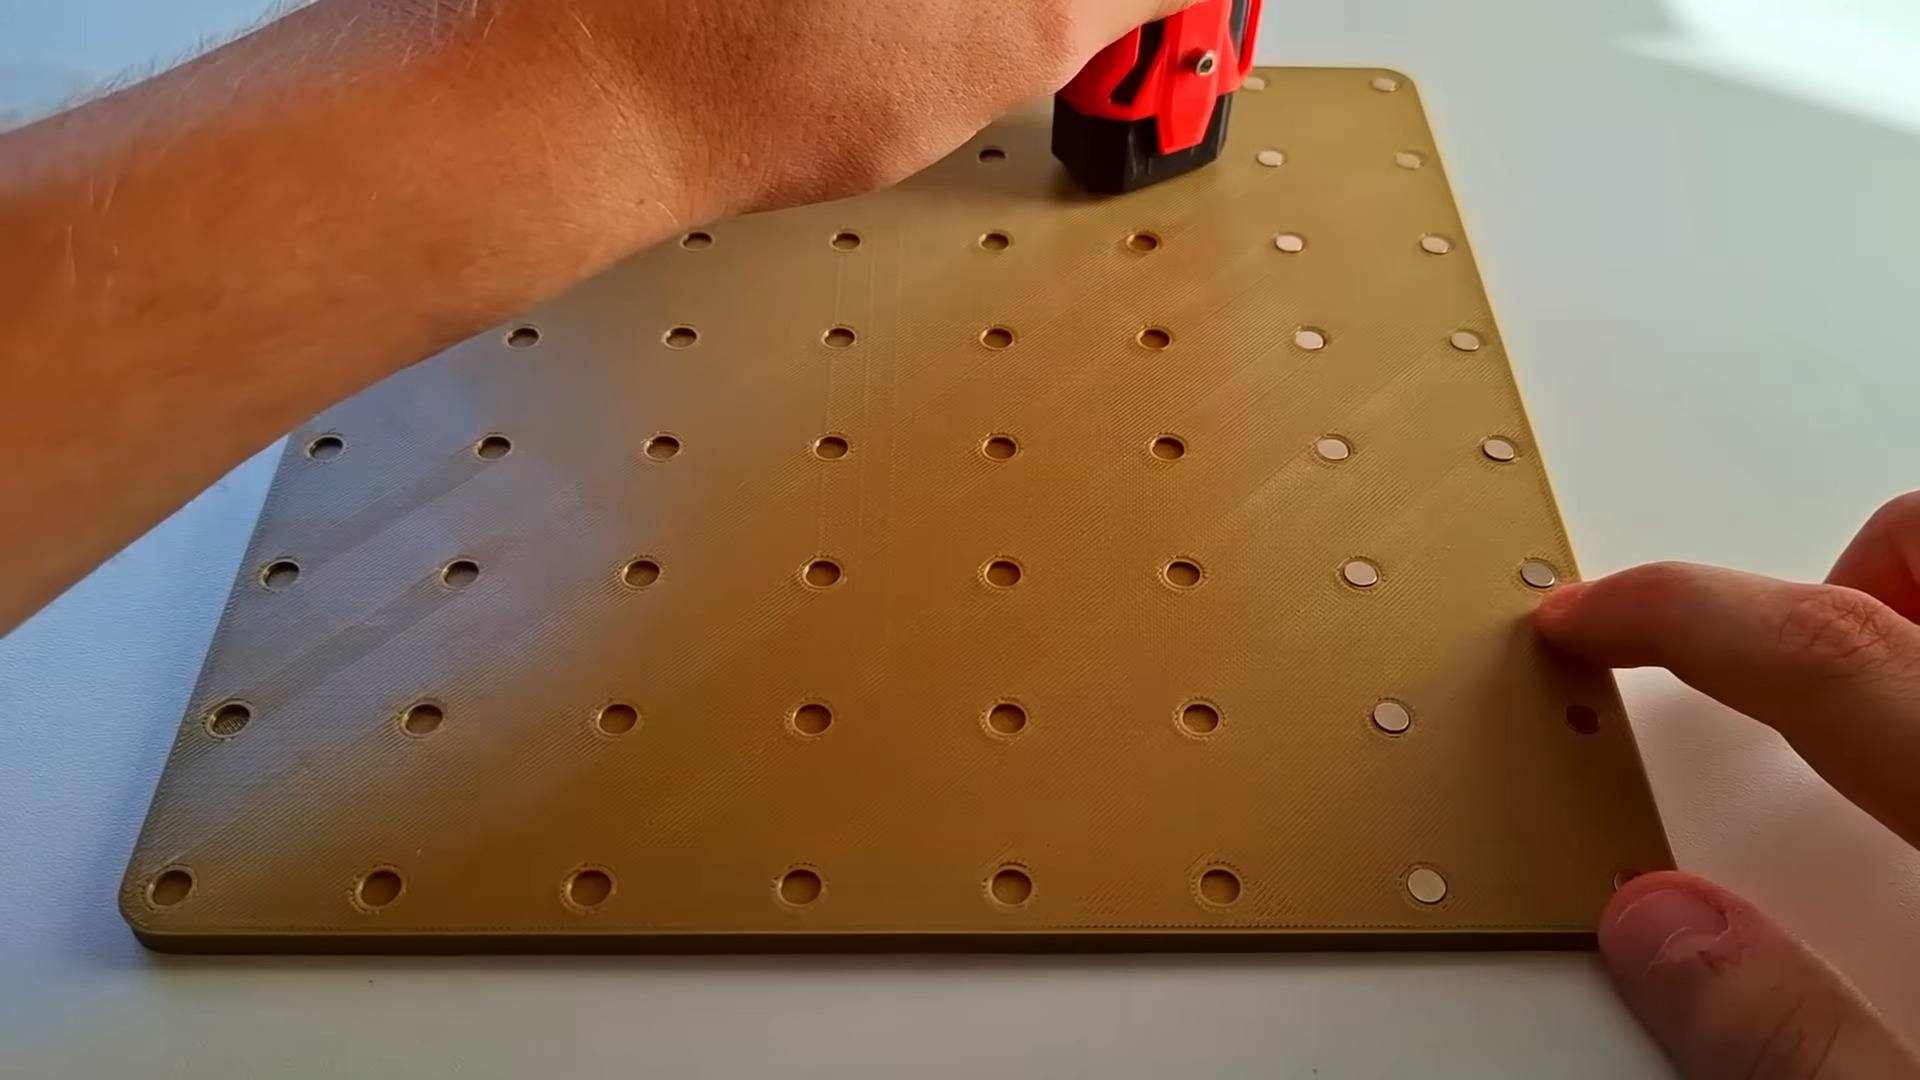
Magnets are pretty nice little tools. [EmGi] has used them in many a cool 3D printed build with great success. But getting them where you want can be really tricky. More often than not, you end up with glue all over your fingers, or the magnets fly out of place, or they stick together when you don’t want them to.
Well, [EmGi] created a mighty fine magnet insertion tool that you can print for yourself. It’s finger-operated and uses a single embedded magnet to place magnets wherever they’re needed.
This thing went through several designs before [EmGi] ever printed it out. Originally, there were two magnets, but there was an issue where if the tool wasn’t lifted off perfectly, it would send the magnet flying.
But now it works great, and [EmGi] even deposited an array of 64 magnets without using glue to test it out before printing a second one to handle the other polarity. Check out the build/demo video after the break.