
As you might expect, the University of Puerto Rico at Arecibo has a fascination with radio signals from space. While doing research into the legendary “Wow! Signal” detected back in 1977, they realized that the burst was so strong that a small DIY radio telescope would be able to pick it up using modern software-defined radio (SDR) technology.
This realization gave birth to the Wow@Home project, an effort to document both the hardware and software necessary to pick up a Wow! class signal from your own backyard. The University reasons that if they can get a bunch of volunteers to build and operate these radio telescopes, the resulting data could help identify the source of the Wow! Signal — which they believe could be the result of some rare astrophysical event and not the product of Little Green Men.
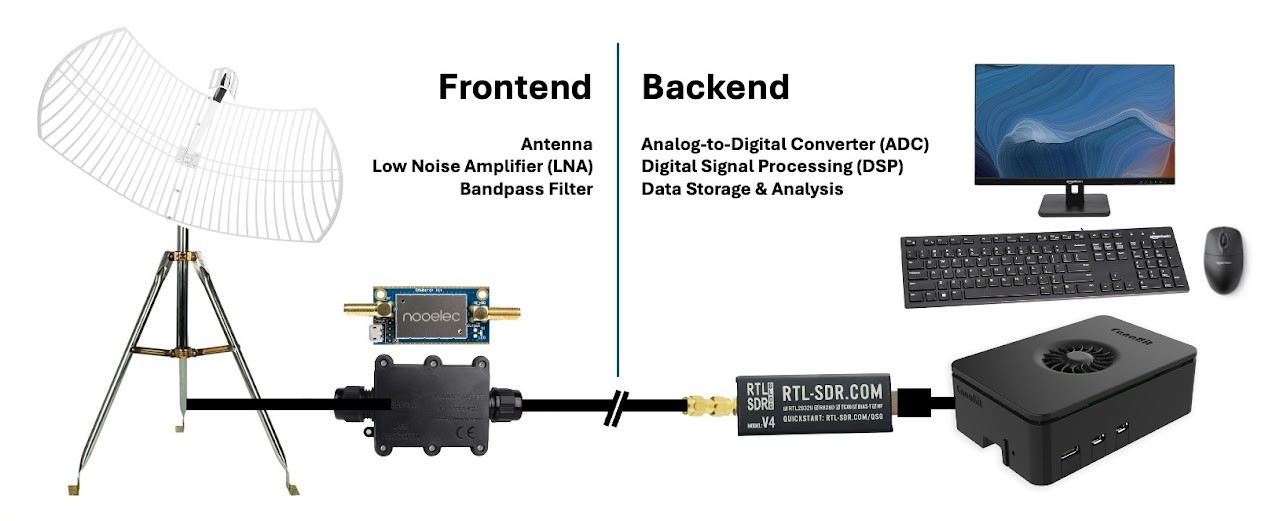
Ultimately, this isn’t much different from many of the SDR-based homebrew radio telescopes we’ve covered over the years — get a dish, hook your RTL-SDR up to it, add in the appropriate filters and amplifiers, and point it to the sky. Technically, you’re now a radio astronomer. Congratulations. In this case, you don’t even have to figure out how to motorize your dish, as they recommend just pointing the antenna at a fixed position and let the rotation of the Earth to the work — a similar trick to how the legendary Arecibo Observatory itself worked.
The tricky part is collecting and analyzing what’s coming out of the receiver, and that’s where the team at Arecibo hope to make the most headway with their Wow@Home software. It also sounds like that’s where the work still needs to be done. The goal is to have a finished product in Python that can be deployed on the Raspberry Pi, which as an added bonus will “generate a live preview of the data in the style of the original Ohio State SETI project printouts.” Sounds cool to us.
If you’re interested in lending a hand, the team says they’re open to contributions from the community — specifically from those with experience RFI shielding, software GUIs, and general software development. We love seeing citizen science, so hopefully this project finds the assistance and the community it needs to flourish.
Thanks to [Mark Stevens] for the tip.


