Many of us develop things for one of two purposes: to hack something cool, or to sell something cool. When hacking something cool, your target market is yourself, and you already know you’ve made the sale. If your goal is to sell the thing you are making, then a lot more thought and effort is required. You could develop the coolest product in the world, but if your target market is too small, your price is too high, your lead time is too long, or any of a dozen other factors is not quite right, you’ll be spending a lot of time and effort on what will amount to a huge disappointment. The Hackaday Prize Best Product has many great examples which let us study some of these success factors, so let’s take a look. Continue reading “Will It Sell?”→
Museum exhibits are difficult to make, and they’re always breaking down; especially the interactive ones. This is a combination of budget, building a one-off, and the incredibly harsh abuse they take from children.
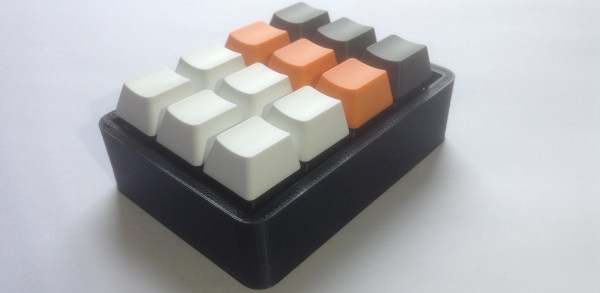
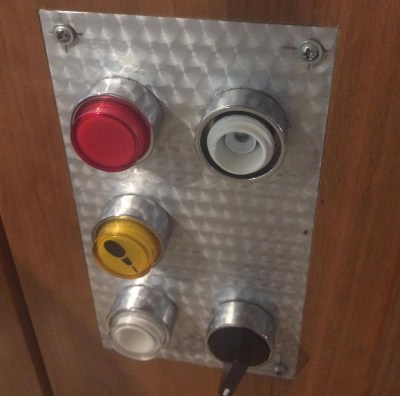
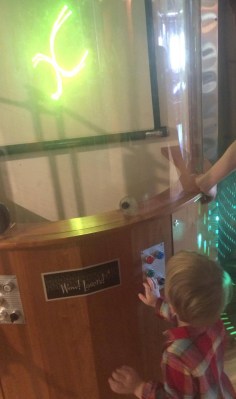
My first exhibit is an interactive laser show that turns waveforms from music into laser patterns, and different types of music have very different patterns. I knew from talking to the museum staff that industrial buttons were a necessity, but it turns out that industrial buttons are made under the assumption that tiny creatures won’t be constantly mashing, twisting, and (ew ew ew) licking the buttons. After a while, the buttons (and poor knob) were trashed.
The button face has been removed, and the knob is spinning freely.
Buttons at toddler level are in a vulnerable position.
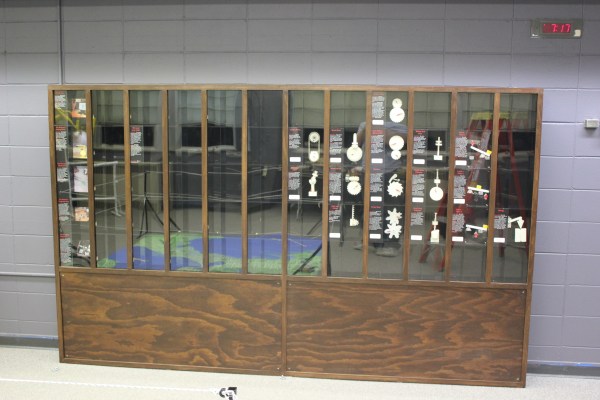
The second exhibit is also interactive, but in this case it’s just a simple button that turns on a thing for a while, then shuts it off. You can read more about the Periodic Table of Motion on the project page. Here I thought; let’s use capacitive touch, put the sensor behind two layers of acrylic for protection, and then there won’t be any moving parts to break. I built a bunch of units, tested it for weeks, then installed it. Instant failure despite my diligence.
Something is different about the installation from my test environment. It might be the second layer of acrylic contributing. Maybe it’s the power supply and a strange ground issue. Maybe the room’s fluorescent lights are creating an electromagnetic field that is interrupting the sensor, or the carpet is causing static buildup that is somehow causing the midichlorians to reverse polarity and discharge through the base plate of prefabulated aluminite. In some of the cells, the button doesn’t work. In other cells it is extremely sensitive. In one column of the table (columns share a common piece of acrylic among 5 cells), a single touch will trigger all 5.
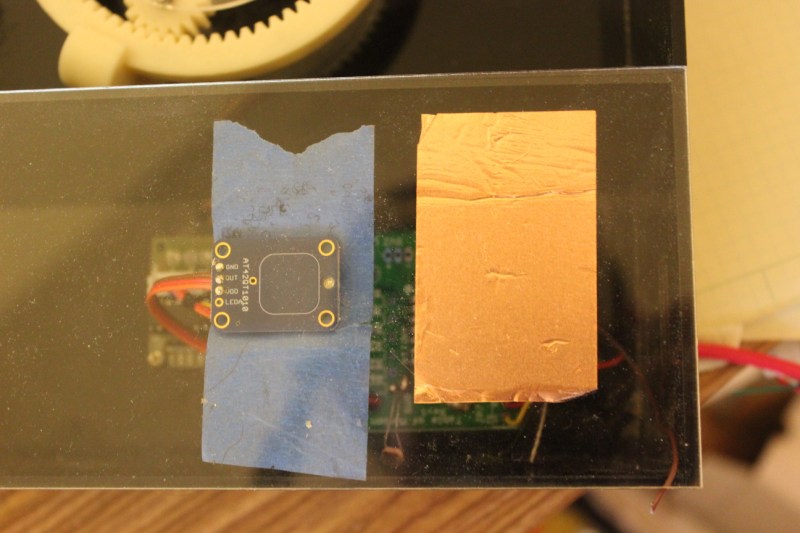
The circuit is an ATtiny with a 2.2M resistor between two pins, one of which connects via a short wire to a soldered connection to a piece of copper tape on the underside of an acrylic piece. The ATtiny is using the capsense library, which has features for automatic recalibration. Because of the way it is installed, I can’t reprogram them to adjust their sensitivity while inside the enclosure, so tweaking them post-install is not an option. I thought I could isolate the problem and use an existing capacitive touch sensor breakout of the AT42QT1010 hooked up to just power, but it had the exact same issue, meaning it’s either the power supply, the enclosure, or the room.
Side-by-side tests of copper tape+Arduino and AT42QT1010 had similar problems.
There are three paths I can go down now:
Find the problem and solve it
Switch to a photoresistor
Petition Hackaday for a better solution
Finding the problem and solving it will be a long and difficult path, especially since the museum environment is somehow and inexplicably different from the test environment. The photoresistor option has promise; when the user puts their hand over the paper button the light level changes. Some early testing indicates that it is easy to detect instantaneous change, and a trailing average and adjusting threshold make it robust enough for changing lighting conditions throughout the day. Further, it’s a simple change to the code, and the existing circuit board will accommodate the adjustment.
As for the third option…
What have you done for child-compatible touch interfaces that are robust enough to handle uncertain environments and harsh abuse? What buttons, knobs, and other interactive elements have you used?
Hackaday is all about the neat hacks and the repurposing of old components into new projects, but many people then try to take those projects and turn them into businesses. We’ve seen lots of people offer their stuff as kits and sell them on Tindie, with the rare few going on to develop a consumer electronic product at scale.
The Hackaday Prize 2017 Best Product highlights this journey. “Scale” itself is a vague term, but essentially it means to be able to produce enough to meet market demand. We hope that market demand is roughly 7 billion units, purchasing yearly, but the reality is that it is somewhere between 1 and a few hundred thousand, with very big differences in manufacturing at each order of magnitude. So how do you start with a proof of concept and design your product from the very beginning to be optimized to scale to meet whatever demand you can handle?
[Paul] has put together an insanely small yet powerful tracker for monitoring all the things. The USB TinyTracker is a device that packages a 48MHz processor, 2G modem, GPS receiver, 9DOF motion sensor, barometer, microphone, and micro-SD slot for data storage. He managed to get it all to fit into a USB thumb drive enclosure, meaning that you can program it however you want in the Arduino IDE, then plug it into any USB port and let it run. This enables things like remote monitoring, asset tracking, and all kinds of spy-like activity.
One of the most unusual aspects of his project, though, is this line: “Everything came together very nicely and the height of parts and PCBs is exactly as I planned.” [Paul] had picked out an enclosure that was only supposed to fit a single PCB, but with some careful calculations, and picky component selection, he managed to fit everything onto two 2-layer boards that snap together with a connector and fit inside the enclosure.
We’ve followed [Paul’s] progress on this project with an earlier iteration of his GSM GPS Tracker, which used a Teensy and fit snugly into a handlebar, but this one is much more versatile.
3D printing is a technique we’ve all been using for ages at home, or via Shapeways, but if you are designing a product, 3D printing will only get you so far. It’s crude, slow, expensive, and has lots of limitations. While it’s great for the prototyping stage, ultimately products manufactured in volume will be manufactured using another method, and most likely it will be injection molding. Knowing how to design a part for injection molding means you can start prototyping with 3D printing, confident that you’ll be able to move to a mold without major changes to the design.
The 2017 Hackaday Prize includes a $30,000 prize for Best Product as we seek products that not only show a great idea, but are designed for manufacturing and have thought through what it takes to get them into the hands of the users. Some of the entries seem to be keenly aware of the challenges associated with moving from prototyping to production. Here are some examples of best practices when prototyping with future injection molding in mind.
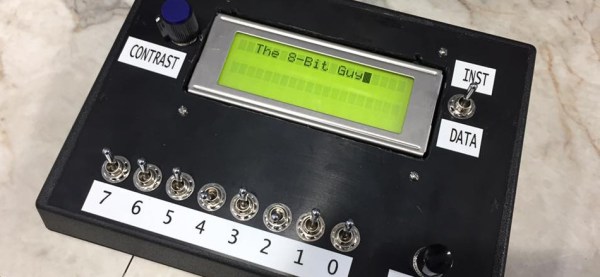
The HD44780 is one of the first chips we learned about as a kid, and chances are good you’ve used one in your project at some point, and almost certain that you’ve interacted with one in your life. The character LCD is ubiquitous, easy to interface, and very robust. They come in sizes from 8 x 1 to 20 x 4 and even larger, but they almost all have the same pinout, and there are libraries in many embedded environments for interacting with them. [The 8-Bit Guy] decided to interface with one using just switches and a button, (YouTube, embedded) with the intent of illustrating exactly how to use them, and how easy they are.
You’re a contractor and people are paying you to work in your pajamas. It’s a life of luxury, but when tax time comes, you are in a world of hurt and you wonder why you even do it. Taxes are tricky, but there are some tools you can use to make it less painful on your pocketbook. With planning and diligence, you can significantly increase the amount of money that stays in your bank account. Continue reading “Life On Contract: Hacking Your Taxes”→