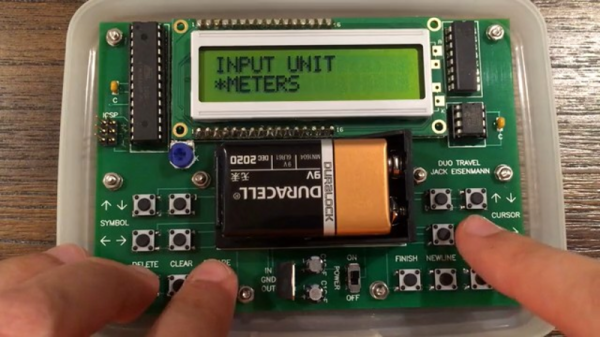
If there was one downside to 8-bit computers like the Commodore 64, it’s that they weren’t exactly portable. Even ignoring their physical size, the power requirements would likely have required a prohibitively large power bank of some sort to lug around as well. The problem of portability has been solved since the late ’70s, but if you still want that 8-bit goodness in a more modern package you’ll have to look at something like retrocomputing madman [Jack Eisenmann]’s DUO Travel computer.
The computer is based around the ubiquitous ATmega328 which should make the ease at which it is programmable apparent. Even so, its 14-button keypad makes it programmable even without another computer. While it has slightly less memory than a standard C-64, it’s still enough for most tasks. And, since its powered by a 9-volt battery it doesn’t require any external power sources either.
The most impressive part of the build, however, is the custom programming language specifically tailored for this platform. After all, a 14-button keypad wouldn’t be a great choice if you had to program in Perl or C all the time. There is some example code on the project page for anyone interested in this specific implementation. While it’s not the most minimal computer [Jack] has ever built, it’s certain to be much more practical.
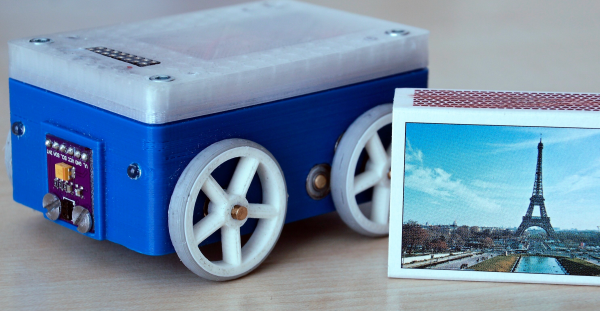
[Stefan]’s Mini WiFi/BLE 4WD robot platform (seen next to a matchbox above) packs an impressive capability into a tiny rover. It’s based on a SparkFun ESP32 Thing, a very compact way to add wireless control to your project. Compare it to some giant old UNO with a WiFi shield, these boards are small but powerful, as well as an easy adoption for Arduino fans.
[Stefan] beefed up the robot with a BNO055 module to determine orientation, an APDS-9930 proximity sensor, as well as four CNY70 IR proximity sensors on the bottom, used for line-following. A pair of 6 V motors move the robot, with a DC-DC step up converter boosting the LiPo’s 3.7 V. It’s impressive how many components [Stefan] crammed inside the shell; they’re all packed in there snugly.
The concept behind the robot is that it’s a generic platform that could be customized as needed, and [Stefan] has versions with a LEGO dart gun as well as a camera. The robot’s code resides on GitHub and the custom 3D-printed chassis is up on Thingiverse.
If you like ESP32 projects you should be sure to check out the Monster Board and the Hamster Tracker we posted recently.
Instructables user [lingib] made a clever and inexpensive pen arm plotter that uses plastic rulers for arms. An inspiring sight for anyone without a bunch of robot parts lying around,
The electronics are straightforward, with an Arduino UNO and a pair of Easy Drivers to control NEMA17 stepper motors connected to robot wheels, which serve as hubs for the rulers. At the end of the arms, an SG90 micro servo raises and lowers the pen as commanded, shoving the whole pen assembly off the paper with its horn—an elegant solution to an age-old drawbot problem. He even wrote wrote a custom Processing program that allows him to control the plotter from his desktop
[lingib]’s experimented with different kinds of drawing machines, including a drum plotter (video after the break), a V-plotter, as well as a rolling drawbot.
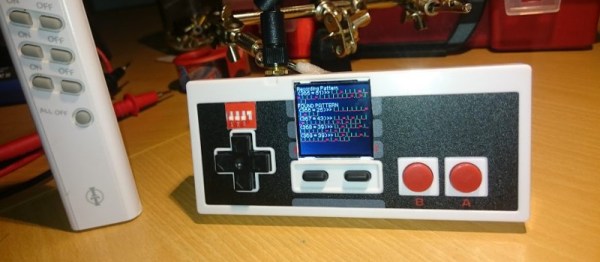
If you wanted to name a few things that hackers love, you couldn’t go wrong by listing off vintage console controllers, the ESP system-on-chip platform, and pocket tools for signal capture and analysis. Combine all of these, and you get the ESP32Thang.
At its heart, the ESP32Thang is based around a simple concept – take an ESP32, wire up a bunch of interesting sensors and modules, add an LCD, and cram it all in a NES controller which helpfully provides some buttons for input. [Mighty Breadboard] shows off the device’s basic functionality by using an RFM69HW module to allow the recording and replay of simple OOK signals on the 433 MHz band. This is a band typically used by all sorts of unlicenced radio gear – think home IoT devices, wireless doorbells and the like. If you want to debug these systems when you’re out and about, this is the tool for you.
This is a fairly straightforward build at the lower end of complexity, but it gets the job done with style. The next natural step up is a Raspberry Pi with a full software defined radio attached, built into a Nintendo DS. If you build one, be sure to let us know. This project might serve as some inspiration.
With the wide availability of SPI and I2C modules these days, combined with the ease of programming provided by the Arduino environment, this is a project that just about any hacker could tackle after passing the blinking LED stage. The fact that integrating such hardware is so simple these days is truly a testament to the fact that we are standing on the shoulders of giants.
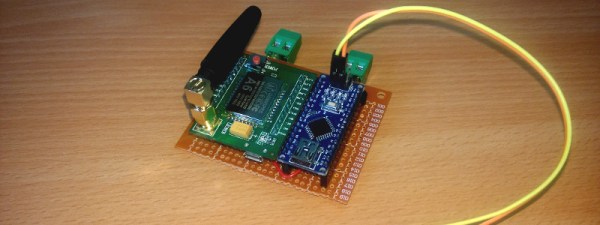
Electric gates can be an excellent labor-saving device, allowing one to remain in a vehicle while the gate opens and closes by remote activation. However, it can become somewhat of a hassle juggling the various remotes and keyfobs required, so [bredman] devised an alternative solution – controlling an electric gate over the mobile network.
20 years ago, this might have been achieved by wiring a series of relays up to the ringer of a carphone. These days, it’s a little more sophisticated – a GSM/GPRS module is connected to an Arduino Nano. When an incoming call is detected, the gate is opened. After a 3 minute wait, the gate is once again closed.
[bredman] suffered some setbacks during the project, due to the vagaries of working with serial on the Arduino Nano and the reset line on the A6 GSM module. However, overall, the gate was a simple device to interface with, as like many such appliances, it has well-labelled and documented pins for sending the gate open and close signals.
[bredman] was careful to design the system to avoid unwanted operation. The system is designed to always automatically close the gate, so no matter how many times the controller is called, the gate will always end up in a closed state. Special attention was also paid to making sure the controller could gracefully handle losing connection to the mobile network. It’s choices like these that can make a project much more satisfying to use – a gate system that constantly requires attention and rebooting will likely not last long with its users.
Overall, it’s a great project that shows how accessible such projects are – with some carefully chosen modules and mastery of serial communications, it’s a cinch to put together a project to connect almost anything to the Internet or mobile networks these days. For a different take, check out this garage door opener that logs to Google Drive.
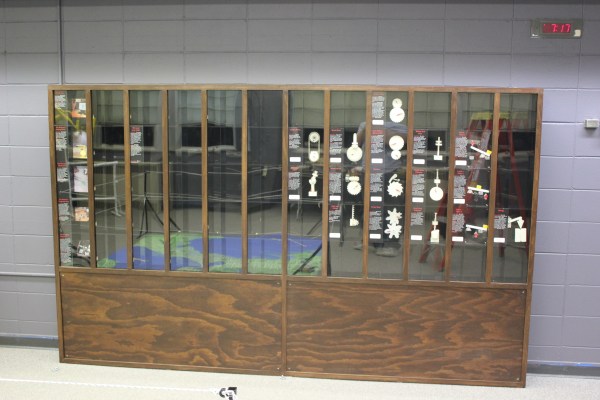
Museum exhibits are difficult to make, and they’re always breaking down; especially the interactive ones. This is a combination of budget, building a one-off, and the incredibly harsh abuse they take from children.
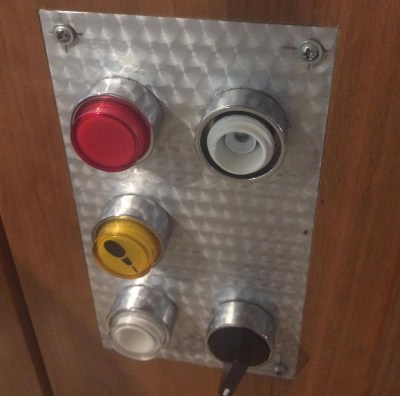
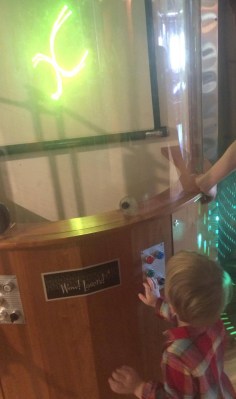
My first exhibit is an interactive laser show that turns waveforms from music into laser patterns, and different types of music have very different patterns. I knew from talking to the museum staff that industrial buttons were a necessity, but it turns out that industrial buttons are made under the assumption that tiny creatures won’t be constantly mashing, twisting, and (ew ew ew) licking the buttons. After a while, the buttons (and poor knob) were trashed.
The button face has been removed, and the knob is spinning freely.
Buttons at toddler level are in a vulnerable position.
The second exhibit is also interactive, but in this case it’s just a simple button that turns on a thing for a while, then shuts it off. You can read more about the Periodic Table of Motion on the project page. Here I thought; let’s use capacitive touch, put the sensor behind two layers of acrylic for protection, and then there won’t be any moving parts to break. I built a bunch of units, tested it for weeks, then installed it. Instant failure despite my diligence.
Something is different about the installation from my test environment. It might be the second layer of acrylic contributing. Maybe it’s the power supply and a strange ground issue. Maybe the room’s fluorescent lights are creating an electromagnetic field that is interrupting the sensor, or the carpet is causing static buildup that is somehow causing the midichlorians to reverse polarity and discharge through the base plate of prefabulated aluminite. In some of the cells, the button doesn’t work. In other cells it is extremely sensitive. In one column of the table (columns share a common piece of acrylic among 5 cells), a single touch will trigger all 5.
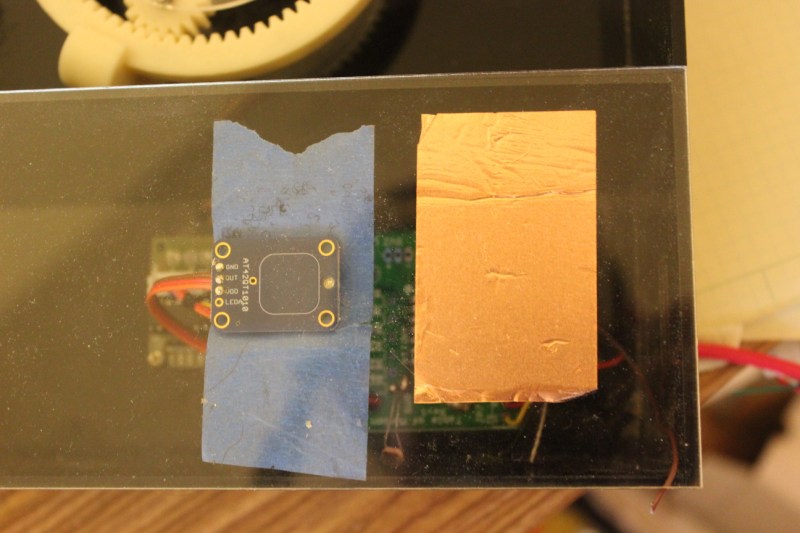
The circuit is an ATtiny with a 2.2M resistor between two pins, one of which connects via a short wire to a soldered connection to a piece of copper tape on the underside of an acrylic piece. The ATtiny is using the capsense library, which has features for automatic recalibration. Because of the way it is installed, I can’t reprogram them to adjust their sensitivity while inside the enclosure, so tweaking them post-install is not an option. I thought I could isolate the problem and use an existing capacitive touch sensor breakout of the AT42QT1010 hooked up to just power, but it had the exact same issue, meaning it’s either the power supply, the enclosure, or the room.
Side-by-side tests of copper tape+Arduino and AT42QT1010 had similar problems.
There are three paths I can go down now:
Find the problem and solve it
Switch to a photoresistor
Petition Hackaday for a better solution
Finding the problem and solving it will be a long and difficult path, especially since the museum environment is somehow and inexplicably different from the test environment. The photoresistor option has promise; when the user puts their hand over the paper button the light level changes. Some early testing indicates that it is easy to detect instantaneous change, and a trailing average and adjusting threshold make it robust enough for changing lighting conditions throughout the day. Further, it’s a simple change to the code, and the existing circuit board will accommodate the adjustment.
As for the third option…
What have you done for child-compatible touch interfaces that are robust enough to handle uncertain environments and harsh abuse? What buttons, knobs, and other interactive elements have you used?
It’s always an exciting moment when an event schedule is released, and since events in our community don’t come much larger than this August’s SHA Camp in the Netherlands, you can imagine that the announcement of their schedule of lectures of talks is something of an event in itself. The event runs over five days, and you can browse the schedule itself to make your picks.
The SHA team have made their own picks, but with so many stages and speakers they are only a tiny selection. Running a Hackaday eye over the schedule, here are the ones that caught our eye.
[dennisdebel]’s lecture, from glass fiber to fiber glass noodles caught our eye. Using mung bean vermicelli, or ‘glass noodles’, for data transmission, is not something you hear about every day.
If you are a regular at European hardware hacker camps, you may have encountered the chiptune extravaganza performances of [Gasman], otherwise known as [Matt Westcott]. Hie lecture, Zero to chiptune in one hour, will create, from scratch, a chiptune cover version of a pop song chosen by the audience, all on a Sinclair ZX Spectrum.
The Hackeboy handheld game console is a project from a small Hamburg-based indie game label.[Axel Theilmann] describes the process of building the handheld console they always dreamed of.
One of the final lectures of the event comes from [Niek Blankers], and will describe in detail the SHA2017 badge. How it was designed, and showcasing what some of the attendees will by then have managed to do with it.
Finally, if you want to see a Hackaday scribe talking about fun and games with little plastic bags of parts, you could do worse than seeking out From Project To Kit, all you will need to know about turning your personal electronic projects into a kit business.
Watch this space for more from SHA Camp as we get it. Meanwhile you can take a look at our coverage of the SHA2017 badge launch.