Putting A Mac Plus On The Internet

plus

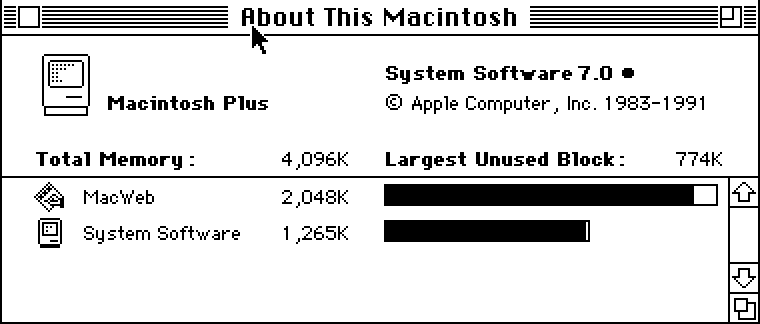
[Jeff] has a Mac Plus, an 8 MHz computer with 4 MB of RAM and a 512×342 1-bit screen. It was his first ‘real’ computer, and like those guys that take Model A Fords out for a Sunday drive, [Jeff] decided to put this old box on the Internet.

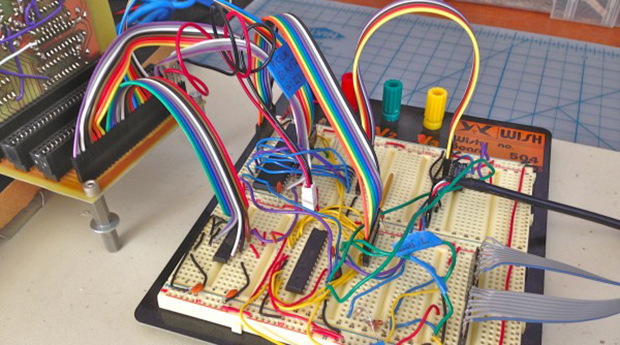
A Plus has a few options to get on the Internet. The best, but most expensive, is a SCSI to Ethernet computer. For a somewhat slower connections, a PowerPC mac can be used as an Ethernet to Localtalk (the Macintosh serial port networking protocol) bridge. Lacking either of those pieces of hardware, [Jeff] decided to use a Raspberry Pi. The Pi does the heavy lifting, and a handful of serial adapters and voltage converters turns the Pi into something that can talk to the Plus’ serial port.

Even with the MacTCP stack and the MacWeb browser, there are still some things this ancient computer couldn’t do. HTTPS hadn’t been invented until 1994, cookies are just a pain, and CSS is right out. This means modern websites (except, of course, the Hackaday retro edition) simply won’t render properly. To fix this issue, [Jeff]’s friend [Tyler] came up with a Python script using Requests, Beautiful Soup, and Flask to strip out all the Web 2.0 cruft, handle the cookies, and to get rid of SSL.

The end result is a Mac Plus with 4 Megabytes of RAM on the Internet, able to pull up Wikipedia and Hacker News. It isn’t fast by any means – in the video below, it takes about five minutes to pull up the front page of Hacker News – but it is a 27-year-old computer on the Internet.

Continue reading “Putting A Mac Plus On The Internet”

Fubarino Contest: VFD Clock

hackad

The entries for our Fubarino contest are slowly yet surely coming in. [James] already had an awesome VFD clock under his belt, and figured adding a Hackaday easter egg to his project would be simple enough.

[James’] clock is based on the TI Stellaris LaunchPad with six beautiful seven-segment VFD display tubes. The clock’s time is controlled by a DS1307 RTC chip, and a small switch-mode power supply controlled by the Stellaris boosts the power from 5 Volts to 50 Volts for the tubes. The tubes are controlled with a Max6921 VFD driver chip.

The easter egg for this project – displaying the Hackaday URL – is only shown when you power up the clock when the seconds display shows 37. That’s extremely subtle for an easter egg and just the way we like it.

All the code for [James]’ project is up on GitHubĀ along with the designs for the tube clock’s enclosure. Really an awesome project, and a great way for [James] to earn himself a Fubarino.

What are you waiting for? We still haven’t passed twenty entries which means your chances of winning are pretty good!

Continue reading “Fubarino Contest: VFD Clock”

Finally, An Animated GIF Light Painter

led_strips_dragon-flap

Light painting, or taking a picture of a moving RGB LED strip with a very long exposure, is the application du jourĀ of Arduinos, photography, and bright, glowey, colorful things. Hackaday alumnusĀ [Phil Burgess] has come up with the best tutorial for light painting we’ve seen. It’s such a good setup, it can be used to create animated .gifs using multiple camera exposures.

The build uses an Arduino Uno, SD card shield, and Adafruit’s new NeoPixel strip with 144 RGB LEDs per meter. Despite a potentially huge mess of wires for this project, [Phil] kept everything very, very neat. He’s using an Altoids case for the ‘duino, an 8 AA-cell battery holder and 3A UBEC Ā for the power, and a wooden frame made out of pine trim.

Part of the art of light painting involves a lot of luck, exponentially so if you’re trying to make a light painted animated .gif. To solve this problem, [Phil] came up with a very clever solution: using a rotary encoder attached to a bicycle. With the rotary encoder pressed up against the wheel of a bike, [Phil] can get a very precise measurement of where the light strip is along one dimension, to ensure the right pixels are lit up at the right time and in the right place.

It’s a wonderful build, and if Santa brings you some gift certificates to your favorite electronics retailer, we couldn’t think of a better way to bring animated .gifs into the real world.

Turning A Building Into A Rubik’s Cube

cube

[Javier] must have an awesome academic adviser. For his master’s thesis, he turned a building into a Rubik’s cube.

The Ars Electronic Center in Linz, Austria, is a building with a whole bunch of colored, programmable lights on the facade. [Javier] thought this would make for an excellent Rubik’s cube, and set to work convincing his thesis advisers this idea was possible, and building the hardware and software.

Since only two sides of the building are visible at any one time, [Javier] needed to build a controller for this project. The solution was to build a normal Rubik’s cube and stuff a microcontroller and a FreeIMUĀ in the center. This setup senses the twists and turns of the Rubik’s cube, as well as it’s position in space, effectively creating an interface between the hand and a giant light-covered building.

The Rubik’s cube interface connects to a computer running an app written in openFrameworks.Ā By sensing the direction the cube is oriented, it can automatically display the two sides of the cube facing the user.

There’s a great video showing just how this building-sized Rubik’s cube works. You can check that out below.

Continue reading “Turning A Building Into A Rubik’s Cube”

The 3D Printed Ukulele

uke

The creator of everyone’s favorite slic3r – [Alessandro Ranellucci] – has been hard at work putting his 3D modeling skills to the test. He’s created a ukulele that’s nearly entirely 3D printed (Google translation). Everything on the uke, short of the strings and tuning pegs came from a MendelMax 3D printer, all without any support material at all.

In the video, [Alessandro] and uke virtuoso [Jontom] show off how this instrument was put together and how good it can sound. The body of the uke is made of two parts, and the neck – three parts including the headstock and fretboard – all fit together with surprisingly traditional methods. A dovetail joint connects the neck to the body and a tongue and groove-like joint holds the headstock to the neck.

[Allessandro] puts the print time of all the uke parts at about 120 under 20 hours and about 20 Euros worth of plastic. As far as ukuleles go, this sounds just as good as the average instrument, but [Jontom] says the action is a little bit high. That’s why files were invented, we guess.

Thanks [iant] for sending this one in.

Continue reading “The 3D Printed Ukulele”

[Ben Heck] Builds The Ultimate Glue Gun

glue

For how many can be found on the workbenches and in the toolboxes of makers and hackers the world over, finding a glue gun that does more than just heat up and drip glue everywhere can be a challenge. [Ben Heck] finally solved this problem with a hot glue gun that’s more like an extruder from a 3D printer than a piece of junk you can pick up at Walmart for a few dollars.

By far, the most difficult part of this project was the glue stick extruder. For this, [Ben] used a DC motor with a two-stage planetary gear system. This drives a homemade hobbed bolt, just like the extruder in 99% of 3D printers. The glue stick is wedged up against the hobbed bolt with a few 3D printed parts and a spring making for a very compact glue stick extruder.

The electronics are a small AVR board [Ben] made for a previous episode, a thermistor attached to the hot end of the glue gun, a solid state relay for the heater, and analog controls for speed and temperature settings. After finishing the mechanics and electronics, [Ben] took everything apart and put it back together in a glue gun-shaped object.

The finished product is actually pretty nice. It lays down constistant beads of hot glue and thanks to a little bit of motor retraction won’t drip.

You can check out both parts of [Ben]’s build below.

Continue reading “[Ben Heck] Builds The Ultimate Glue Gun”

Veronica Gets A Pair Of Gamepads And A Bugged Chip

veronica

[Quinn Dunki]’s awesome 6502-based computer is coming right along, and she decided it’s time to add one of the most important features found in the 80s microcomputers she’s inspired by – gamepads.

There were two ways of implementing gamepads back in the 80s. The Apple II analog joysticks used a potentiometer for each joystick axis along with a 556 timer chip to convert the resistance of a pot into a digital value. Analog controls are awesome, but a lot of hardware is required. The other option is the Atari/Commodore joystick that uses buttons for each direction. Surprisingly, these joysticks are inordinately expensive on the vintage market but a similar hardware setup – NES gamepads – are common, dirt cheap, and extremely well documented.

[Quinn] wrote a few bits of 6502 assembly to read these Nintendo controllers with Veronica’s 6522 VIA with the help of an ATMega168, and then everything went to crap.

In testing her setup, she found that sometimes the data line from the controller would be out of sync with the clock line. For four months, [Quinn] struggled with this problem and came up with one of two possible problems: either her circuit was bad, or the 6522 chip in Veronica was bad. You can guess which option is correct, but you’ll probably be wrong.

The problem turned out to be the 6522. It turns out this chip has a bug when it’s used with an external clock. In 40 years of production this hasn’t been fixed, but luckily 6502 wizard [Garth Wilson] has a solution for this problem: just add a flip-flop and everything’s kosher. If only this bug were mentioned in the current datasheets…

Now Veronica has two NES controller inputs and the requisite circuitry to make everything work. Video evidence below.

Continue reading “Veronica Gets A Pair Of Gamepads And A Bugged Chip”