Checking Network Status With A Traffic Light

If you’ve ever dealt with a buggy Internet connection, you know how frustrating it can be. This project takes the guesswork out of mashing F5 over and over, or simply walking over to your router and ‘turning it on and off again.’

Necessity is the mother of invention, and when the folks at the Bitlair hackerspace in Amersfoort, Netherlands got tired of opening up a terminal to see if their network connection was down at this weekend’s Haxogreen camp they did what any self-respecting hackerspace would do: make a traffic light monitor the Internet.

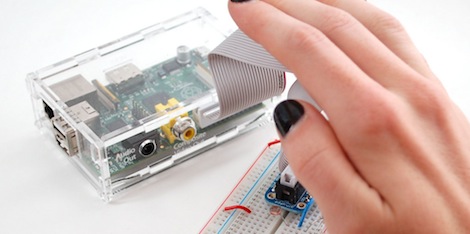
The traffic light is controlled by a Raspberry Pi the Bitlair folks had lying around attached to a spare traffic light they somehow obtained with a relay. Green means the Raspi can reach 8.8.8.8, red means there is no connection, and flashing lights means there is packet loss.

Not bad for a project put together in a few hours. Now if we only knew how they obtained a traffic light, ‘just lying around.’

Video after the break.

Continue reading “Checking Network Status With A Traffic Light”
Geigers On A Plane

[Thomas] took a Geiger counter he built on a plane. Why? Because he can, much to the chagrin of airport security.

[Thomas]’ Geiger counter is built around an old Russian SBT-10A detector containing ten separate Geiger tubes. This tube was connected to a circuit containing a LiPo battery, a few high-voltage components, and an audio jack connected to the tubes themselves. When alpha, beta, or gamma radiation hits one of the Geiger tubes, an enormous click is sent to the audio jack and into the microphone jack of a small netbook.

Right after boarding a plane in Dublin, [Thomas] booted up his computer, started recording in Audacity, plugged in his Geiger counter, and stored his experiment safely in the overhead compartment. After landing in Prague a few hours later, [Thomas] saved the 247 MB .WAV file and began working on a way to convert clicks in an audio track into usable data.

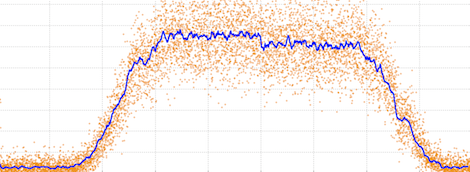
The audio output on the Geiger counter overloaded the mic input on his netbook, making ‘event detection’ very easy with a small C app. After plotting all the data (seen above), [Thomas] had a complete record of the radiation on his 2-hour flight.

Because there was far less atmosphere to absorb cosmic radiation, [Thomas]’ radiation dose was 9.1 microsieverts. Much more than at sea level, but nothing even air crews need to worry about.

Two Hard Disks And One DJ Get Down With No Delay

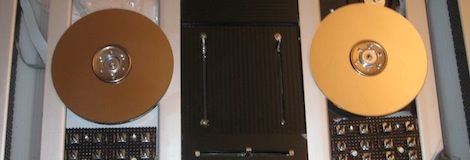
Mixmaster [robelix] built a MIDI controller for DJs that uses two hard drives for scratching and cutting some wicked beats.

[robelix]’s project is called Hard DJ and was inspired by this earlier build capable of producing a droning appreciated chiptune music using the motor inside a hard drive. Instead of reading the out of phase sine waves produced when a hard drive platter is manually rotated, [robelix] used custom laser cut encoder wheels and an IR detector from old computer mice. This gives [robelix] far more resolution than would be possible by reading the drives stepper motors and allows him to scratch and cut to whatever his MC desires.

The electronics portion of the build are a little rough at this stage – just an Arduino Mega, a few buttons, and a trio of faders. [robelix] will be building a proper enclosure for his controller soon, something we can’t wait to see.

If you’d like to clone this DJ controller, all the files are up on the Git. Check out the video after the break.

Continue reading “Two Hard Disks And One DJ Get Down With No Delay”

Reading Analog Sensors With The Raspberry Pi

Adafruit just posted an awesome tutorial on reading analog sensors with the Raspberry Pi. It’s a great walkthrough that can be applied to your next Raspi project as well as any project where you just need one more analog input.

Earlier, the folks over at Adafruit posted a tutorial on using a MCP3008 ADC with the Raspi to directly read analog values using a Raspi. Sometimes, though, you don’t need eight analog inputs and a 12-bit ADC to get a project off the ground. Adafruit’s tutorial for reading analog values without an ADC relies on a single 1μF ceramic capacitor attached between a digital input and ground. By pulling the sensor line high for a millisecond or two, the capacitor charges at different rates depending on the value of the analog sensor.

Yes, it’s just an RC timing circuit but seeing as how the Raspi doesn’t have an analog input, we figure this tutorial could help out a few people.

Melting Plastic Powder Together, One Layer At A Time

[youtube=http://www.youtube.com/watch?v=vVOtKSKyIvI&fw=470]

Here’s an interesting development in the world of 3D printers: A rapid prototyping machine that melts plastic powder together to create objects with extremely good resolution

The Blueprinter works by drawing a 0.1 mm thick layer of plastic powder over the build platform. After that, a very hot needle-shaped probe melts the plastic together. This process continues at a rate of 10mm an hour on the z axis, and a very precise plastic model eventually appears in the powder.

There is no price ( or solid release date ) for the Blueprinter, but this 3ders.org article from earlier this year tells us the price for the machine will be €9,995, with a material cost of €49 per kg. Pricey, yes, but seeing as how the RepRap community already has the techniques behind melting plastic down pat, it might now be too hard to build your own plastic sintering printer.

If you know of any current projects or builds that are trying to emulate this plastic powder melting technique, drop us a note on the tip line. We’d love to see a version of this printer up and running. Until then, you can check out the render showing a rendered Blueprinter in action, along with a demo of a plastic clip printed on this sintering printer.

Continue reading “Melting Plastic Powder Together, One Layer At A Time”

Writing On LEDs With A Laser Pointer

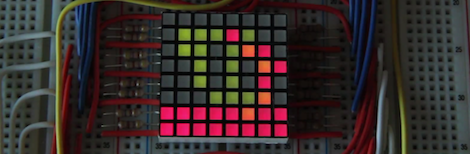
After [Ch00f] got his hands on an 8×8 LED display, he didn’t make a 64-pixel video game or VU meter. He made a laser doodler, allowing him to draw on this display with only a laser pointer.

Using LEDs as light sensors is nothing new; [Forrest Mims III] discovered that LEDs can also detect light way back in the late 60s. [Ch00f] played around with this concept before creating a circuit that uses an LED as both a light emitter and sensor that reacts to the ambient brightness.

[Ch00f]’s laser doodler takes this phenomena and applies it to an Adafruit bicolor LED matrix. When a light shines on an individual pixel in the display, the ATMega48 senses the current and turns that pixel on. Since this these pixels have two colors, [Ch00f] used a latch circuit and a button to cycle between what color the ‘Mega writes to the display.

In the video after the break, [Ch00f] shows off his display by having the LEDs light up in response to a laser pointer. It may be a bit small, but we can see a lot of potential for something like this as a gigantic art installation.

Continue reading “Writing On LEDs With A Laser Pointer”

Visualizing Heat With Schlieren Photography

[Kevin] wanted to check out the air patterns present when his 3D printer is in action. This is useful research; slight differences in temperature can affect the quality of his prints. Instead of something like a thermometer, [Kevin] decided to use Schlieren photography to visualize the air around his 3D printer.

If you’ve ever seen very old-school pictures of supersonic research, you’ve seen Schlieren photography. It’s a way of visualizing the density of transparent objects using only mirrors, lenses, and a point light source. The resulting pictures are usually black and white, although some amazing color pictures exist of bullets traveling through the air next to soap bubbles and candles.

The process of creating a Schlieren photograph is actually pretty easy. [Kevin] pointed a light at a used a 4-inch parabolic mirror placed behind his printer. A knife edge is placed at exactly twice the focal length of the mirror, and after putting a camera behind this knife edge, differences in the density of the air are visible.

From [Kevin]’s video of his Schlieren setup (available after the break), you can see the air is extremely turbulent around his print. That might have been obvious given the presence of a cooling fan, but it’s still very, very cool to look at.

Continue reading “Visualizing Heat With Schlieren Photography”