We just wrapped up the Robotics Module Challenge portion of the Hackaday Prize, and if there’s one thing robots need to do, it’s move. This usually means some sort of motor, but you’ll probably want a gear system on there as well. Gotta have that torque, you know.
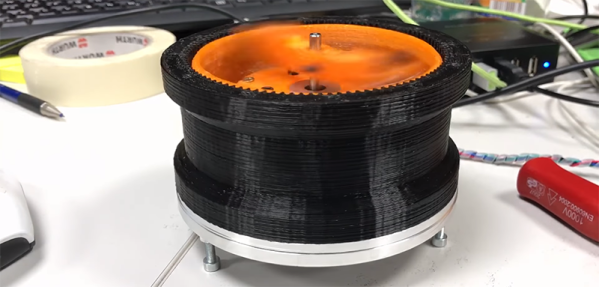
For his Hackaday Prize entry, [Johannes] is building a 3D printed Strain Wave Gear. A strain wave gear has a flexible middle piece that touches an outer gear rack when pushed by an oval central rotor. The difference in the number of teeth on the flexible collar and the outer rack determine the gear ratio.
This gear is almost entirely 3D printed, and the parts don’t need to be made of flexible filament or have weird support structures. It’s printed out of PETG, which [Johannes] says is slippery enough for a harmonic drive, and the NEMA 17 stepper is completely contained within the housing of the gear itself.
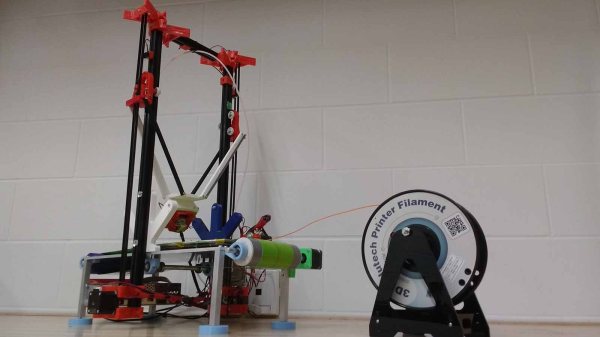
Printing a gear system is all well and good, but what do you do with it? As an experiment, [Johannes] slapped two of these motors together along with a strange, bone-like adapter to create a pan/tilt mount for a camera. Yes, if you don’t look at the weird pink and blue bone for a second, it’s just a DSLR on a tripod with a gimbal. The angular resolution of this setup is 0.03 degrees, so it should be possible to use this setup for astrophotography. Impressive, even if that particular implementation does look a little weird.
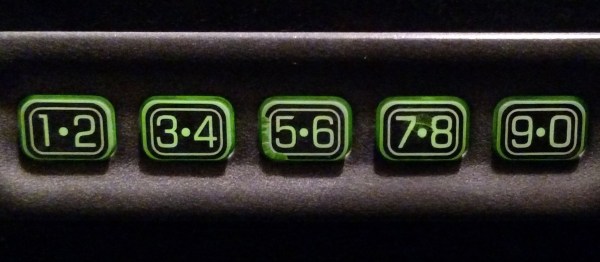
The Ford Securicode, or the keyless-entry keypad available on all models of Ford cars and trucks, first appeared on the 1980 Thunderbird. Even though it’s most commonly seen on the higher-end models, it is available as an option on the Fiesta S — the cheapest car Ford sells in the US — for $95. Doug DeMuro loves it. It’s also a lock, and that means it’s ready to be exploited. Surely, someone can build a robot to crack this lock. Turns out, it’s pretty easy.
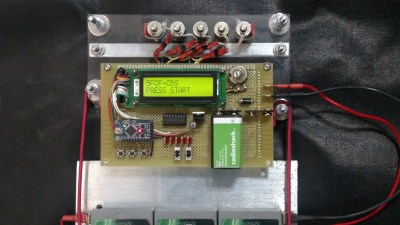
The electronics and mechanical part of this build are pretty simple. An acrylic frame holds five solenoids over the keypad, and this acrylic frame attaches to the car with magnets. There’s a second large protoboard attached to this acrylic frame loaded up with an Arduino, character display, and a ULN2003 to drive the resistors. So far, everything you would expect for a ‘robot’ that will unlock a car via its keypad.
The real trick for this build is making this electronic lockpick fast and easy to use. This project was inspired by [Samy Kamkar]’s OpenSesame attack for garage door openers. In this project, [Samy] didn’t brute force a code the hard way by sending one code after another; (crappy) garage door openers only look at the last n digits sent from the remote, and there’s no penalty for sending the wrong code. In this case, it’s possible to use a De Bruijn sequence to vastly reduce the time it takes to brute force every code. Instead of testing tens of thousands of different codes sequentially, this robot only needs to test 3125, something that should only take a few minutes.
Right now the creator of this project is putting the finishing touches on this Ford-cracking robot. There was a slight bug in the code that was solved by treating the De Bruijn sequence as circular, but now it’s only a matter of time before a 1993 Ford Taurus wagon becomes even more worthless.
Do you like badges? Of course you like badges. It’s conference season, and that means it’s also badge season. Well good news, Tindie now has a ‘badge’ category. Right now, it’s loaded up with creepy Krustys, hypnotoads, and fat Pikas. There’s also an amazing @Spacehuhn chicken from [Dave]. Which reminds me: we need to talk about a thing, Spacehuhn.
On the list of ‘weird emails we get in the tip line’ comes Rat Grease. Rat Grease is the solution to rodents chewing up cabling and wires. From what we can gather, it’s a mineral oil-based gel loaded up with capsaicin; it’s not a poison, and not a glue. Rats are our friends, though, which makes me want to suggest this as a marinade, or at the very least a condiment. The flash point is sufficiently high that you might be able to use this in a fryer.
[Matthias Wandel] is the guy who can build anything with a table saw, including table saws. He posts his stuff online and does YouTube videos. A while back, he was approached by DeWalt to feature their tools in a few videos. He got a few hand tools, a battery-powered table saw, and made some videos. The Internet then went insane and [Matthias] lost money on the entire deal. Part of the reason for this is that his viewers stopped buying plans simply because he featured yellow power tools in his videos. This is dumpster elitism, and possibly the worst aspect of the DIY/engineering/maker community.
Elon Musk is the greatest inventor ever. No scratch that. The greatest person ever. Need more proof? The CEO of Tesla, SpaceX, and our hearts has been given the green light to build a high-speed underground train from Chicago O’Hare to downtown. Here’s the kicker: he’s going to do it for only $1 Billion, or $55 Million per mile, making it the least expensive subway project by an order of magnitude. Yes, Subways usually cost anywhere between $500 to $900 Million per mile. How is he doing it? Luck, skill, and concentrated power of will. Elon is the greatest human ever, and we’re not just saying that to align ourselves with an audience that is easy to manipulate; we’re also saying this because Elon has a foggy idea for a ‘media vetting wiki’.
There are rumors Qualcomm will acquire NXP for $44 Billion. This deal has been years in the making, with reports of an acquisition dating back to 2016. Of course, that time, the deal was set to go through but was apparently put on hold by Chinese regulators. Now it’s the same story again; there were recent rumors of Qualcomm buying NXP, and the story was later changed to rumors. We’re waiting for an actual press release on this one. It’s just another long chapter in the continuing story of, ‘where the hell are all the Motorola app notes and data sheets?’
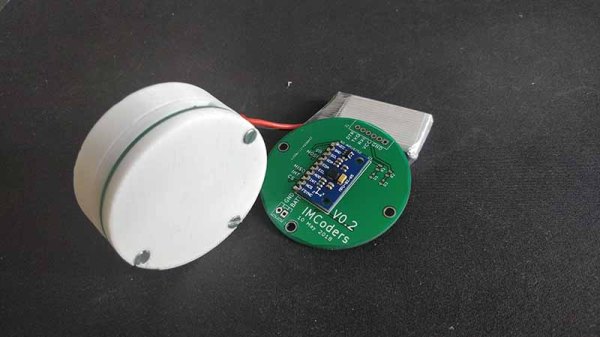
The future is autonomous robots. Whether that means electric cars with rebranded adaptive cruise control, or delivery robots that are actually just remote control cars, the robots of the future will need to decide how to move, where to move, and be capable of tracking their own movement. This is the problem of odometry, or how far a robot has traveled. There are many ways to solve this problem, but GPS isn’t really accurate enough and putting encoders on wheels doesn’t account for slipping. What’s really needed for robotic odometry is multiple sensors, and for that we have [Pablo] and [Alfonso]’s entry to the Hackaday Prize, the IMcorder.
The IMcorder is a simple device loaded up with an MPU9250 IMU module that has an integrated accelerometer, gyro, and compass. This is attached to an Arduino Pro Mini and a Bluetooth module that allows the IMcorder to communicate with a robot’s main computer to provide information about a robot’s orientation and acceleration. All of this is put together on a fantastically tiny PCB with a lithium battery, allowing this project to be integrated into any robotics project without much, if any, modification.
One interesting aspect of the IMcorders is that they can be used for robot kidnapping issues. This, apparently, is an issue when it comes to robots and other electronic detritus littering the sidewalks. Those electric scooters abandoned on the sidewalk in several cities contain some amazing components that are ripe for some great hardware hacking. Eventually, we’re going to see some news stories about people stealing scooters and delivery robots for their own personal use. Yes, it’s a cyberpunk’s dream, but the IMcorder can be used for a tiny bit of theft prevention. Pity that.
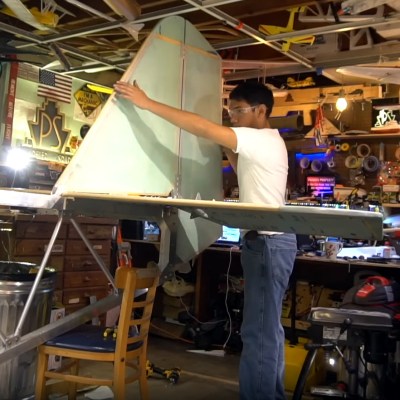
The first airplane he built was documented on YouTube over a month and a half. It was an all-electric biplane, built from insulation foam covered in fiberglass, and powered by a pair of ludicrously oversized motors usually meant for large-scale RC aircraft. This was built under Part 103 regulations — an ultralight — which means there were in effect no regulations. Anyone could climb inside one of these without a license and fly it. The plane flew, but there were a few problems. It was too fast, and the battery life wasn’t really what [Peter] wanted.
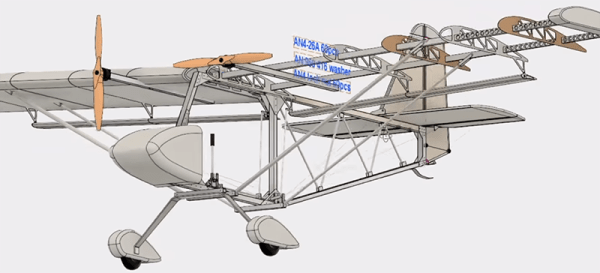
Now [Peter] is onto his next adventure. Compared to the previous plane, this has a more simplified, traditional construction. It’s a high wing monoplane with an aluminum frame. There are two motors again, although he’s still in the process of finding lower kV motors. This plane should also fly slower, longer, something you really want in an ultralight.
As far as tools required for this build, it’s surprising how few are needed to put the plane together. Of course, there are a few excessively large pop rivet guns and there will be some extra special aviation-grade bolts, but the majority of this plane will be made out of standard aluminum, insulation foam, a bit of wood, and some fiberglass. Watching [Peter] churn out high-end fabrication with these simple parts is so satisfying. If you have a drill press with a cross slide vise, you too can build a plane in your basement.
This is shaping up to be a truly fantastic build. [Peter] has already proven that yes, he can indeed build an airplane in his basement. This time, though, he’s going to have a plane that will stay in the air for more than just a few minutes.
As reported by the BBC, the United States is set to impose a 25% tariff on over 800 categories of Chinese goods. The tariffs are due to come into effect in three weeks, on July 6th. Thousands of different products are covered under this new tariff, and by every account, electronic designers will be hit hard. Your BOM cost just increased by 25%.
The reason for this tariff is laid out in a report (PDF) from the Office of the United States Trade Representative. In short, this tariff is retaliation for the Chinese government subsidizing businesses to steal market share and as punishment for stealing IP. As for what products will now receive the 25% tariff, a partial list is available here (PDF). The most interesting product, by far, is nuclear reactors. This is a very specific list; one line item is, ‘multiphase AC motors, with an output exceeding 746 Watts but not exceeding 750 Watts’.
Of importance to Hackaday readers is the list of electronic components covered by the new tariff. Tantalum capacitors are covered, as are ceramic caps. Metal oxide resistors are covered. LEDs, integrated circuits including processors, controllers, and memories, and printed circuit assemblies are covered under this tariff. In short, nearly every bit that goes into anything electronic is covered.
This will hurt all electronics manufacturers in the United States. For a quick example, I’m working on a project using half a million LEDs. I bought these LEDs (120 reels) two months ago for a few thousand dollars. This was a fantastic buy; half a million of the cheapest LEDs I could find on Mouser would cost seventeen thousand dollars. Sourcing from China saved thousands, and if I were to do this again, I may be hit with a 25% tariff. Of course; the price on the parts from Mouser will also go up — Kingbright LEDs are also made in China. Right now, I have $3000 worth of ESP-12e modules sitting on my desk. If I bought these three weeks from now, these reels of WiFi modules would cost $3750.
There are stories of a few low-volume manufacturers based in the United States getting around customs and import duties. One of these stories involves the inexplicable use of the boxes Beats headphones come in. But (proper) electronics manufacturing isn’t usually done by simply throwing money at random people in China or committing customs fraud. These tariffs will hit US-based electronics manufacturers hard, and the margins on electronics may not be high enough to absorb a 25% increase in the cost of materials.
Electronics made in America just got 25% more expensive to produce.
The Hackaday Prize is all about empowering you with the tools you need to create the next great hardware device. To that end, we’ve set up seed funding for your projects, we’ve given you a project hosting site, and most importantly, Hackaday gives you the opportunity to connect with tens of thousands of like-minded hardware hackers across the globe.
Not all hackers are out tinkering in their garage after work. Some are pulling the night shift in their dorm rooms, balancing classes, homework, hacking, and life. Student hackers, we salute you with the Ender’s Achievement!
This robotic gripper is the solution to robotic gripping
The Modular Universal Jamming Gripper by [cole b.] and a group of students at the Arizona Makers Collective is something every robot needs. It’s a device that allows a robot to pick up just about anything. The old way of doing this is by fancy robotic fingers, maybe an Armatron, or if you’re of a sufficient vintage or radioactive, a Waldo. This is not anything like that. Instead of robotic fingers, this is basically a balloon filled with grains of sand. To use it, the robot jams this squishy ball over an object and sucks the air out of the balloon. The result is an end effector that latches onto any small object.
Devices like this have been built before. Coincidentally, the earliest projects like this we’ve seen are also from students at engineering schools. However, [cole] and his team are really improving this sort of device, making it 3D printable and cheaper to make. It’s an amazing project, and you’re doing yourself a disservice if you don’t check out the project page.
If you want more evidence that students are our future and that we should teach them well and let them lead the way, take a look at this 3D printer project.
Most 3D printers only print one object at a time. Sure, you can load up your build platform with a bunch of objects, but the fact remains that 3D printing is a batch process. [Swaleh]’s WorkHorse 3D changes all of that. It’s a 3D printer with a conveyor belt. Sure, it violates the MakerBot patent, but that’s not the point. This is a printer that can produce an infinite amount of objects with just a little bit of G-code hacking. When one print is done, it rolls off the end of the bed, and another print is started without any downtime in between. It’s a factory on a desktop, and it’s amazing. And [Swaleh] is a mechanical engineering student, which means that he’s building this even though he has more homework than the rest of us.
Like all of the projects entered by students in The Hackaday Prize, these projects won an achievement. Yes, we’re doing achievements for projects this year, and these two are getting the Ender’s Achievement for incredible student entries. No, it’s not an extra prize or points or anything like that; it’s just recognition of the amazing projects done by students. These are some of the best, and if you’re a student who entered a project into the Hackaday Prize, we’d be more than happy to bestow the Ender’s Achievement on your project.

 The electronics and mechanical part of this build are pretty simple. An acrylic frame holds five solenoids over the keypad, and this acrylic frame attaches to the car with magnets. There’s a second large protoboard attached to this acrylic frame loaded up with an Arduino, character display, and a ULN2003 to drive the resistors. So far, everything you would expect for a ‘robot’ that will unlock a car via its keypad.


 Now [Peter] is onto his next adventure. Compared to the previous plane, this has a more simplified, traditional construction. It’s a high wing monoplane with an aluminum frame. There are two motors again, although he’s still in the process of finding lower kV motors. This plane should also fly slower, longer, something you really want in an ultralight.