3D Printing 90° Overhangs With Non-Planar Slicing

When slicing a model for 3D printing, the part is divided into a stack of flat, 2D layers. But there’s an alternative in the form of non-planar slicing, where the layers can follow 3D curves. [Rene K. Mueller] took this a step further and successfully used non-planar slicing to print 90° overhangs on a normal Cartesian FDM printer.

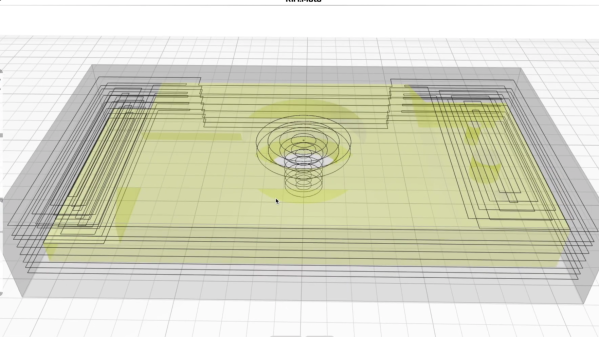
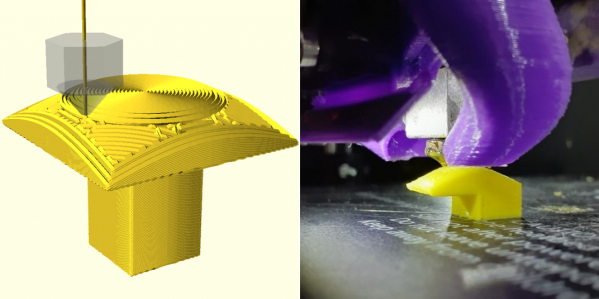
Non-planar layers have been around for a while, but were generally limited to creating smooth curves without layer lines. The idea of using the technique for overhangs had been floating around in [Rene]’s head for a while, and he was spurred to action after seeing the rotating tilted nozzle printer featured here on Hackaday. The idea is only to have the outer edge of each layer overhang, by making each layer slope downward toward the overhang. [Rene] programmed a conic slicer algorithm for this purpose, which splits the model into dome-shaped layers, like an onion.

He did a lot of testing and documented the results in detail. Conical slices were compared with tilted slices, which are also used for belt 3D printers. Both have some geometric limitations. Tilted slices can only print the overhang in one direction, but conical slices can do this in all directions, allowing it to create a mushroom-like shape without any support. The limitation is that it can only print inward or outward from a central point. More complex geometry must be segmented, and each sub-volume sliced separately. The slicing angle is also limited by the shape of the print head, to avoid it crashing into the print.

We think this technique has a lot of potential for widespread use, especially since it is compatible with most existing FDM printers. It is still a work in progress, but support has already been added for Slic3r and Prusa Slicer. We look forward to seeing how it develops and gets adopted.

This Dual Extrusion System Rocks

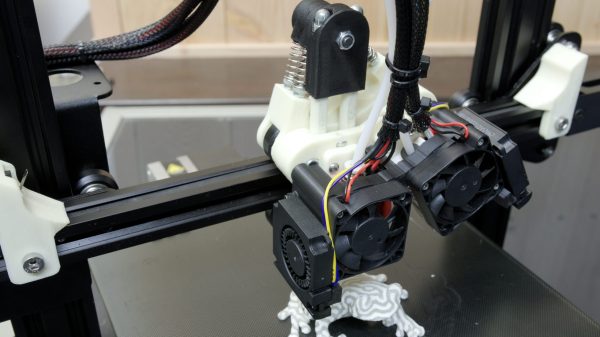
Dual extrusion systems for 3D printers have been around for quite a few years, but the additional cost, complexity, and hassle of printing with them have kept them off the workbenches of most hackers. [Jón Schone] from Proper Printing has now thrown his own hat in the ring, with a custom dual extrusion rocker system that can swap extruders without any additional actuators.

The two extruders are mounted on a spring-loaded rocker mechanism, which holds the inactive extruder up and away from the printing surface. Extruders are swapped by moving the carriage to either end of the x-axis, where the v-wheel rolls a ramp and pops the rocker over, putting the new extruder in the center line of the carriage. There are 3 wheels at the top of the carriage, but only two are in contact with the rail at any time. While this system is more complex than simply mounting two extruders side-by-side, it reduces the chances of the inactive nozzle oozing onto the parts or scraping across the surface. The height of each extruder can be adjusted with a screw,  and any horizontal offset between the nozzles is checked with a calibration procedure and corrected in the firmware. See the full video after the break.

[Jón] is offering the design files and modified firmware to perform this mod on your own Ender 3 Pro (though he notes other Creality printers should be compatible), but you’ll still need to source a control board with the additional stepper driver and heater output for the second extruder. This is yet another in a long list of hacks he’s performed on this popular entry-level printer, such as a modification that allows you to fold the machine up and take it on the go.

Continue reading “This Dual Extrusion System Rocks”

Cycling Cadence Display With ESP32

Terry Pratchett once said “Wisdom comes from experience. Experience is often a result of lack of wisdom.” This is as true with technical skills as it is with the rest of life, and you won’t truly understand a specific topic unless you’ve struggled with it a bit. [publidave] wanted a simple wireless display for a bluetooth cycling cadence sensor, and soon found himself deep down the rabbit hole of Micropython and Bluetooth Low Energy on the ESP32.

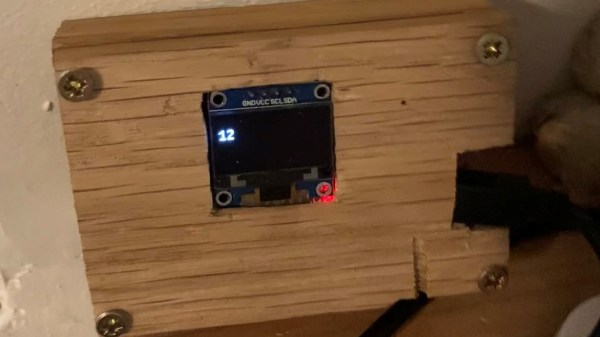
[publidave] had converted his bicycle for indoor training during lockdown and winter, and realized he can’t use the guided training app and view his cadence simultaneously, so he needed a dedicated cadence display. Since [publidave] was comfortable with Python, he decided to give Micropython on the ESP32 ago. Bluetooth Low Energy can be rather confusing if you haven’t implemented it before, especially if good examples are hard to come by. In short, the ESP32 needs to find the sensor, connect to it, select the right service, and listen for the notifications containing the data. The data is then converted to RPM and displayed on a small OLED display. [publidave] does an excellent job of describing what exactly he did, highlighting the problems he encountered, and how he solved them.

In the end, he had a functional display, a good idea of what he would do differently next time, and a lot of additional knowledge and understanding. In our book that’s a successful project.

Since so much of the health related devices work with Bluetooth Low Energy, it could be handy to know the technology and how to interface with it. It would allow you to do things like unbrick a $2000 exercise bike,

Lowering The Electricity Bill By Mining Cryptocurrency

Wherever you are in the world, the chances are that a large portion of your utility bill is for heating. This was certainly the case for [Christian Haschek], who realized he can use a cryptocurrency mining rig to offset some of his heating costs.

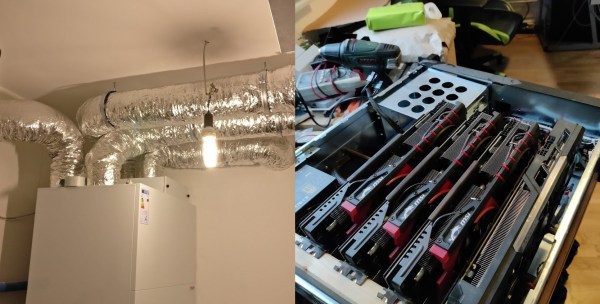
[Christian]’s central ventilation and water heating is handled by a heat pump, which uses a lot of electricity, especially in the Austrian winter. When it draws in cool air, it first needs to heat it to the thermostat temperature before venting it to the house. Cryptocurrency mining rigs are also heavy electricity users, but they also produce a lot of heat, which can be used to preheat the air going to the heat pump. [Christian] had four older AMD R9 390 GPUs (equivalent to the Nvidia GeForce GTX 970) lying around, so he mounted them in a server case and piped the heat pump’s air intake through the case.

At the time he did the tests, earnings from mining were enough to cover half of his heating bill, even after paying for the mining rig’s electricity. That is not taking into account the electricity savings from the preheated air. He only shows the results of one evening, where it dropped his electricity usage from around 500Wh to below 250Wh. We would like to see the long-term results, and it would be an interesting challenge to build a model to calculate the true costs or savings, taking into account all the factors. For instance, it could be possible to save costs even if the mining rig itself is running at a slight loss.

Of course, this is not a new idea. A quick internet search yields several similar projects and even some commercial crypto mining space heaters. We do like the fact that [Christian] reused some hardware he already had and integrated it into his central heating rather than using it as a mobile unit.

When [Christian] isn’t building crypto heaters, he can be found flooding phishing scams with fake data, or tracking down corporate spies.

Open Source CAM Software In The Browser

3D printers, desktop CNC mills/routers, and laser cutters have made a massive difference in the level of projects the average hacker can tackle. Of course, these machines would never have seen this level of adoption if you had to manually write G-code, so CAM software had a big part to play. Recently we found out about an open-source browser-based CAM pack created by [Stewert Allen] named Kiri:Moto, which can generate G-code for all your desktop CNC platforms.

To get it out of the way, Kiri:Moto does not run in the cloud. Everything happens client-side, in your browser. There are performance trade-offs with this approach, but it does have the inherent advantages of being cross-platform and not requiring any installation. You can click the link above and start generating tool paths within seconds, which is great for trying it out. In the machine setup section you can choose CNC mill, laser cutter, FDM printer, or SLA printer. The features for CNC should be perfect for 90% of your desktop CNC needs. The interface is intuitive, even if you don’t have any previous CAM experience. See the video after the break for a complete breakdown of the features, complete with timestamp for the different sections.

All the required features for laser cutting are present, and it supports a drag knife. If you want to build an assembly from layers of laser-cut parts, Kiri:Moto can automatically slice the 3D model and nest the 2D parts on the platform. The slicer for 3D printing is functional, but probably won’t be replacing our regular slicer soon. It places heavy emphasis on manually adding supports, and belt printers like the Ender CR30 are already supported.

Kiri:Moto is being actively improved, and it looks as though [Stewart] is very responsive to community inputs. The complete source code is available on GitHub, and you can run an instance on your local machine if you prefer to do so. Continue reading “Open Source CAM Software In The Browser”

Shredding The Ice With Powered Skates

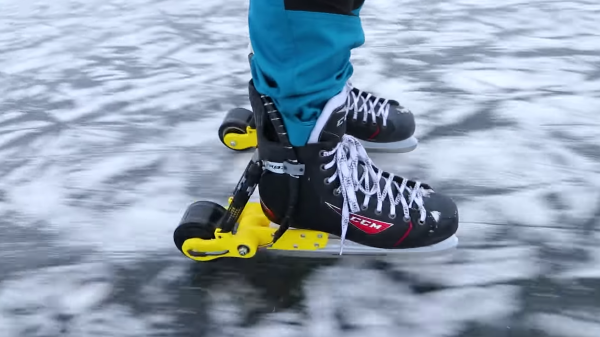
The availability of small and powerful brushless motors has been instrumental in the development of so-called micro-mobility vehicles. But if your commute involves crossing a frozen lake, you might find the options a bit lacking. Fortunately [Simon] from [RCLifeOn] now has a solution for you in the form of motorized ice skates.

[Simon] used 3D printed brackets to mount outrunner brushless motors to the back of a pair of ice-skates. The spinning outer housing of the motor is used as the wheel, with a bunch of studs threaded in it to dig into the ice and provide traction. At first [Simon] tried to use a pair of RC car springs to keep the motor in contact with the ice, but spring force was insufficient for the task, so he ended up rigidly mounting the motors. Getting proper traction on the ice from a standstill was still tricky, so he ended up leaning back to push the motor down, which also had the effect of putting him off balance, limiting the practical acceleration. The most obvious solution for the tracking problem seems to be stronger springs, but we assume he didn’t have any on hand. The batteries are held in a backpack, with cables running down to the skates, and a wireless electric skateboard controller is used for throttle control.

The obvious risk of these skates is of the studded motors inadvertently becoming meat grinders if you fall. It still looks like a fun project, and we wouldn’t mind having a go on those skates.

[Simon] likes messing around with brushless motors, and has done everything from a jet-powered surfboard to a gyro-stabilized RC “motorbike”.

Continue reading “Shredding The Ice With Powered Skates”

Hidden TV-Out On The Nintendo DS Lite

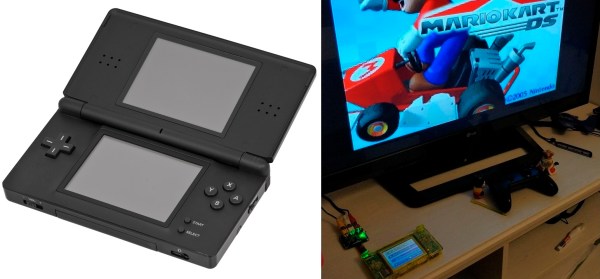
The DS Lite was one of Nintendo’s most popular handheld gaming consoles, but unbeknownst to all, it has a hidden feature that could have made it even more popular. Digging through the hardware and firmware, the [Lost Nintendo History] team discovered the System-on-Chip (SoC) in the DS Lite can output a composite video signal.

The SoC can output a 10-bit digital output running at 16.7 MHz, but it is disabled by the stock firmware early in the boot process, so custom firmware was required. It still needs to be converted to an analog signal, so a small adaptor board with a DAC (digital-analog converter) and op-amp is attached to the flex cable of the upper screen. A set of buttons on the board allow you to select which screen is displayed on the TV. The adaptor board is open source, and the Gerbers and schematics are available on GitHub.

The current version of the adaptor board disables the upper screen, but the [Lost Nintendo History] team is considering designing a pass-through board to eliminate this disadvantage. The TV-out mod can also be combined with the popular Macro mod, in which the upper screen is removed to turn it into a Game Boy Advance. The Nintendo DS is a popular hacking subject, and we’ve been covering them for well over a decade.