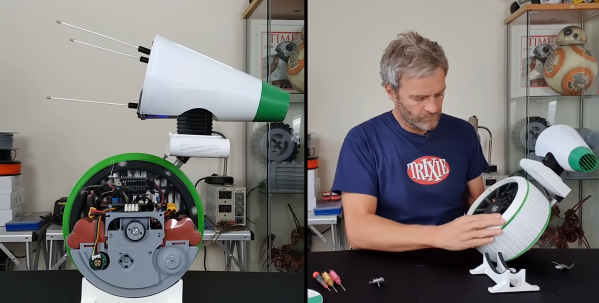
Building D-O, The Cone Face Droid

For many of us, movies are a great source of inspiration for projects, and the Star Wars films are a gift that just keeps giving. The D-O droid featured and the Rise of Skywalker is the equivalent of an abandoned puppy, and with the help of 3D printing, [Matt Denton] has brought it to life. (Video, embedded below.)

D-O is effectively a two-wheeled self-balancing robot, with two thin drive wheels on the outer edges of the main body. A wide flexible tire covers the space between the two wheels, where the electronics are housed, without actually forming part of the drive mechanism. The main drive motors are a pair of geared DC motors with encoders to allow closed-loop control down to very slow speeds. The brains of the operation is an Arduino MKR-W1010 GET on a stack that consists of a motor driver, shield, IMU shields, and prototyping shield. [Matt] did discover a design error on the motor driver board, which caused the main power switching MOSFET to burst into flames from excessive gate voltage. Fortunately he was able to work around this by simply removing the blown MOSFET and bridging the connection with a wire.

The head-on D-O is very expressive and [Matt] used four servos to control its motion, with another three to animate the three antennas on the back of its head. Getting all the mechanics to move smoothly without any slop took a few iterations to get right, and the end result looks and moves very well. Continue reading “Building D-O, The Cone Face Droid”

Combine Broken Drone Propellers For A Second Spin

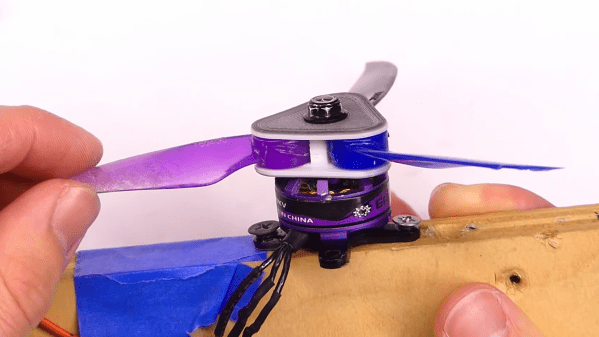
If you’ve ever flown or watched anyone fly a racing drone for any length of time, you know that crashes are just part of the game and propellers are consumables. [Adam] knows this all to well, decided to experiment with combining multiple broken propellers into one with a 3D printed hub.

A damaged propeller will often have one blade with no damage, still attached to the hub. [Adam] trimmed the damaged parts of a few broken props, and set about designing a 3D printed hub to attach the loose blades together. The hubs were designed let the individual blades to move, and folding out as the motors spin up, similar to the props on many photography drones.

Once [Adam] had the fit of the hubs dialed in, he mounted a motor on a piece of wood and put the reborn propellers through their paces. A few hubs failed in the process, which allowed [Adam] to identify weak points and optimise the design. This sort of rapid testing is what 3D printing truly excels at, allowing test multiple designs quickly instead of spending hours in CAD trying to foresee all the possible problems.

He then built a test drone from parts he had lying around and proceeded with careful flight testing. The hubs were thicker than standard propellers so it limited [Adams] motor choices to ones with longer shafts. Flight testing went surprisingly well, with a hub only failing after [Adam] changed the battery from a 3 cell to a 4 cell and started with some aerobatics. Although this shows that the new props are not suitable for the high forces from racing or aerobatics/freestyle flying, they could probably work quite well for smoother cruising flights. The hubs could also be improved by adding steel pins into the 3D printed shafts, and some carefully balancing the assembled props.

Continue reading “Combine Broken Drone Propellers For A Second Spin”

Measure The Speed Of A Speeding Bullet

In the study of ballistics, you can do very little without knowing the velocity of a projectile. Whether you need to hit a target at over a mile, check if a paintball gun is safe for opposing players, or photograph high-velocity objects, you need a way to measure that velocity. [td0g] enjoys the challenge of photographing bullets impacts, and has created an open-source ballistic chronograph to help achieve this.

A rifle bullet punching through a wine glass, captured with the help of the chronograph

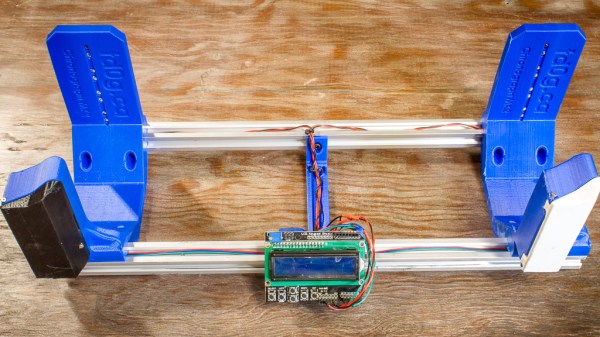
[td0g]’s design makes use of two light gates spaced some distance apart, and the time that an object takes to travel between the two is measured and used to calculate velocity. Most commercial ballistic chronographs also work in this way. [td0g] created the light gates using pairs of infrared photodiodes and LEDs. When there is a sudden dip in the amount of light received by the photodiode, the Arduino control circuit knows that an object has passed between the photodiode and LEDs and triggers the timer. An LCD shield on the Arduino is used to control the software and display velocity. As you probably guessed, clock accuracy is very important for such time measurements, and [td0g] demonstrates a simple technique using a smartphone metronome app to manually calibrate the clock to acceptable accuracy for his purposes. Continue reading “Measure The Speed Of A Speeding Bullet”

A Hackable Drone Without All The Wiring

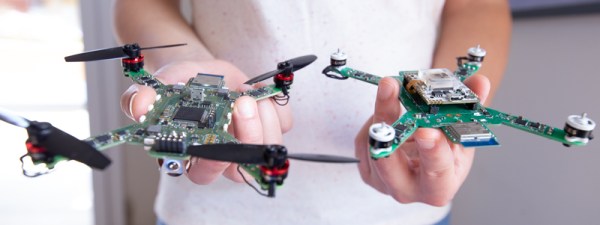
Drones have come a long way in the past decade, and a lot of the pioneering work that made them mainstream was done by individual hackers and small teams. This often involves cobbling together components into flying crow’s nests of wiring. To streamline things a bit for hackers, the team at Luminous Bees are working on Ardubee, a small 3″ drone designed from the ground up for hacking.

The Ardubee is built around a single PCB that also acts as the frame of the drone. Onboard is an STM32F427 microcontroller, IMU, barometer and compass, ESCs, ESP8266 for telemetry, and a downward-facing range finder. It’s ready to connect to an SBUS RC receiver and a range of pluggable modules are in development to expand the drone’s capabilities. It’s designed to run the open-source Ardupilot software, which we’ve seen in so many DIY autonomous vehicles. Power is provided by a single 18650, which will probably limit higher speed maneuverability a bit but should be fine for the slower precision flight that such a drone is likely to be used for.

The team already has a swarm of larger 5″ drones that they developed for light shows. In the process they developed their own Ultrawide-band indoor positioning system, which will also be available for the Ardubee. They hope to launch a Kickstarter campaign soon and are asking for input from the community, so they can know what features need to be prioritized. We look forward to seeing where this project goes!

Autonomous vehicles are a popular topic around here for air, land, and water, and we have no doubt there will be many more.

Thanks for the tip [Andreas]!

Giant Scale RC A350 Airliner Using Carbon Fibre And 3D Printing

Large scale RC aircraft are pleasure to see on the ground and in the air, but putting in the months of effort required to build them requires special dedication. Especially since there is a real possibility it could end up in pieces on the ground at some point. [Ramy RC] is one of those dedicated craftsman, and he has a thing for RC airliners. His latest project is a large Airbus A350, and the painstaking build process is something to behold.

The outer skin of the aircraft is mostly carbon fibre, with wood internal framing to keep everything rigid. The fuselage and winglets are moulded using 3D printed moulds. These were printed in pieces on a large format 3D printer, and painstakingly glued together and prepared to give a perfect surface finish. The wing surfaces are moulded in flat section and then glued onto the frames. [Ramy RC]’s attention to detail is excellent, making all the control surfaces close as possible to the real thing, and retractable landing gear with servo actuated hatches. Thrust comes from a pair of powerful EDF motors, housed in carbon fibre nacelles.

This project has been in the works for almost 5 months so far and it looks spectacular. We’re looking forward to the first flight, and will be holding thumbs that is remains in one piece for a long time. See the video after the break for final assembly of this beast.

For the next step up from RC aircraft, you can always build your own full size aircraft in your basement. If you have very very deep pockets, get yourself a private hangar/workshop and build a turbine powered bush plane.

Thanks for the tip [tayken]! Continue reading “Giant Scale RC A350 Airliner Using Carbon Fibre And 3D Printing”

A DIY Functional F-35 Is No Simple Task

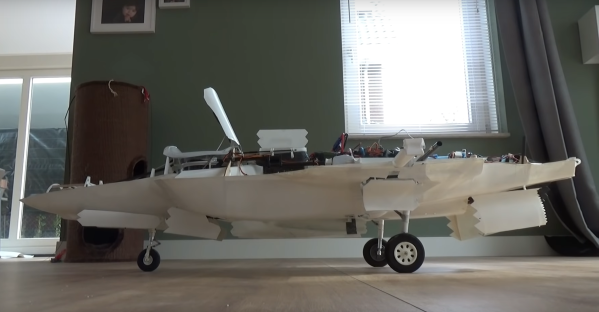
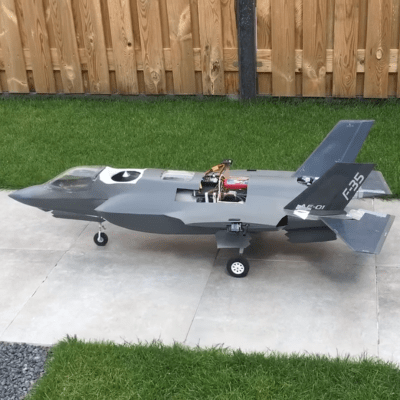
The advent of affordable gear for radio-controlled aircraft has made the hobby extremely accessible, but also made it possible to build some very complex flying machines on a budget, especially when combined with 3D printing. [Joel Vlashof] really likes VTOL fighter aircraft and is in the process of building a fully functional radio-controlled F-35B.

The F-35 series of aircraft is one of the most expensive defence project to date. The VTOL capable “B” variant is a complex machine, with total of 19 doors on the outside of the aircraft for weapons, landing gear and thrusters. The thruster on the tail can pivot 90° down for VTOL operations, using an interesting 3-bearing swivel mechanism.

[Joel] wants his model to be as close as possible to the real thing, and has integrated all these features into his build. Thrust is provided by two EDF motors, the pivoting nozzle is 3D printed and actuated by three set of small DC motors, and all 5 doors for VTOL are actuated by a single servo in the nose via a series of linkages. For tilt control, air from the main fan is channeled to the wing-tips and controlled by servo-actuated valves. A flight controller intended for use on a multi-rotor is used to help keep the plane stable while hovering. One iteration of this plane bit the dust during development, but [Joel] has done successful test flights for both hover and conventional horizontal flight.  The really tricky part will be transitioning between flight modes, and [Joel] hopes to achieve that in the near future.
The real Lockheed Martin F-35 Lightning II project is controversial because of repeated budget overruns and time delays, but the engineering challenges solved in the project are themselves fascinating. The logistics of keeping these complex machines in the air are daunting, and a while back we saw Marine ground crew 3D print components that they were having trouble procuring through normal channels.

Continue reading “A DIY Functional F-35 Is No Simple Task”

Cable Driven Robotic Joint

Even the oldest of mechanisms remain useful in modern technology. [Skyentific] has been messing with robotic joints for quite a while, and demonstrated an interesting way to use a pulley system in a robotic joint with quite a bit of mechanical advantage and zero backlash.

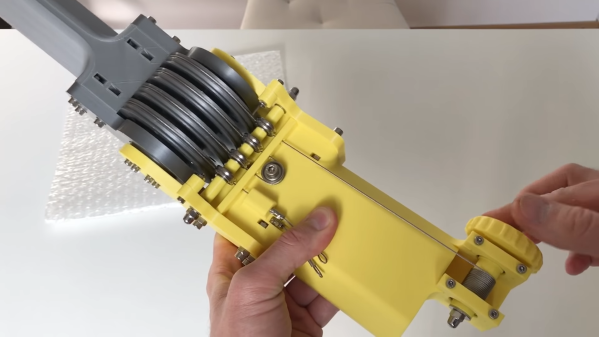
Inspired by the LIMS2-AMBIDEX robotic arm, the mechanism is effectively two counteracting sets of pulley, running of the same cable reel, with rollers allowing them to act around the bend of the joint. Increasing the mechanical advantage of the joint is simply a matter of adding pulleys and rollers. If this is difficult to envision, don’t work as [Skyentific] does an excellent job of explaining how the mechanism works using CAD models in the video below.

The mechanism is back drivable, which would allow it to be used for dynamic control using a motor with an encoder for position feedback. This could be a useful feature in walking robots that need to respond to dynamically changing terrain to stay upright, or in arms that need to push or pull without damaging anything. With properly tensioned cables, there is no backlash in the mechanism. Unfortunately cables can stretch over time, so it is something that needs to be considered when using this in a project.

Pulley systems have been with us for a very long time, and remain a very handy tool to have in your mechanical toolbox. A similar arrangement is used in the Da Vinci surgical robots to control their tiny manipulators. It would also be interesting to see this used in the already impressive robots of [James Bruton]. Continue reading “Cable Driven Robotic Joint”