Hackaday Links Column Banner

Hackaday Links: November 14, 2021

If you’re an infrastructure dweeb, it’s hard to drive past an electrical substation and not appreciate the engineering involved in building something like that. A moment’s thought will also make it hard to miss just how vulnerable a substation is to attack, especially those located way out in the hinterlands. And now we’re learning that late year, someone in Pennsylvania noticed this vulnerability and acted on it by attacking a substation with a commercial drone. Rather than trying to fly explosives over the substation fence, the attacker instead chose to dangle a copper wire tether under the drone, in an attempt to cause a short circuit. The attempt apparently failed when the drone crashed before contacting any conductors, and the attacker appears to have been ignorant of the extensive protective gear employed at substations that likely would have made a successful attack only a temporary outage. But it still points to the vulnerability of the grid to even low-skill, low-cost attacks.

We’ve probably all had the experience of using someone’s janky app and thinking, “Pfft! I could write something better than this!” That’s what a bunch of parents of school-age kids in Sweden thought, and they went ahead and did exactly that. Unfortunately, it didn’t turn out quite the way they expected. The problem app was called Skolplattform, which was supposed to make it easy for Stockholm’s parents to keep track of their kids’ progress at school. The app, which cost 1 billion Swedish Krona to develop, is by all accounts a disaster. But some frustrated parents managed to reverse engineer the API and build a new, better one on top of it. This resulted in Öppna Skolplattformen, an open-source app that actually works. Not to be upstaged, the city of Stockholm accused the parents of cyber crimes and data breaches. They also engaged the parents in an “API war”, constantly changing their system to nerf the new app and forcing the parents to rewrite it. In the end, the parents won, with Stockholm changing its position after a police report found that all data being accessed were voluntarily made public by the city. But it’s still a cautionary tale about the dangers of one-upping The Man.

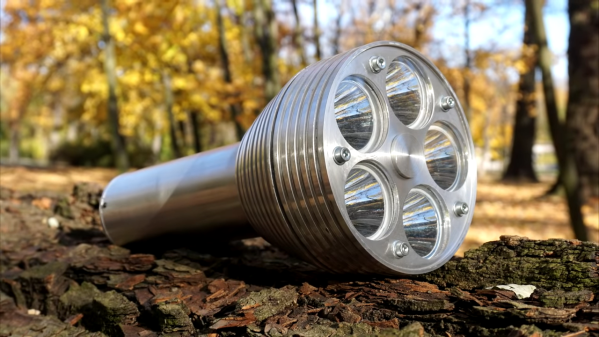
Sam Battles is in a bit of a moral bind, and it’s something that others in our community may run into. Sam is perhaps better known as “Look Mum, No Computer” on YouTube, and as the proprietor of the “This Museum Is (Not) Obsolete” showcase of retro technology in England. He’s also an avid builder of analog synthesizers, including a world-record synth with a thousand oscillators called the “Megadrone.” He’d like to tackle another build to try to break his own records, but in a time of fragile supply chains and other woes too numerous to mention, doing so would likely require the world’s entire supply of some components. Hence the dilemma: do any of us as hobbyists have a moral obligation to tread lightly when it comes to component selection? It’s an interesting question, and one that’s sure to engender strong opinions, which of course we encourage you to share in the comments section. Please just try to keep it civil.

Continue reading “Hackaday Links: November 14, 2021”

UV sensing amulet

Tiny Talisman Warns Wearer About UV Exposure

Given how important our Sun is, our ancestors can be forgiven for seeing it as a god. And even now that we know what it actually is and how it works, it’s not much of a reach to think that the Sun pours forth evil spirits that can visit disease and death on those who bask too long in its rays. So an amulet of protection against the evil UV rays is a totally reasonable project, right?

As is often the case with [mitxela]’s projects, especially the more bedazzled ones, this one is approximately equal parts electronics and fine metalworking. The bulk of the video below focuses on the metalwork, which is pretty fascinating stuff. The case for the amulet was made from brass and sized to fit a CR2032 coin cell. The back of the amulet is threaded to act as a battery cover, and some fancy lathe work was needed there. The case was also electroplated in gold to prevent tarnishing, and lends a nice look when paired up with the black solder mask of the PCB.

On the electronics side, [mitxela] took pains to keep battery drain as low as possible and to make the best use of the available space, choosing an ATtiny84 to support a TTP223 capacitive sensing chip and a VEML6075 UV sensor. The touch sensor allows the wearer to wake the amulet and cycles through UV modes, which [mitxela] learned were not exactly what the sensor datasheet said they were. This required a few software hacks, but in the end, the amulet does a decent job of reporting the UV index and looks fantastic while doing it.

Continue reading “Tiny Talisman Warns Wearer About UV Exposure”

Mini-lathe carriage wheel

Improving A Mini-Lathe With A Few Clever Hacks

Like many budget machinists, the delightfully optimistically named [We Can Do That Better] had trouble with some of the finer controls on his import mini-lathe. But rather than suffer through it, he chose to rectify the machine’s shortcomings and in the process, teach everyone a bunch of great tips.

[We Can Do That Better]’s lathe retrofit focused on the carriage handwheel, which appears to lack proper bearings and wobbles around in a most imprecise manner. On top of that, the gearing of the drive made for an unsatisfying 19 mm of carriage travel per revolution of the handwheel. A single gear change made that an even 20 mm per rev, which when coupled with a calibrated and indexed handwheel ring greatly simplifies carriage travel measurements.

While the end result of the build is pretty great in its own right, for our money the best part of the video is its rich collection of machinist’s tips. The use of a wooden dowel and a printed paper template to stand in for a proper dividing head was brilliant, as was using the tailstock of the lathe to drive an engraving tool to cut the index lines. We’ve seen the use of a Dremel tool mounted to the toolpost to stand in for a milling machine before, but it’s always nice to see that trick used. And the mechanism for locking the dial to the handwheel was really clever, too.

Considering a mini-lathe? As encouraging as [We Can Do That Better]’s experience may be, it might be wise to take a deep dive into the pros and cons of such a machine.

Continue reading “Improving A Mini-Lathe With A Few Clever Hacks”

Mechanical 7-segment display

A One-Servo Mechanical Seven-Segment Display

The seven-segment display may be a bit prosaic after all these years, but that doesn’t mean there aren’t ways to spice it up. Coming up with a mechanical version of the typical photon-based display is a popular project, of which we’ve seen plenty of examples over the years. But this seven-segment display is quite a mechanical treat, and a unique way to flip through the digits.

With most mechanical displays, we’re used to seeing the state of each segment changed with some kind of actuator, like a solenoid or servo. [Shinsaku Hiura] decided on a sleeker design using a 3D-printed barrel carrying one cam for each segment. Each hinged segment is attached to an arm that acts as a follower, riding on its cam and flipping on or off in a set pattern. Which digit is displayed depends on the position of the barrel, which is controlled with a single servo and a pair of gears. It trades mechanical complexity for electrical simplicity and overall elegance, and as you can see from the video below, it’s pretty snappy.

We think the best part of this build is figuring out the shape of the cams. We wonder how they compare to the cam profiles in [Greg Zumwalt]’s mechanical display; it uses two separate discs with grooves, but the principle is pretty much the same.

Continue reading “A One-Servo Mechanical Seven-Segment Display”

The Tower, a discrete component circuit sculpture clock

A Breathtaking Circuit Sculpture Clock

The Tower, a discrete component circuit sculpture clockHere at Hackaday, we pride ourselves on bringing you the very freshest of hacks. But that doesn’t mean we catch all the good stuff the first time around, and occasionally we get a tip on an older project that really should have been covered the first time around. This remarkable circuit sculpture clock is a perfect example of one that almost got away.

[Gislain Benoit] creation is called “The Tower” for good reason: it’s built inside what amounts to a giant glass test tube. Inverted and adorned with MDF discs, the Pyrex tube stands 5 feet (1.5 meters) tall, and is absolutely stuffed with electronic goodness. There are more than 2,100 discrete components mounted inside on a helical framework of carefully bent wires, forming a vertical sculpture that displays the time on three separate pairs of seven-segment displays. All the diode-transitor logic circuits are built from discrete components; nary a chip was used, and to spice things up, [Gislain] used LEDs in place of regular diodes everywhere in the circuit. The result is a constant light show as the clock goes through its paces.

The whole thing looks amazing, and even the power supply at the base works in the overall presentation. The design is a bit of a departure from [Gislain]’s previous circuit sculpture clock, but it’s just as beautiful, and equally as mind-boggling in terms of construction difficulty.

Thanks to [Maarten] for the belated tip on this one.

Not Your Average Nixie Tube Clock

When it comes to Nixie clocks, we all pretty much know what to expect: a bunch of Nixies with some RGB LEDs underneath, a wooden case of some sort, and maybe some brass gears or fittings for that authentic steampunk look. It’s not that we don’t appreciate these builds, but the convergent designs can be a little much sometimes. Thankfully, this 60-tube Nixie clock bears that mold, and in a big way.

The key to [limpkin]’s design is the IN-9 Nixie, which is the long, skinny tube that used to show up as linear indicators; think bar graph displays on bench multimeters or the VU meters on mixing boards. [limpkin] realized that 60 on the tubes could be arranged radially to represent hours or minutes, and potentially so much more. The length of the segment that lights up in the IN-9 is controlled by the current through the tube, so [limpkin] designed a simple driver for each segment that takes a PWM signal as its input. The job of a 60-channel, 14-bit PWM controller fell to an FPGA. An ESP8266 — all the rage five years ago when he started the project — took care of timekeeping and control, as well as driving a more traditional clock display of four 7-segment LEDs in the center of the clock face.

The custom PCB lives in a CNC-machined MDF wood face; the IN-9s shine through slots in the face, while the seven-segment display shows through a thinned area. It looks pretty cool, and there are a lot of display options, like the audio spectrograph shown in the video below. We’re glad [limpkin] decided to share this one after all this time.

Continue reading “Not Your Average Nixie Tube Clock”

big LED flashlight

Own The Night With This Ludicrously Bright DIY Flashlight

If you’re a flashlight person, you know that there’s little you would do to get the brightest, most powerful, most ridiculous flashlight possible. You might even decide to build yourself a ludicrously powerful flashlight, like [Maciej Nowak] did.

If you choose the DIY route, be warned that it’s probably not going to be a simple process, at least if you follow [Maciej]’s lead. His flashlight is machined out of aluminum rounds, all turned down on the lathe to form the head of the flashlight. The head is made from three parts, each of which acts as a heat sink for the five 20-Watt CREE XHP70 LED modules. The LEDs are mounted with care to thermal considerations, and wired in series to DC-DC converter that provides the necessary 30 V using a battery pack made from four 21700 Li-ion cells. The electronics, which also includes a BMS for charging the battery and a MOSFET switching module, form a tidy package that fits into the aluminum handle.

The video below shows that the flashlight is remarkably bright, with a nice, even field with no hotspots. Given the 45-minute useful life and the three-hour recharge time, it might have been nice to make it so anywhere from one to five of the LEDs could be turned on at once. Some interesting effects might be had from switching the LEDs on sequentially, too.

Given the proclivities of our community, it’s no surprise that this is hardly the first powerful flashlight we’ve seen. This one broke the 100-Watt barrier with a single COB LED, while this ammo-can version sports an even higher light output. Neither of them looks much like a traditional flashlight, though, which is where [Maciej]’s build has the edge.

Continue reading “Own The Night With This Ludicrously Bright DIY Flashlight”