Reading Sensors With Scratch

Scratch, a graphical programming language developed by MIT’s Media Lab, is an excellent tool for teaching programming. [Daniel] created an Arduino Sensor Shield to interface with Scratch, allowing for real-world input to the language.

This board is a derivative of the Picoboard, which is designed for use with Scratch. Fortunately, the communication protocol was well documented, and [Daniel] used the same protocol to talk to the graphical programming environment. The shield includes resistance sensing, a light sensor, a sound sensor, and a sliding potentiometer.

The main goal was to create a board that could easily be built by DIY etching. This meant a one sided board with as few jumpers as possible. The final design, which can be downloaded and etched at home, is single sided and uses only one jumper. Detailed steps on testing the board are provided, which is very helpful for anyone trying to build their own.

This board is perfect for educational purposes, and thanks to [Daniel]’s optimizations, it can be built and tested at at home.

Automated PH Control

pH Controller

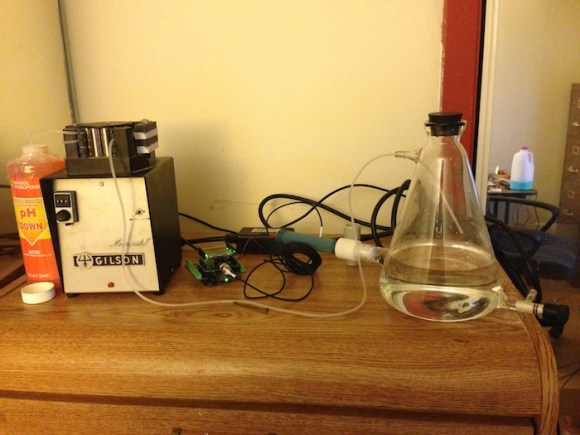
Controlling the pH level of a solution is usually a tedious task. Adding an acid or base to the solution will change the pH, but manually monitoring the levels and adding the correct amount isn’t fun. [Reza] rigged up an automated pH controller to keep a solution’s pH steady.

The build uses an Arduino with a LCD shield, screw terminal shields, and [Reza]’s own pH shield attached. A peristaltic pump is used to pump the pH down acid into the solution. This type of pump isolates the fluid from the pump parts, preventing contamination of the solution. The pump is controlled using a PowerSwitch Tail, allowing the Arduino to control the flow of fluid.

An Omega pH probe is used to read the pH level. [Reza]’s open source firmware has support for calibrating the probe to ensure accurate readings. Once it’s set up, the screen displays the pH level and the current state of the system. The pump is enabled when the pH rises out of the desired range.

After the break, check out a video walk through of the device.

Continue reading “Automated PH Control”

Hacking A Coffee Machine For A Better Brew

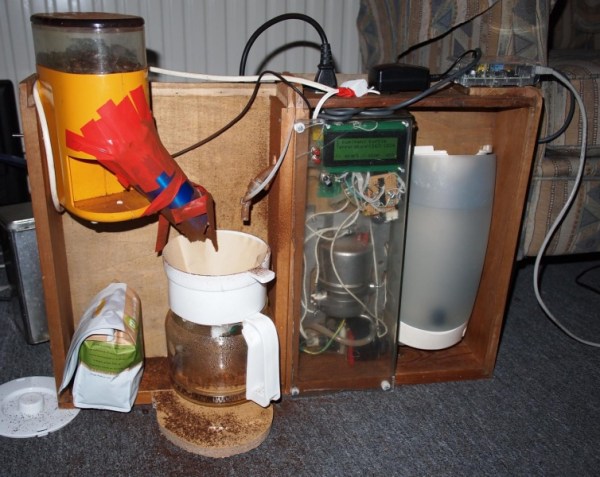
Senseo coffee makers are automated brewers that use coffee pods. [Ronald] had one, but wasn’t satisfied with the quality of the coffee it produced. His solution was to hack it apart and build his own automatic coffee machine with the innards.

The coffee brewing part of the system is controlled by an ATmega8. This reads the temperature using the NTC sensor from the original machine and actuates the various parts of the Senseo machine, and the added grinder. The timing was all done by trial and error, optimizing for the best cup of coffee.

Keeping with the trend of adding Raspberry Pis to everything, [Ronald] connected one to this build for remote control. He runs a very hacked version of LCD2USB which deals with communicating with the RPi. An Apache web server hosts a PHP script to provide a user interface, which runs a C program to tell the system to start brewing.

Unfortunately, [Ronald] didn’t give us a link to his web interface, so we can’t remotely brew him coffee. However he did provide all of the source for the project in his write up.

Minecraft For RPi Released

Minecraft for RPi

Mojang, the folks behind Minecraft, have officially released Minecraft: Pi Edition. This free version of the popular game is optimized to run on the Raspberry Pi hardware, and has an API that exposes the game’s internals to a variety of programming languages.

Mojang intends this release to be an educational tool for teaching and learning programming. Since the API provides instant feedback in the game, it could be an interesting way to make learning to code fun for people of all ages.

Having access to the API on a RPi also means that the game can be connected to the real world. For example, using Python and the RPi.GPIO, pins on the GPIO header can be used for output or input. This creates a slew of possible hacks that interface with the game.

Any ideas on what you’d like to do with Minecraft on a RPi? Let us know in the comments. Also, we coincidentally just printed a minecraft pick on our 3d printer. There’s a time lapse video of it after the break!

Continue reading “Minecraft For RPi Released”

Soldering Small Components For A Video DA

Video DA Board

Video distribution amplifiers are used to amplify a video signal and split it into multiple outputs so multiple displays can be driven. They are also used to correct the gain of an incoming video signal. [Andrew] was having trouble with the video signal from an interferometer, and found the issue was caused by a low output gain. His solution was to build his own video distribution amplifier.

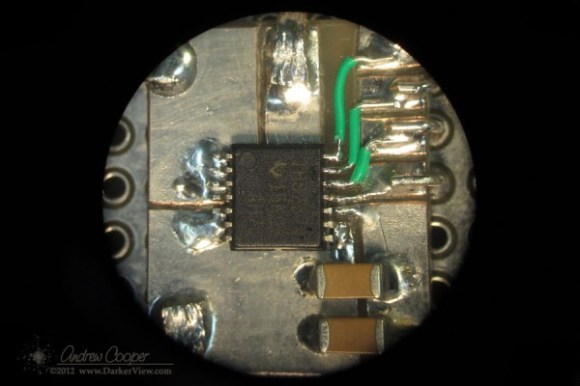
The THS7374 appeared to be the perfect chip for this application. It’s a four channel video amplifier IC, and only requires a few passive components to run. The only problem was the package: a 14 pin TSSOP with 0.65 mm pitch. Not fun to solder by hand, especially if you don’t have a PCB.

[Andrew]’s solution was to build his own breakout out of copper-clad board. He worked under a microscope and cut out a pattern for the part, then soldered 30 AWG wire to the pins to make connections. After cleaning off any copper that could cause a short, the board was working, and the video waveform looked great on an oscilloscope.

After testing, even more gain was needed. [Andrew] ended up cascading two of the amplifiers. This method of prototyping doesn’t look easy, but could be worth it when you need a single board.

Quantifying Cloudiness With OpenCV

What Can I see From the Shard?

The Shard is the tallest building in Western Europe, and has a great view of London.  The condos in the building are very expensive, and a tourist ride to the top of the building costs £24.95.

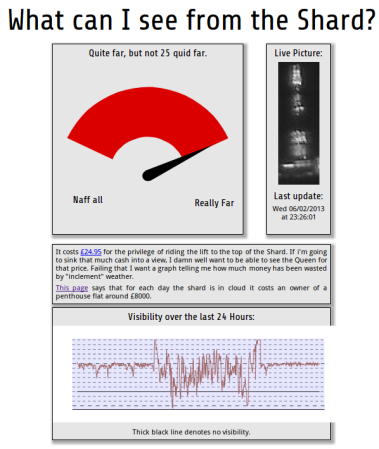
Since the value of the view is so high, [Willem] wanted to quantify the quality of the view at any given time. His solution is the Shard Rain Cam. This device combines a Logitech webcam with a Raspberry Pi to capture a time-lapse set of images. These images are fed to a Python script using OpenCV which quantifies the cloudiness.

[Willem] also had to build a weatherproof enclosure with a transparent window for the camera and RPi. ‘Clingfilm’, which is British for saran wrap, and mineral oil is used to improve the waterproofing of an IP54 rated enclosure.

The resulting data is displayed on www.whatcaniseefromtheshard.com, which provides an indication of whether or not the view is worth £24.95. All of the Python code is available, and is a good starting point for learning about image processing with OpenCV.

Rack Mount Home Automation With A RPi

RPi Home Automation

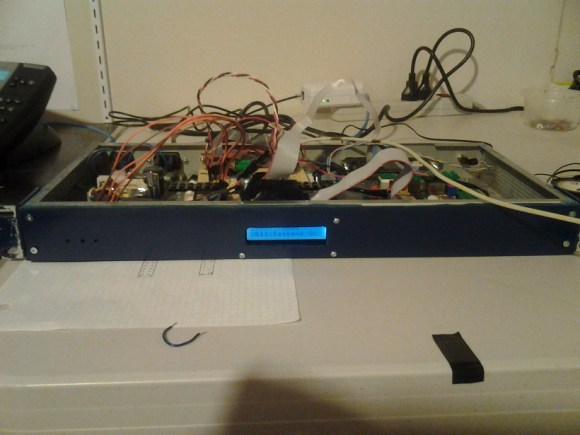
[Patrick] wanted to have centralized sensing and control over various parts of his house. His Raspberry Pi Home Automation System integrates a bunch of functionality in one rack mount package, salvaged from an old network switch.

The automation system is based on a Raspberry Pi running Arch Linux, which talks to an ATmega over SPI. We’ve seen this setup used many times before to add additional ports to the Raspberry Pi, but what makes [Patrick]’s build unique is the amount of control he’s built into the system.

The box controls outdoor lighting at sunset and sunrise, generates wakeup calls, controls IR cameras, and plays sounds based on events. It’s capable of monitoring sump pump water level, the state of a house alarm, and more. A custom REST API is used to interact with the device. This allows for programs on any platform to interface with his home, and acts as an API for his house.

[Patrick] provides a lot of details in his build log, which should be helpful to anyone looking to roll their own home automation system. The source is also provided.