Kentucky-Fried Induction Furnace

[John] and [Matthew] built an induction-heater based furnace and used it to make tasty molten aluminum cupcakes in the kitchen. Why induction heating? Because it’s energy efficient and doesn’t make smoke like a fuel-based furnace. Why melt aluminum in the kitchen? We’re guessing they did it just because they could. And of course a video, below the break, documents their first pour.

Now don’t be mislead by the partly low-tech approach being taken here. Despite being cast in a large KFC bucket, the mini-foundry is well put together, and the writeup of exactly how it was built is appreciated. The DIY induction heater is also serious business, and it’s being monitored for temperature and airflow across the case’s heatsinks. This is a darn good thing, because the combination of high voltage and high heat demands a bit of respect.

Anyway, we spent quite a while digging through [John]’s website. There’s a lot of good information to be had if you’re interested in induction heaters. Nonetheless, we’ll be doing our metal casting in the back yard.

Continue reading “Kentucky-Fried Induction Furnace”

The Halfbug

[Alex] posted up build details of his robot, Halfbot, on Tinkerlog. We’ve been big fans of his work ever since his Synchronizing Fireflies Instructable way back in the day. [Alex’s] work usually combines an unconventional idea with minimalistic design and precise execution, and Halfbot is no exception.

You’ll have to watch the video (embedded below the break) to fully appreciate the way it moves. The two big front legs alternate with the small front pads to make an always-stable tripod with the caster wheel at the back. It lifts itself up, moves a bit forward, and then rests itself down on the pads again while the legs get in position for the next step. It’s not going to win any speed tournaments, but it’s a great-looking gait.

The head unit also has two degrees of freedom, allowing it to scan around with its ultrasonic rangefinder unit, and adding a bit more personality to the whole affair.

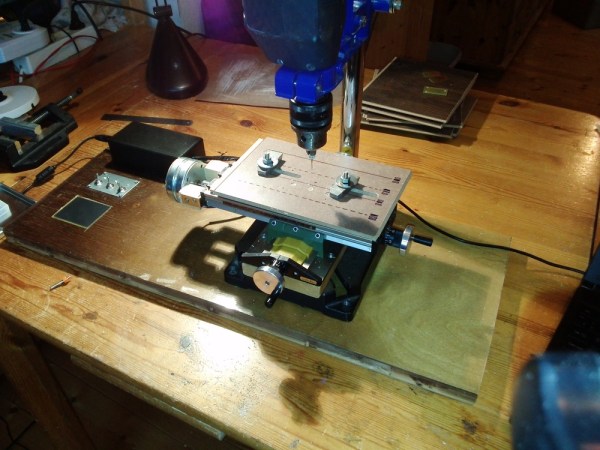
[Alex] mentions that he’d recently gotten a lathe and then a CNC mill. So it’s no surprise that he made all the parts from scratch just to give the machines a workout. We think he did a great job with the overall aesthetics, and in particular the battery pack.

We’re excited to see how [Alex] adds new behaviors as he develops the firmware. No pressure!

Continue reading “The Halfbug”

Darth Vader Magic 8 Ball

Imagine that your wife likes Darth Vader and wants help making important life choices. (Who doesn’t?) [bithead942] solves both problems in one project by gutting a Lego clock and making a talking animatronic Darth Vader 8-Ball-style oracle. Now his wife can simply press Darth’s head and her decision-making is handled by the Dark Side of the Force.

You can see the result in the video below the break.

The internals consist mainly of an Arduino Nano, a WTV020SD WAV playback chip, and some swanky servos. [bithead942] took a Dremel to the existing clock interior and found a way to make it all fit. The cloak helped, and the speaker was a good fit for the previous clock’s display.

Then he used IMDB and combed through the Star Wars movies to find Darth Vader quotes that kinda sound like the 8-Ball’s answers. As [bithead942] mentions Darth Vader doesn’t really dwell much on the positive, so finding instances where he says “yes” was hard work. This is in contrast to the original 8 Ball which has a brighter outlook than a cheerleader on Prozac, but there’s a reason they call it the Dark Side.

We really like the way the waist and arm servos work together to bring Darth to life. The added oak base with pull-out instruction card not only makes Darth look fancy, but prevents him from falling over when he leans forward to talk. All in all, a really nice build and well written-up with difficulties and their solutions.

Continue reading “Darth Vader Magic 8 Ball”

Chicken-powered Pendulum

Every once in a while we get sent a link that’s so cute that we just have to post it. For instance: this video from [Ludic Science]. It’s a wind-up chicken toy that kicks a pendulum back and forth. No more, no less.

But before you start screaming “NOT A HACK!” in the comments below, think for a second about what’s going on here. The bird has a spring inside, and a toothed wheel that is jammed and released by the movement of the bird’s foot (an escapement mechanism). This makes the whole apparatus very similar to a real pendulum clock.

Heck, the chick toy itself is pretty cool. It’s nose-heavy, so that under normal conditions it would tip forward. But when it’s wound up, tipping forward triggers the escapement and makes it hop, tipping it backward in the process and resetting the trigger. The top-heavy chicken is an inverted pendulum!

And have a look, if you will indulge, at the very nice low-tech way he creates the pivot: a bent piece of wire, run through a short aluminum tube, held in place by a couple of beads. Surely other pivots are lower-friction, but the advantage of using a rod and sleeve like this is that the pendulum motion is constrained to a plane so that it never misses the chicken’s feet.

Our only regret is that he misses (by that much) the obvious reference to a “naked chick” at the end of the video.

Continue reading “Chicken-powered Pendulum”

Laser-cut Album Released

In some alternate universe, where laser cutters and phonographs are more common than MP3 players, it makes a ton of sense to release laser-cutter files for your band’s new album (Translated). In this universe, it’s wacky and awesome.

The new EP from ASIC, alias [Patric] from Fablab Zürich, is out as PDF before it’s out in other forms of digital download, and the trailer video (embedded below the break) looks fantastic.

The release draws on this Instructable by Amanda Ghassaei to turn the music into PDFs suitable for feeding into a laser cutter, and we think it’s classy that she gets a shout-out on the label’s release page.  Everything else about the album will be released under a Creative Commons license to boot.

Continue reading “Laser-cut Album Released”

Harmonic Analyzer Mechanical Fourier Computer

If you’re into mechanical devices or Fourier series (or both!), you’ve got some serious YouTubing to do.

[The Engineer Guy] has posted up a series of four videos (Introduction, Synthesis, Analysis, and Operation) that demonstrate the operation and theory behind a 100-year-old machine that does Fourier analysis and synthesis with gears, cams, rocker-arms, and springs.

In Synthesis, [The Engineer Guy] explains how the machine creates an arbitrary waveform from its twenty Fourier components. In retrospect, if you’re up on your Fourier synthesis, it’s pretty obvious. Gears turn at precise ratios to each other to create the relative frequencies, and circles turning trace out sine or cosine waves easily enough. But the mechanical spring-weighted summation mechanism blew our mind, and watching the machine do its thing is mesmerizing.

In Analysis everything runs in reverse. [The Engineer Guy] sets some sample points — a square wave — into the machine and it spits out the Fourier coefficients. If you don’t have a good intuitive feel for the duality implied by Fourier analysis and synthesis, go through the video from 1:50 to 2:20 again. For good measure, [The Engineer Guy] then puts the resulting coefficient estimates back into the machine, and you get to watch a bunch of gears and springs churn out a pretty good square wave. Truly amazing.

The fact that the machine was designed by [Albert Michelson], of Michelson-Morley experiment fame, adds some star power. [The Engineer Guy] is selling a book documenting the machine, and his video about the book is probably worth your time as well. And if you still haven’t gotten enough sine-wavey goodness, watch the bonus track where he runs the machine in slow-mo: pure mechano-mathematical hotness!

Continue reading “Harmonic Analyzer Mechanical Fourier Computer”

$2 FM Transmitter For Raspberry Pi

We love re-purposed consumer gear. This project uses a cheap, discontinued cellphone gadget to create a Raspberry Pi controlled FM radio transmitter.

The Sony-Ericsson MMR-70 radio transmitter apparently used to connect to a cell phone and broadcast music. But the Walkman cellphones in question are a little bit old in the tooth, so one can buy the transmitter units for cheap on the resale market. What makes the transmitters even more interesting is that you can activate and deactivate the radio, change frequency or output power, and even send RDS station and song information.

It turns out (link in German) that the radios have an AVR ATMega32 microcontroller and a NS73 radio transmitter module, which can be entirely controlled over I2C. (Schematic here as PDF.) The units also have handy test points strewn all around. Once the test points were mapped out, one could completely ignore the on-board AVR microcontroller and control the FM transmitter module directly using the Raspberry Pi’s I2C outputs.

And that’s where [Manawyrm] stepped in. She wrote an I2C daemon for the Raspberry Pi that lets you control the FM transmitter via simple commands. All you have to do is solder up a bunch of test points, install [Manawyrm]’s software, write a batch script, and you’re on the air. For instance, this makes building a FM radio retransmitter for online streamed audio a one-day project. You can see his working example on youtube. Of course, you’ll want a web-based remote control interface to go with that.

If you’re interested in hacking along, and don’t have a Raspberry Pi application in mind, Sparkfun used to sell the NS73 radio transmitter so you can find lots of good information about the chip. We’d love to see a stand-alone broadcasting gizmo that actually utilizes the onboard AVR chip, but our hats are off to [Manawyrm] for making the Raspberry Pi version so accessible.