ESP8266 As A Networked MP3 Decoder

Support libraries, good application notes, and worked examples from a manufacturer can really help speed us on our way in making cool stuff with new parts. Espressif Systems has been doing a good job with their ESP8266 product (of course, it doesn’t hurt that the thing makes a sub-$5 IOT device a reality). Only recently, though, have they started publishing completed, complex application examples. This demo, a networked MP3 webradio player, just popped up in Github, written by the man better known to us as Sprite_tm. We can’t wait to see more.

The MP3 decoder itself is a port of the MAD MP3 library, adapted for smaller amounts of SRAM and ported to the ESP8266. With a couple external parts, you can make an internet-connected device that you can point to any Icecast MP3 stream, for instance, and it’ll decode and play the resulting audio.

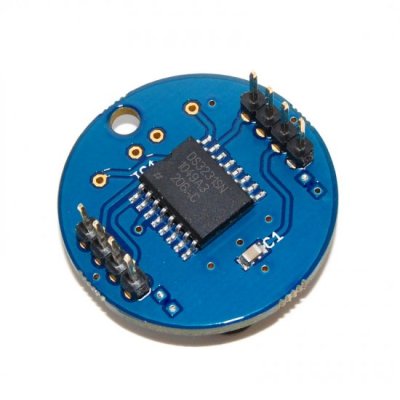
What external parts, you ask? First is something to do the digital-to-analog conversion. The application, as written, is build for an ES9023 DAC, but basically anything that speaks I2S should be workable with only a little bit of datasheet-poking and head-scratching. Of course, you could get rid of the nice-sounding DAC chip and output 5-bit PWM directly from the ESP8266, but aside from being a nice quick demo, it’s going to sound like crap.

The other suggested external IC is an SPI RAM chip to allow for buffering of the incoming MP3 file. WiFi — and TCP networks in general — being what they are, you’re going to want to buffer the MP3 files to prevent glitching. As with the dedicated DAC, you could get away without it (and there are defines in the “playerconfig.h” file to do so) but you’ll probably regret it.

In sum, an ESP8266 chip, a cheap I2S DAC, and some external RAM and you’ve got a webradio player. OK, maybe we’d also add an amplifier chip, power supply, and a speaker. Hmmm…. and a display? Or leave it all configurable over WiFi? Point is, it’s a great worked code example, and a neat DIY device to show your friends.

The downsides? So far, only the mono version of the libMAD decoder / synth has been ported over to ESP8266. The github link is begging for a pull request, the unported code is just sitting there, and we think that someone should take up the task.

Other Resources

In our search for other code examples for the ESP8266, we stumbled on three repositories that appear to be official Espressif repositories on Github: espressif, EspressifSystems, and EspressifApp (for mobile apps that connect to the ESP8266). The official “Low Power Voltage Measurement” example looks like a great place to start, and it uses the current version of the SDK and toolchain.

There’s also an active forum, with their own community Github repository, with a few “Hello World” examples and a nice walkthrough of the toolchain.

And of course, we’ve reported on a few in the past. This application keeps track of battery levels, for instance. If you’ve got the time, have a look at all the posts tagged ESP8266 here on Hackaday.

You couldn’t possibly want more resources for getting started with your ESP8266 project. Oh wait, you want Arduino IDE support?

Thanks [Sprite_tm] for the tip.

Embed With Elliot: Multiplexing SPI Uses Few Pins

[Ralph Doncaster], aka Nerdralph, seems to be absolutely driven to see how few resources he can use on a microcontroller to get the job done. In this post on his blog, [Ralph] writes some custom bit-banged SPI code to cut the number of SPI lines necessary to drive an nRF24L01+ radio module from four down to two. That really helps if you’re using a micro with only six free pins, like an ATtiny85.

If you’re going to say, “why don’t you just buy a bigger microcontroller?”, you’re missing the point. This exercise strikes us as optimization for optimization’s sake and a dirty hack, both of which are points in its favor.  There are also a couple of techniques here for your mental toolbox. We thought it was interesting enough to look at in depth.

Continue reading “Embed With Elliot: Multiplexing SPI Uses Few Pins”

Model House Models House, Vice-Versa

[Eric Tsai] is on a home-automation rampage. Not content with the usual smartphone-based GUIs, [Eric] built a cardboard model house that models his house. Open the garage door, and the model house’s garage door opens. Open the real front door, and a tiny servo motor opens the cardboard front door.

The model house also comes with a power meter that represents his current power usage, which is certainly useful for figuring out if something electronic has gone grossly wrong. You should watch the video (found after the break) all the way through, here’s the spot where he turns on an electric leaf blower. Despite a little big of lag that’s pretty cool!

But the system doesn’t stop there. Since he can control the garage door and some lights remotely via WiFi, the next logical step is to add a couple of buttons so that the model house can control the real house.

We’ve covered [Eric]’s home before. He set up simple, Arduino-based sensor packages all around his house, connected them together through the pub/sub framework MQTT and added in the open-source OpenHAB software interface. The door sensors connect to a hacked Wink hub. From whether or not his dog is barking to whether his laundry is done, [Eric]’s system knows it all.

Continue reading “Model House Models House, Vice-Versa”

Mimimalist Arduino Gaming Platform

A pretty color LCD screen, an Arduino, a buzzer and a joystick is all you need for a minimalist gaming console for under $20. At least, that’s all [João Vilaça] needed to get this sweet version of Tetris up and running. He’s working on Breakout right now. His Breakout looks even better. See the postscript below for details.

It’s a testament to the current state of the hardware hacking scene that [João] could put this device together in an afternoon for so cheap, presumably after waiting a while for shipments from China. The 320×240 SPI color TFT LCD screen used to cost twice as much as this whole project did. And wiring it up is a simple matter of connecting this pin to that pin. Almost child’s play.

Equally impressive is the state of open source software. A TFT library from Seeed Studios makes the screen interface a piece of cake. [João] wrote his own sound and joystick code, and of course the Tetris gameplay itself, but it’d be much more than a few weeks’ work without standing on the shoulders of giants. Check out [João]’s Github for the project code and stick with us after the break for a demo video and some of our other favorite Arduino gaming hacks.

Continue reading “Mimimalist Arduino Gaming Platform”

Tiny Robot Jazz

Microcontroller-based projects don’t have to be fancy to be fantastic. Case in point: [r0d0t]’s “Musicomatic: the random jazz machine“. Clever programming and a nice case can transform a few servos and a microcontroller into something delightful.

musicomat_schematicsHardware-wise, there’s really nothing to see here; a speaker and some servos are hooked up to an ATmega328. We think it’s cute to have the microcontroller control its own power supply through a relay, but honestly a MOSFET in place of the relay or better still using the AVR’s shutdown sleep mode would be the way to go.

Nope, where this project shines is the programming. Technically, it might make some of you cringe — full of blocking delays and other coding “taboos”. But none of that matters, because [r0d0t] put his work in where it counts: the music. You simply must hear it for yourself in the clip after the break.

The basis of making music that humans like is rhythm, so [r0d0t] doesn’t leave this entirely to chance. The array “rhythms” has seven beat patterns that get randomly selected. The other thing humans like is predictability and repetition, so choruses and “improvs” repeat as well. All of the random notes are constrained to the pentatonic scale, which keeps it from ever sounding too bad. (The secret sauce of Kenny G.)

In short, [r0d0t] packs a lot of basic music theory into a very basic device, and comes up with something transcendent. We’re a bit reminded of the Yellow Drum Machine robot, and that’s high praise. Both projects are testaments to building something simple and then investing the time and effort into the code to make the project awesome.

For another slice of [r0d0t]’s excellent minimalist pie, check out his take on the classic Snake game: Twisted Snake.

Continue reading “Tiny Robot Jazz”

Foldable Quadrotor Is Origamilicious

A team at the École Polytechnique Fédéral de Lausanne has developed and built a quadcopter with arms that unfold just before takeoff. The idea is that you can fold the device back up when you’re done with it, making it possible to store a bunch more of the quads in your backpack for instance.

The unfolding mechanism relies on the torque of the rotors spinning up to swing the arms into place. Once fully extended, a spring-loaded flap folds up, catches on some magnets, and forms an L-shaped structure that won’t re-fold without human intervention.

quadcopter_animUnder normal flying conditions, quads have a two left-handed propellers and two right-handed ones and the motors spin in opposite directions. In order to do the unfolding, two of the motors need to run essentially in reverse until the frame has clicked into place. They use a sensor (Hall effect?) to detect the arm locking, and then the rotors quickly switch back to their normal rotation before the quad hits the floor. In the video, they demonstrate that they’ve got this so well tuned that they can throw it up into the air to launch. Wow.

Everything’s still in prototype phase, and one of the next goals is “strengthening the arms so they can withstand crashes”, so don’t expect to see these in your local hobby store too soon. In the mean time, you’ll be able to see them in the flesh if you head up to the IEEE International Conference on Robotics and Automation in Seattle that started today and runs through Friday. If anyone goes, take more video and post in the comments?

Continue reading “Foldable Quadrotor Is Origamilicious”

Covert Remote Protest Transmitters

As a piece of protest art, “Covert Remote Protest Transmitters” ticks all the boxes. An outdoor covert projector that displayed anti-globalization messages at a G20 summit is protest. To disguise it inside a surveillance camera body housing — sticking it to the man from inside one of his own tools — is art. And a nice hack.

However you feel about the politics of globalization (and frankly, we’re stoked to be able to get cheap tech from anywhere in the world) the open-source DIY guidebook to building the rig (PDF) makes up for it all.

They installed the camera/projector long before the summit, where it sat dormant on a wall. A cell phone inside turned on the projector’s light with each ring because they attached a relay to the cell phone’s speaker circuit. In the instructions there’s an example of using a light-dependent resistor (CdS cell) to do the same thing, relying on the phone’s backlight functionality instead. There are a lot of ways to go here.

The optics consist of a couple of lenses aligned by trial and error, then fixed in place to a balsa wood frame with hot glue. A big fat Cree LED and driver provide the photons.

The video documentation of the piece is great. It’s mostly the news media reacting to the art piece as a “security breach”. A security breach would be a gun or a bomb. This was an overhead projector displaying messages that were out of the organizers’ control. Equating security with the supression of dissent is double-plus-ungood. Touché, CRPT.

Anyway, while you’re getting prepped for your next protest, have a look at the Image Fulgurator.