The Trials And Tribulations Of E-Bike Drivetrain Design

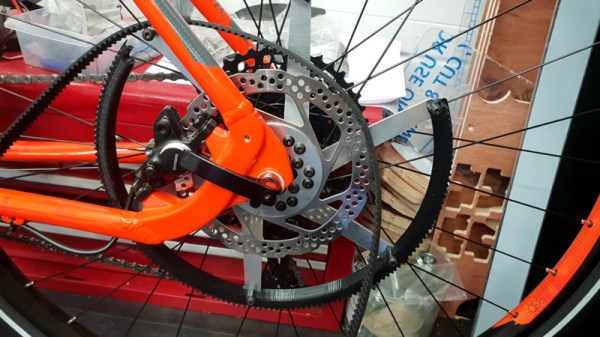
[Tom Stanton] is well-regarded in the maker community, and has put much effort in over the years on a variety of electric vehicle builds. In the process of upgrading his e-bike last year, he ran into some issues with the main drive pulley. Rather than rely on guesswork, he threw engineering at the problem.

Static weight tests were carried out in combination with FEA to determine the root cause of the problem.

The problem concerned the mounting bolts on the pulley’s hub, which would pull out under high torque. [Tom’s] initial finite element simulations had suggested the design was sound, but reality was proving otherwise. After further analysis and testing, [Tom] determined that his analysis hadn’t properly simulated the bolt pull-out condition. With this corrected in the software, it was readily apparent that there simply wasn’t enough material around the bolt holes to hold the torque load.

With the simulation now more closely agreeing with reality, [Tom] was able to correct the design. New parts were created with a strengthened mounting section, and the pulley was successfully able to deal with the loads in service.

It’s a great example of using engineering simulation tools to solve a problem quickly, rather than simply guessing and hoping things will hold up. We’ve seen [Tom]’s work before, too — like this fun backyard trebuchet build. Video after the break.

Continue reading “The Trials And Tribulations Of E-Bike Drivetrain Design”

NES Gets A Slick Acrylic Casemod

Those alive during the 1990s will remember the clear or “crystal” versions of various home consoles. Made with the usual injection molding processes, they usually came out somewhere closer to a smoky translucency and didn’t reveal much of the insides. [BitHead1000] likes to do things right though, and has busted out an awesome acrylic case mod for his NES.

The build starts with the disassembly of the original console, naturally, and the RF shielding is discarded in order to provide an unobstructed view of the internals. The acrylic case is then built up piece by piece, using the original case as a template. Flame polishing is used to treat the edges, and everything is stuck together using what appears to be acrylic cement. For a nice finishing touch, the cartridge door gets a frosted Nintendo logo, thanks to some careful work in the sandblasting booth.

The final product looks stunning, and the transparent case lends itself excellently to edge-lighting thanks to a few LEDs. We’ve seen [BitHead1000’s] work before, with the stunning flamethrowing N64 build. Video after the break.

Hacked Hoverboards Become Potent RC Tank

Hoverboards were the darling, or perhaps the scourge, of the last few years, Banned by vigilant airlines, they’re a great way to break an ankle or set your house on fire. However, they’re also a treasure trove of valuable parts for hacking, as [Aaron] ably demonstrates with his RC tank build.

[Aaron’s] build utilizes not only the hoverboard’s torquey hub motors but also the original control hardware, too. This is a cinch to repurpose, thanks to the custom firmware for the original controller developed by [Lucy Fauth], whose work we have featured before.

The hacked parts are crammed into a chassis built with aluminum extrusion, and the final result is a nimble and robust tank with one motor per wheel. This enables some exciting driving dynamics. Additionally, with all the torque available, [Aaron] is even able to ride the tank like an electric skateboard.

It’s a fun build that shows off the raw power available from the hoverboard hardware. We fully expect to see these parts remain popular in the hacking scene in the coming years. Video after the break.

Continue reading “Hacked Hoverboards Become Potent RC Tank”

This Rubik’s Cube Lamp Has Some Serious Retro Style

The reassembly is handled with super glue and acrylic to diffuse the light.

There’s an easy way to signal to your friends and family that you’re a successful, urbane member of society – by decorating your home with tasteful references to popular culture. A classy oil painting of Yoda or a framed Tarantino movie poster is a great way to go. Alternatively, consider building yourself a swanky Rubik’s Cube lamp.

The build starts by disassembling the cube, as if you were going to cheat and reassemble it in the correct order. Instead, the cube is then gutted to make room for electronics. Inside, a ping pong ball covered in LEDs is installed, along with lithium batteries and a power board cribbed from a USB power bank. The whole assembly is laced back together with glue and frosted acrylic which acts as an retro-styled grid-like diffuser. The power button is even sneakily hidden in one of the squares!

It’s a sweet retro build that would make an excellent addition to any hip lounge room. We’re a big fan of self-contained glowing cubes here at Hackaday – we’ve covered nuclear powered and infinity designs before. Video after the break.

Continue reading “This Rubik’s Cube Lamp Has Some Serious Retro Style”

LED Triangle Looks Cool; Someone Tell Alt-J

For the average person, decorating at home is as simple as a few choice picks from the IKEA catalogue. Makers are a different breed, though – preferring something customized and glowing. This LED triangle is a particularly great example of the form, and the latest benchmark for excellence to come out of [scanlime’s] workshop.

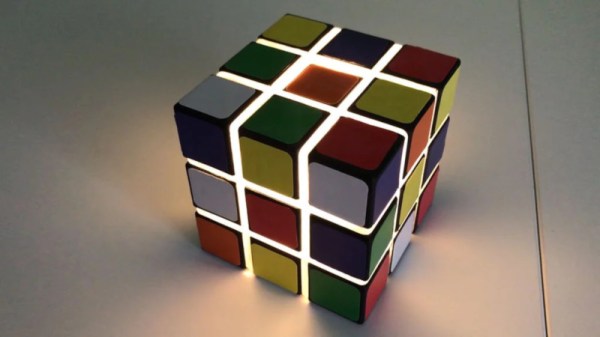
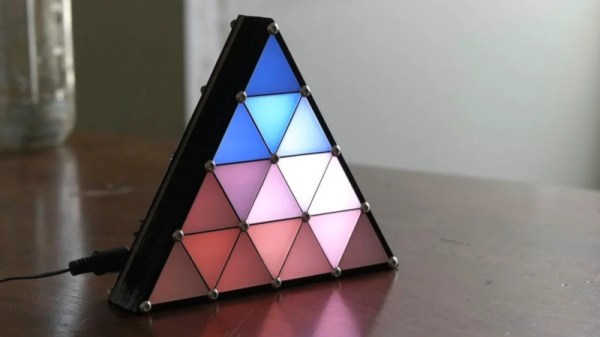
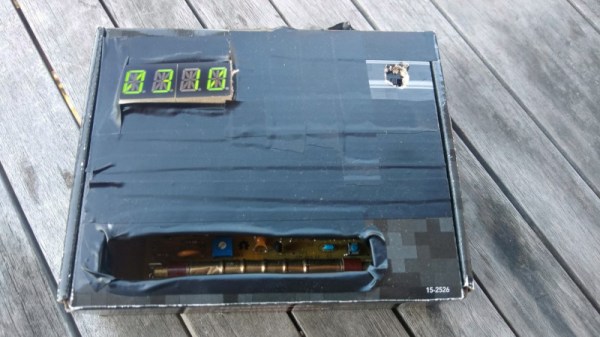
Hailing from the recent past of 2014, it’s a design that is well-suited to the average makerspace. Built out of layers of lasercut chipboard and acrylic, it creates 16 seperate pockets for LEDs with very little bleed in between. A black bezel is fitted to complete the effect, along with frosted white acrylic diffusers for each triangle element.

The build uses WS2812B LEDs, controlled by [scanlime’s] Fadecandy controller. Fadecandy is a combination of hardware and software designed specifically for LED art projects, providing high-quality control of dithering and other effects to help make glowables prettier. It tends to turn up wherever head-turning visualizations are needed. In this application, it does a great job, with the pseudo-random flickering of the pixels being almost hypnotizing in nature.

It’s a great cyberpunk art piece, and we’d love to have one on our coffee table at home. If you’re sick of LED cubes, triangle-based builds may reignite your passion. Video after the break.

Continue reading “LED Triangle Looks Cool; Someone Tell Alt-J”

Easy Direction Finding Thanks To Quad SDRs

Direction finding has long been a pastime of the ham radio community. Fox hunts and other DF events have entertained many, as they swept their antennas hunting for a transmitter. As with rock and roll and flared pants, time changes all things, and [Corrosive] has been experimenting with a very modern way to go about direction finding with SDR.

The work is made possible through the use of Kerberos SDR, a device which is essentially four RTL-SDR radios operating in unison. By fitting these with the appropriate antennas and running the right calibrations, the hardware can be used as a powerful direction finding tool.

[Corrosive] demonstrates this ably, by fitting the rig to his car and driving around on the hunt for a transmitter. Hunting for a P25 control station, he demonstrates the configuration of the hardware to help find the FM modulated signal. The software part of the equation is integrated with GPS maps, so one can follow the bearing towards the signal source while data is collected. Over time, the software takes more samples until it builds up an expected location for the transmitter.

The setup is remarkably effective, and largely does all of the heavy lifting, leaving the user to simply handle driving the car. The heat mapping feature is also incredibly cool, and would look great in your next spy movie. We’ve featured Kerberos SDR before, and fully expect to see more great work on this platform. Video after the break.

Continue reading “Easy Direction Finding Thanks To Quad SDRs”

A Cheap And Cheerful Geiger Counter Build

Hackers often have broad interests across the sciences, of which nuclear topics are no exception. The Geiger counter remains a popular build, and could be a handy tool to have in a time of rising tensions between nuclear powers. [Leonora Tindall] had tinkered with basic units, but wanted a better idea of actual radiation levels in her area. Thus began the build!

The project began by leveraging the Geiger counter kit from the Mighty Ohm. [Leonora] had built one of these successfully, but wished for a visual readout to supplement the foreboding ticking noises from the device. This was achieved by installing a Metro Mini microcontroller along with a 4-character, 14-segment alphanumeric display. This, along with the cardboard enclosure, makes the build look like a prop from an 80s hacker movie. Very fitting for the Cold War-era technology at work.

By using a pre-built kit and upgrading it with display hardware, [Leonora] now has readings at a glance without having to reinvent the wheel and design her own board from scratch. Of course, if you’re thinking of taking on a more complex build, you might consider a scintillation detector instead.