SoundCube: A Companion Cube That Can Talk

sound_companionCube

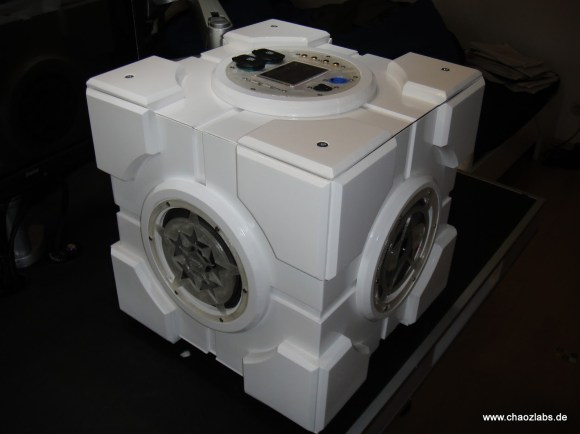
The Enrichment Center likely disapproves of the SoundCube: a portal music box in the form of a Portal Companion Cube. [Andreas] finished this project a couple of years ago, but we’re glad he’s finally had time to give a rundown on the details at his blog.

The build is primarily a modified speaker box cube—constructed out of what appears to be MDF—with four Alpine SXE-1725S speakers placed at the center of the middle faces. The faces were routed out to resembled the Companion Cube, while the electronics mount and the speaker grills were 3d printed. Inside is a homemade amplifier built around an Arduino Mega, with a TDA7560 quad bridge amplifier, a TDA7318 audio processor, a Belkin bluetooth receiver, and a 3.5″ touchscreen for volume control and for input selections.

Two 12v 7.2Ah lead-acid batteries keep the cube functional for an entire weekend of partying, but probably add a few pounds to the already hefty MDF construction. Check out [Andreas’s] blog for more pictures and his GitHub for all the necessary code.

3D Printed RGB LED Bracelet

3dprintedrgbbraclet

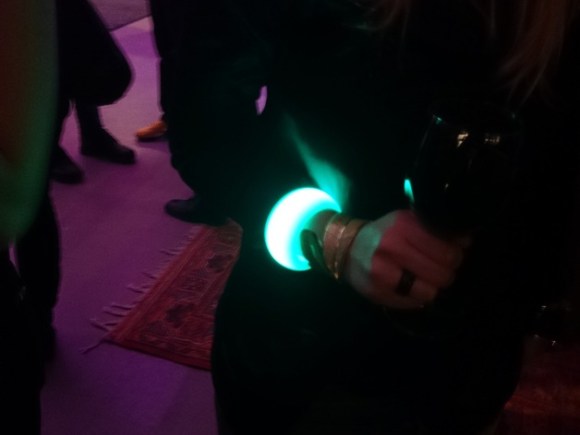
[Marcus’s] 3D-printed LED bracelet has moved through a number of revisions recently, but each iteration is impressive in both simplicity and functionality. Inspired to experiment with his print of [nervoussystem’s] Diagrid Bracelet, [Marcus] took the opportunity to add some LEDs with his first build, which combined a strip of RGB LEDs, a small battery, and an Adafruit Trinket microcontroller.

A second build soon followed, which overhauled the bracelet’s design into a more solid form and managed to double the amount of LEDs by upgrading to a different strip. The bracelet is currently in its third revision, cycling through the spectrum for around 3.5 hours on a single charge. This build also sports a 3-axis accelerometer: when the wearer shakes the bracelet, the colors skip around. If shaken long enough, the bracelet will enter a dazzling flurry of color flickering. Stick around after the break for a few demonstration videos. If you want to print your own, head over to [Marcus’s] Thingiverse file.

Continue reading “3D Printed RGB LED Bracelet”

Open Bitcoin ATM

openBitcoinAtm

If there’s one thing Bitcoins can benefit from, it’s easier accessibility for first-time users. The process can be a bit daunting if you’re new to cryptocurrency, but [mayosmith] is developing an open Bitcoin ATM to help get coins in the hands of the masses. There are already some Bitcoin dispensers out there. The Lamassu is around 5k a pop, and then there’s always the option of low-tech Condom Vending Machine conversions.

[mayosmith’s] build is still in the proof-of-concept phase, but has some powerful functionality underway. The box is made from acrylic with a front plate of 12″x12″ aluminum sheet metal, held on by 2 aluminum angles and some bolts. Slots were carved out of the aluminum sheet for the thermal printer and for bill acceptor—the comments identify it as an Apex 7000. Inside is an Arduino with an SD Shield attached. Dollars inserted into the acceptor trigger the Arduino to spit out a previously-generated QR code for some coins via the thermal printer, though all values are pre-determined at the time of creation and stored sequentially on the SD card. Stick around for a quick video below, and check out the official page for more information: http://openbitcoinatm.org

Continue reading “Open Bitcoin ATM”

HTPC For Lunch

xbmcLunchbox

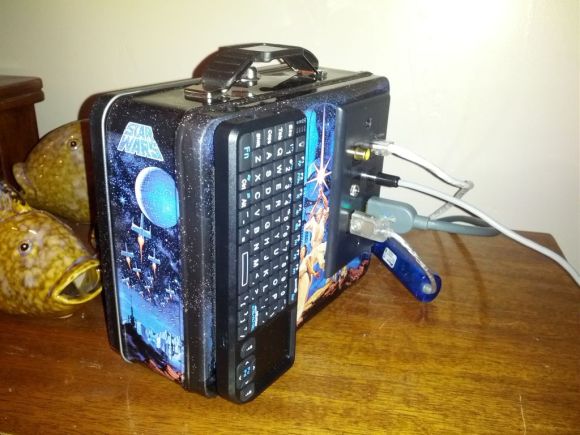
If you’re hungry for a portable HTPC (Home Theatre PC) solution, maybe packing everything into a stylish mini lunch box is the way to go. [tomhung] wanted a quick and easy way to drag his media around while he’s away from home, but in an intentionally portable, self-contained enclosure, and the Star Wars lunch box provided plenty of space for the necessary guts.

Inside, he’s stacked the RasPi and a USB hub on top of one another. Each is mounted to its own platform made out of plastic DVD covers, and kept separate by standoffs carved from what appear to be the casings of inexpensive plastic pens. The stack also includes a 250GB 2.5″ HD, which [tomhung] simply attached with velcro for easy removal. The cables underwent minor surgery to keep the rat’s nest under control, and although the interior may still cause cable management enthusiasts to cringe, the exterior of the box cleans up well for its evening out. [tomhung] fit a simple 6-port keystone wall plate to the face of the lunch box to provide simple connections for all the important plugs.

40-Node Raspi Cluster

Multi-node RasPi clusters seem to be a rite of passage these days for hackers working with distributed computing. [Dave’s] 40-node cluster is the latest of the super-Pi creations, and while it’s not the biggest we’ve featured here, it may be the sleekest.

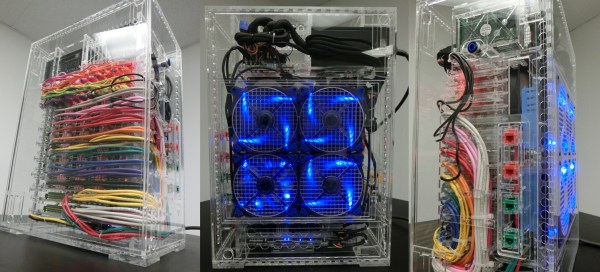
The goal of this project—aside from the obvious desire to test distributed software—was to keep the entire package below the size of a full tower desktop. [Dave’s] design packs the Pi’s in groups of 4 across ten individual cards that easily slide out for access. Each is wired (through beautiful cable management, we must say) to one of the 2 24-port switches at the bottom of the case. The build uses an ATX power supply up top that feeds into individual power for the Pi’s and everything else, including his HD array—5 1TB HD’s, expandable to 12—a wireless router, and a hefty fan assembly.

Perhaps the greatest achievement is the custom acrylic case, which [Dave] lasered out at the Dallas Makerspace (we featured it here last month). Each panel slides off with the press of a button, and the front/back panels provide convenient access to the internal network via some jacks. If you’ve ever been remotely curious about a build like this one, you should cruise over to [Dave’s] page immediately: it’s one of the most meticulously well-documented projects we’ve seen in a long time. Videos after the break.

Continue reading “40-Node Raspi Cluster”

Hack A Mag-Lite To Be Rechargeable

rechargeMaglite

Most tools sport rechargeable batteries these days, but there’s no need to toss that old flashlight: just replace the cells with rechargable ones!

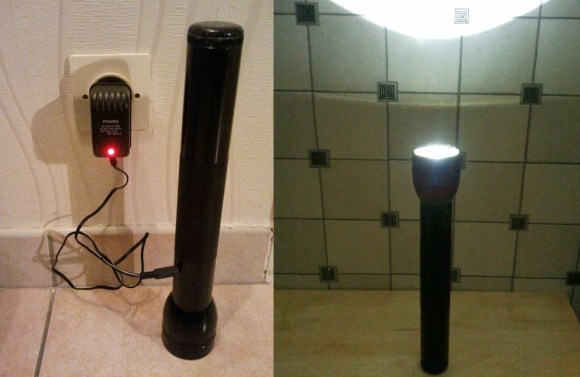
[monjnoux] had a 3-cell D-sized MagLite lying around—though you could reproduce this hack with a 2 to 5 cell model—which he emptied of its regular batteries and replaced with some 11000mAh NiMHs from eBay. The original bulb was also tossed in favor of a 140-lumens LED.

After disassembling the flashlight, [monjnoux] set about installing the new parts. He replaced the original bulb with the LED, soldering it into place and securing it with hot glue. He then drilled a hole in the body of the flashlight for a DC socket. The charger he purchased is adaptive, detecting the number of cells and adjusting its voltage accordingly. It had the wrong connector, though, so [monjnoux] simply chopped off the end and soldered on a new one. For a hack that comes in at 40€, it’s definitely a cheaper alternative to the official rechargeable model: which costs 80€. And with a duration of 7 hours (though it’s unclear whether this number reflects continuous use), it likely outlasts the official model, as well.

Single Digit Numitron Clock

numitronClock

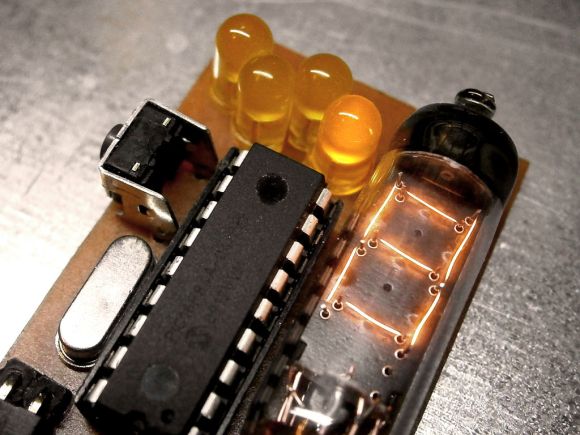
The above may look like a Nixie tube, but it’s a Numitron: the Nixie’s lower-voltage friend, and part of [pinomelean’s] single-digit Numitron clock. If you’re unfamiliar with Numitrons, we suggest you take a look at our post from a few years ago, which includes a helpful tutorial to catch you up to speed.

[pinomelean] built this little device to capture a steampunk-ish look on the cheap for a clock small enough to fit on a wrist. The build uses a PIC16F84A uC and a 4MHz crystal on a custom PCB. A small button on the side lets the wearer set the time. Similar to the Vibrating Timepiece from last month, the Numitron clock isn’t perfect, though it is more accurate: gaining only one minute every 3 days.

Check out the video after the break to see it being set and keeping track of the time. It may take a moment to understand how to read the clock, though. Each of the four LEDs indicates where the number in the Numitron tube belongs. The LEDs light in sequence from left to right, displaying the clock one digit at a time.

Continue reading “Single Digit Numitron Clock”