3D Printed Forge For Recycling

If you own a CNC and have kept tabs on metal prices these past few years (honestly months), you might shed a small tear as you watch chips fly off your work and into the trash. With a sigh, these flecks and pieces are consigned to be the cost of machining a part. Thankfully, the fine folks at [ActionBox] have been working on a 3d printed plaster forge for recycling their metal scraps.

The team ordered some graphite crucibles of a few sizes from a large online bookstore and started 3D printing some molds for crucible holders. They started with a smaller version to try the method. While the walls were too thin in that initial version, the approach was proven. With slightly thicker walls, the medium-sized version worked much better. The goal of the forge was to smelt copper as they had a lot of thick copper wire lying around. Armed with several propane torches, they started melting aluminum and brass, which worked reasonably well. However, the melting point of copper continued to elude them (1984°F or 1085°C).  To counter this, the [ActionBox] team bought some new torches that provided significantly higher BTU output, while still fitting the holes in the mold. This did the trick!

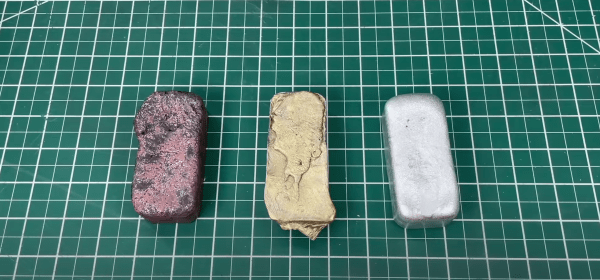
The mold to accommodate the large crucible was massive and printed in four sections. The team did melt copper successfully and had four ingots to show off. We want to stress how dangerous molten copper and other metals are, particularly regarding things you might not realize have moisture soaked up inside. Proper PPE is essential to use these things without getting hurt. [ActionBox] has some helpful pointers in that area, but they admit they are relatively new to forging and casting themselves. Perhaps version two can incorporate a flip lid for added safety.

Video after the break.
Continue reading “3D Printed Forge For Recycling”

Chris playing his tiny pinball machine

Tiny Pinball Is As Cute As Pi

Pinball machines are large, complex, and heavy boxes of joy and delight. However, when you don’t have the money or space for one, you have to make your own mini Raspberry Pi-powered one.

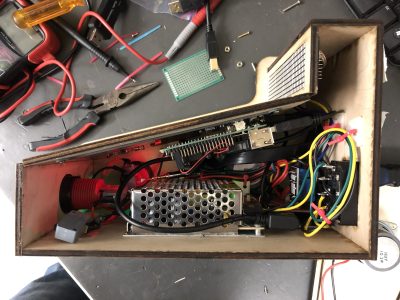
With access to a local makerspace and a bit of extra free time, [Chris Dalke] had plans to capture the flavor of a full-scale pinball machine in a small package. Laser-cut Baltic birch forms the enclosure, and a screen makes up the playing field rather than a physical ball. An Arduino Uno handles the three buttons, the four LED matrixes, and a solenoid for haptic feedback, communicating

with the Pi via serial. Unfortunately, even with a relatively decent

volume inside, it is still a tight squeeze.

Rather than use an off-the-shelf pinball game, [Chris] wrote his own in C using raylib and raygui, two handy libraries that can be included in the project quickly. SQLLite3 writes high scores out to disk. All in all, an inspiring project that has a very high level of polish.

If you’re looking for a tiny pinball machine but want more of the classic pinball feel, why not look at this scale pinball machine?

Continue reading “Tiny Pinball Is As Cute As Pi”

Now The V In RISC-V Stands For VRoom

Hundreds of variations of open-source CPUs written in an HDL seem to float around the internet these days (and that’s a great thing). Many are RISC-V, an open-source instruction set (ISA), and are small toy processors useful for learning and small tasks. However, if you’re [Paul Campbell], you go for a high-end super-scalar, out-of-order, speculative, 8 IPC monster of a RISC-V CPU known as VRoom!.

That might seem a bit like word soup to the uninitiated in the processor design world (which is admittedly relatively small) but what makes this different from VexRISC is the scale and complexity. Rather than executing one instruction at a time sequentially, it executes multiple instructions, completing them concurrently in whatever order it can handle. The VexRISC chip is a good 32-bit modular design that can run Linux. It pulls a solid 1.57 DMIPS/MHz with everything turned on. The VRoom already clocks in at mighty 6.5 DMIPS/MHz, with more performance gains. It peaks at 8 instructions every clock cycle with a dual register file and a clever committing system to keep up.

VRoom is written in System Verilog to leverage Verilator (a handy linting and simulation framework), and while there is some C that generates different files, we’d wager it is pretty run-of-the-mill compared to a TypeScript based project. VRoom currently boots Linux thanks to an AWS-FPGA instance (a Xilinx VU9P Ultrascale), though it has to be trimmed to fit. [Paul] has big plans working his way up to a server-class chip with lots of cores and a huge cache.

It’s all on GitHub under a GPLv3 license; go check it out! [Paul] also has a talk with lots of great details. If you’re interested in getting into RISC-V but a server-class isn’t your speed, we heard Espressif is starting to use RISC-V cores in their ever-popular ESP series.

A Clear Guide For A Low-Profile Bespoke Keyboard

At the risk of stepping on our fantastic Keebin with Kristina series, a beautiful tutorial by [Ben Vallack] details how to create a custom low-profile keyboard in great detail.

We’ve covered complete guides to building your own and projects making custom rubber dome keyboards. In addition, several subreddits exist around custom keyboard builds and dozens of websites are dedicated to selling parts. So why add not add one more guide, especially on as well done as [Ben’s]?

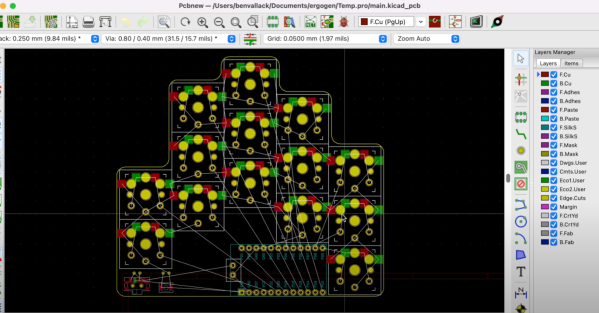
[Ben] focuses on the high-level tooling and the methodology of laying out a keyboard and how it all comes together. It all starts with determining your specific hand shape and layout with Ergopad. With that shape taken care of, you can move onto Ergogen, which allows you to take the layout you have in mind and generate a KiCAD board layout that just needs to be routed. Flippable boards, various footprints for switches, and connecting up different microcontrollers are all supported.

Once you have your PCB in hand, [Ben] walks you through soldering the sockets on the back and setting up your board firmware in ZMK with Github Actions. It’s a slick guide with a nifty product at the end. Video after the break.

Continue reading “A Clear Guide For A Low-Profile Bespoke Keyboard”

DOOM Comes To The RP2040

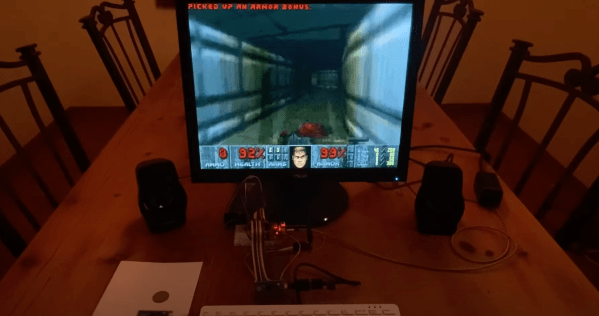
To the point of being a joke, it seems like DOOM is adapted to run on everything these days. So it was only natural that we would see it ported to the RP2040 by [Graham Sanderson], the tiny chip powering the Raspberry Pi Pico.

You might be thinking, what’s different about this port? There have been 55 articles about DOOM here on Hackaday, showing it running on everything from web checkboxes to desk phones. The RP2040 has 256 K of RAM, two decently clocked processor cores, and 2 MB of flash, so it’s not the most constrained platform ever to have DOOM run it. But [Graham] also set some very lofty goals: all nine levels needed to be playable, faithful graphics and music, multiplayer, and it would output to VGA directly. It should play just like the original. DOOM has a demo that is stored as a sequence of input events. They form excellent regression tests as if the character gets stuck or doesn’t make it to the end; then you’re not accurate according to the original code.

There are two big problems right out the gate. First, a single level is larger than the 2 MB storage that the RP2040 has. And to drive the 320×200 display, you either need to spend a lot of your CPU budget racing the beam or allocate a vast amount of RAM to framebuffers, making level decompression much harder.

A default compression scheme wouldn’t cut it because it needed a high compression ratio and random access since decompressing into RAM wasn’t an option. However, carefully optimizing and compressing the different data structures yielded great results. Save game files are given a similar treatment to ensure they fit into the remaining flash after all the levels (34k).

The result is fantastic, and it supports DOOM, Ultimate DOOM, and DOOM II. The write-up goes into far more detail than we could here; enjoy the read. If you decide to make a day trip to the depths of Hell on your own Pi Pico, be sure to let us know in the comments.

Continue reading DOOM Comes To The RP2040″

Pedal Powered Power

When you have a solar-powered web server, where do you go next for a source of power? Instead of lazily mooching off the sun, you can use your muscle with a bike generator. [Ed note: The site is run on an entirely solar-powered server, so if it’s the middle of the night, you might have a better web experience here.]

We’ve covered bicycle generators before, so what’s new? For starters, the accessibility of chargers and batteries has changed significantly. Rather than just charging a phone or putting out a measly 5V, this bike can be integrated into an existing solar PV system and output many voltages. This guide goes over building one with hand tools with great detail.

It starts with a 1950’s vintage exercise bicycle, no hacksaw required. A friction drive connects a generator and makes for an incredibly compact generator/exercise machine. Calculating the correct gear ratio is crucial to getting the 12 volts out at an average pedaling speed. You want your range of voltages to be between 5 and 24 volts. With the help of a control panel provides 5v, 12v, 14.4v, and 220v to power a variety of devices. Boost and buck converters output these voltages (depending on whether the voltage needs to be set for a maximum or a minimum). A potentiometer allows you to dial back the power draw of certain appliances (an electric kettle, for instance), making a workout a tad easier on the human component of the generator.

Another key takeaway from this guide is using a wind charge controller to charge batteries. A solar charge controller will just cut the circuit when the batteries are full. A wind charge controller will increase the load until the motor breaks. Some controllers are also hybrid wind and solar, allowing you to connect a small panel like the one running the webserver this guide is posted on and then charge up the batteries when it has been overcast for a few days in a row.

kumiko from nails

Nail This Tricky Kumiko Pattern

[Pask Makes] has previously made Kumiko patterns in wood and was happy with the results, but he wondered if he could make something visually similar from metal instead of wood.

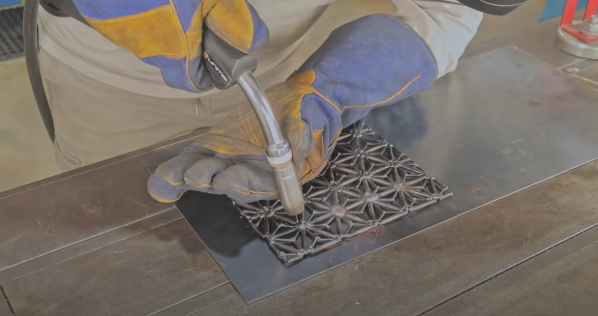
For that, he reached for nails as it is a cheap source of uniform small rods of metal. Kumiko is, funny enough, a technique known for joining small pieces of wood without nails. There are many different patterns that use the technique and most are inspired by nature. It is the pressure of the wood in the pattern itself that holds it together and requires dedicated planning and thousands of minute adjustments. Since [Pask] was using a MIG welder to hold the nails together, it isn’t technically Kumiko but rather a Kumiko pattern.

The first step was to take the coating off the nails, which is something a little acid does a wonderful job with. After dropping a little acid, his nails were prepped and he was ready to tack them together. He printed a template on a sheet of paper and used a straight edge and a palm router with a groove bit to cut little channels for each of the nails to sit in. The nails were trimmed to the correct width with the help of a small jig. After he had tacked the nails together, he came back and filled in the centers.

It’s a straightforward little project that creates a beautiful pattern and it’s a good reminder that simple materials can make complex things. If you prefer the wood look, this Kumiko guitar might be more to your taste. Video after the break.

Continue reading “Nail This Tricky Kumiko Pattern”