Over at the Usagi Electric farm, [David Lovett]’s custom 1-bit, vacuum tube-based computer (UEVTC for short) has been coming along well the past years, matching and exceeding the Motorola MC14500B 1-bit industrial control unit (ICU) that it is heavily inspired by. What is still missing, however, is a faster way to get data into the computer than manually toggling switches. The obvious choice is to make a (punched) paper tape reader, but how does one go about this, and what options exist here? With a few historical examples as reference and the tape reader on the impressive 1950s Bendix G-15 which [David] happens to have lounging around, [David] takes us in a new video through the spiraling complexity of what at first glance seems like a simple engineering challenge.
Punched paper tape saw significant use alongside punched paper cards and magnetic tape, and despite their low bit density, if acid-free paper (or e.g. mylar) is used, rolls of paper tape should remain readable for many decades. So how to read these perforations in the paper? This can be done mechanically, or optically, with in both case the feedrate an important consideration.
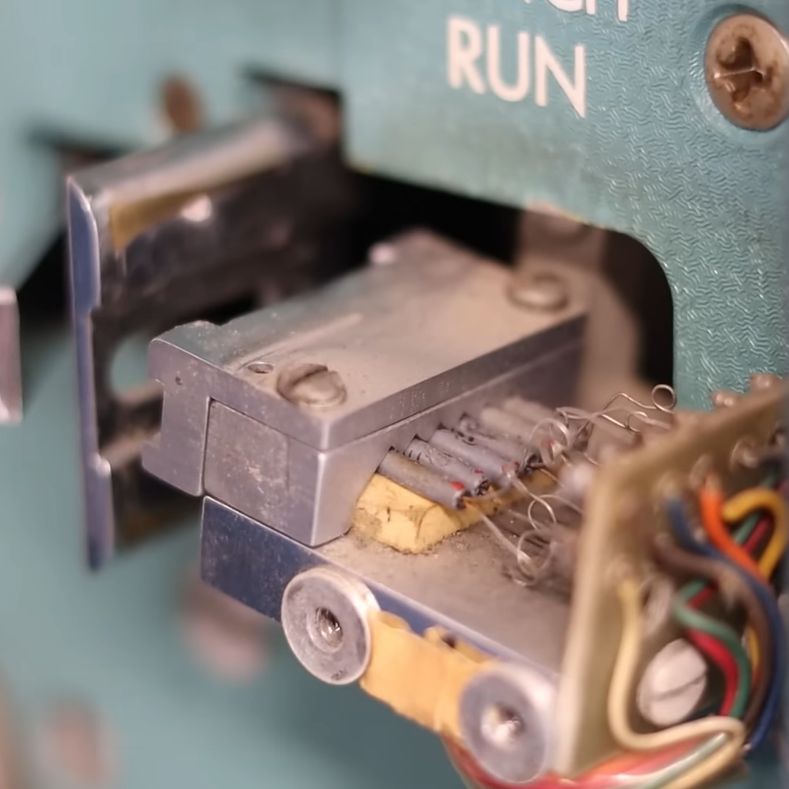
Right off the bat the idea of a mechanical reader was tossed out due to tape wear, with [David] digging into his stack of photodetector tubes. After looking at a few rather clunky approaches involving such tubes, the photodiodes in the Bendix G-15’s tape reader were instead used as inspiration for a design. These are 1.8 mm diameter photodiodes, which aren’t super common, but have the nice property that they align exactly with the holes in the paper tape.
This left building a proof-of-concept on a breadboard with some incandescent bulbs and one of the photodiode to demonstrate that a valid logic signal could be produced. This turned out to be the case, clearing the construction of the actual tape reader, which will feature in upcoming videos.
Continue reading “Building A Paper Tape Reader To Read Bytes”