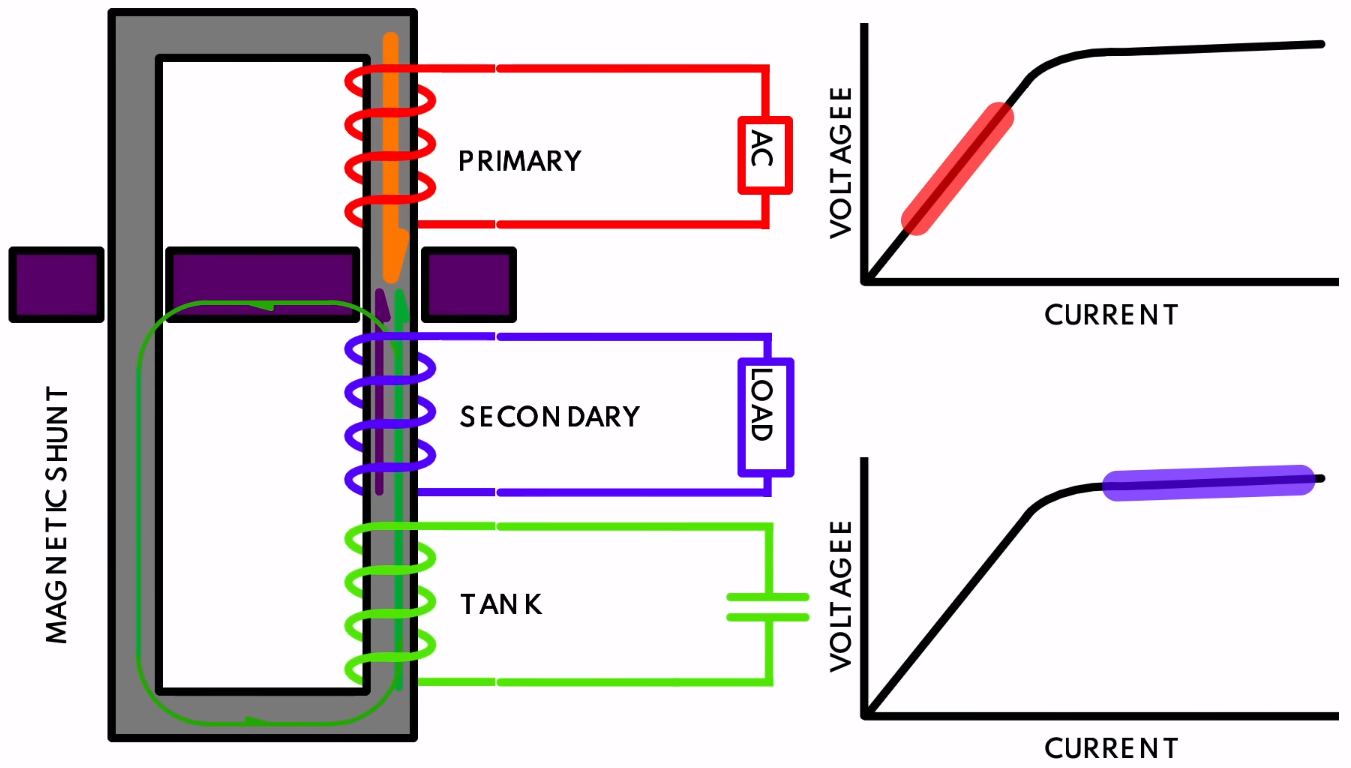
Ferroresonant (constant voltage) transformer diagram. Secondary side is kept in full saturation with the tank, keeping voltage constant. (Credit: Usagi Electric)
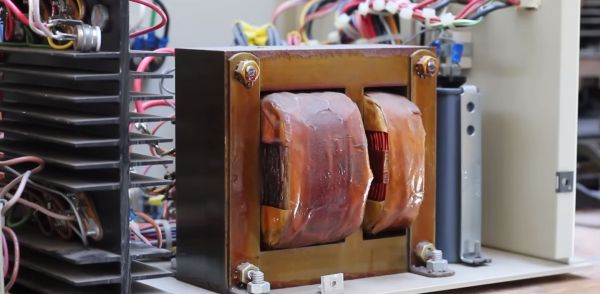
While troubleshooting the power supply of a 1970s Centurion system, [Usagi Electrics] came across a fascinating feature of these units: the ferroresonant, or constant voltage transformer (CVT). The main difference between a regular transformer and a CVT is that the former has a quite direct correlation between the input and output voltage, as the magnetic flux induced on the primary side is directly translated to the secondary (output) side.
A CVT adds a second element on the secondary side in the form of a tank circuit (LC circuit) – essentially a large capacitor – along with a magnetic shunt that ‘short circuits’ part of the magnetic flux between the primary and secondary side. The result of this is that even as the primary side is kept well below the saturation point where efficiency plummets, the secondary side is kept within this saturation region, enabling a very constant output voltage across a wide range of input voltages. For the Centurion’s power supply this input range goes from 90 to 130 VAC.
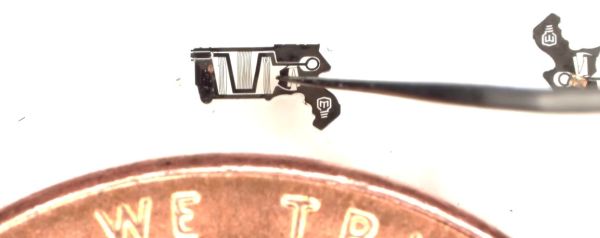
Mechanical actions underlie much of what makes modern day society function, whether it’s electric motors, combustion engines, switches, levers, or the springs inside a toy blaster gun that propel foam darts at unsuspecting siblings. Yet as useful as it would be to scale such mechanisms down to microscopic levels, this comes with previously minor issues on a macroscopic scale, such as friction and mechanical strength, becoming quickly insurmountable. Or to put in more simple terms, how to make a functioning toy blaster gun small enough to be handled by ants? This is the topic which [Mark Rober] explores in a recent video.
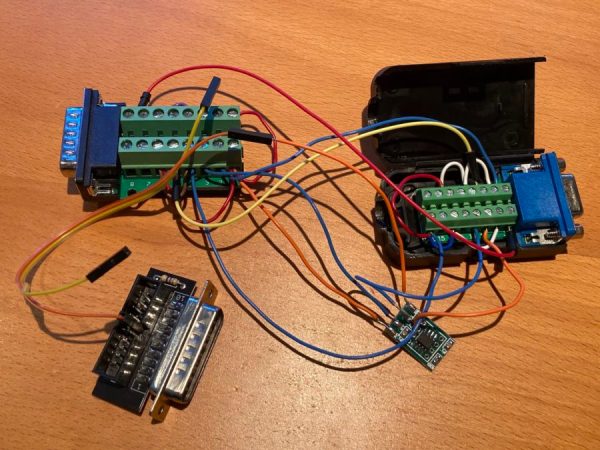
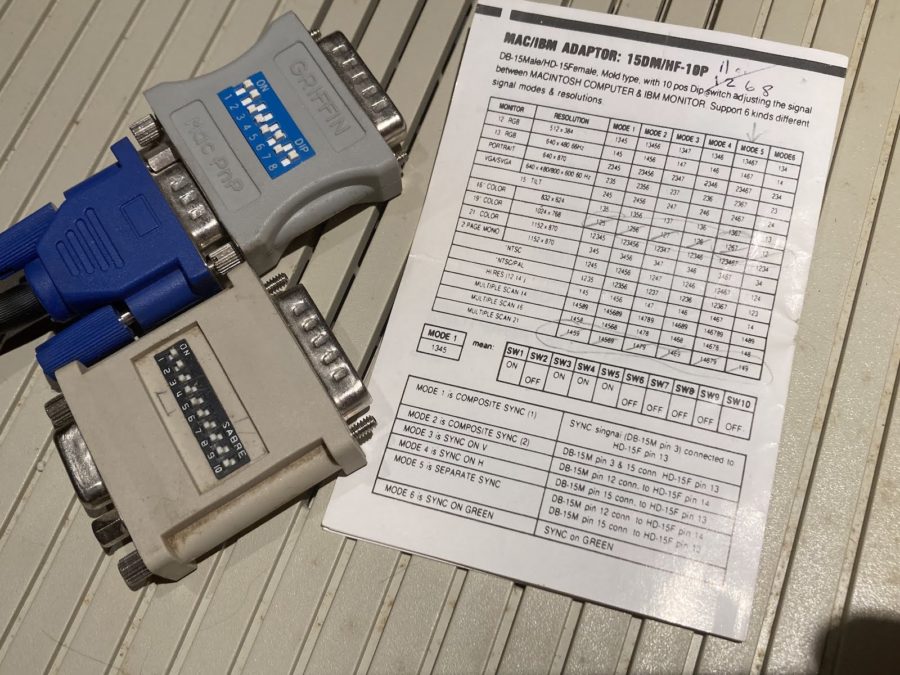
Old-school Macintosh-to-VGA adapter. Just solve for X, set the right DIP switches and you’re golden.
If you’re the happy owner of a vintage Apple system like a 1989 Macintosh IIci you may know the pain of keeping working monitors around. Unless it’s a genuine Apple-approved CRT with the proprietary DA-15-based video connector, you are going to need at least an adapter studded with DIP switches to connect it to other monitors. Yet as [Steve] recently found out, the Macintosh’s rather selective use of video synchronization signals causes quite a headache when you try to hook up a range of VGA-equipped LCD monitors. A possible solution? Extracting the sync signal using a Texas Instruments LM1881 video sync separator chip.
Much of this trouble comes from the way that these old Apple systems output the analog video signal, which goes far beyond the physical differences of the DA-15 versus the standard DE-15 D-subminiature connectors. Whereas the VGA standard defines the RGB signals along with a VSYNC and HSYNC signal, the Apple version can generate HSYNC, VSYC, but also CSYNC (composite sync). Which sync signal is generated depends on what value the system reads on the three sense pins on the DA-15 connector, as a kind of crude monitor ID.
Theoretically this should be easy to adapt to, you might think, but the curveball Apple throws here is that for the monitor ID that outputs both VSYNC and HSYNC you are limited to a fixed resolution of 640 x 870, which is not the desired 640 x 480. The obvious solution is then to target the one monitor configuration with this output resolution, and extract the CSYNC (and sync-on-green) signal which it outputs, so that it can be fudged into a more VGA-like sync signal. Incidentally, it seems that [Steve]’s older Dell 2001FP LCD monitor does support sync-on-green and CSYNC, whereas newer LCD monitors no longer list this as a feature, which is why now more than a passive adapter is needed.
Although still a work-in-progress, so far [Steve] has managed to get an image on a number of these newer LCDs by using the LM1881 to extract CSYNC and obtain a VSYNC signal this way, while using the CSYNC as a sloppy HSYNC alternative. Other ICs also can generate an HSYNC signal from CSYNC, but those cost a bit more than the ~USD$3 LM1881.
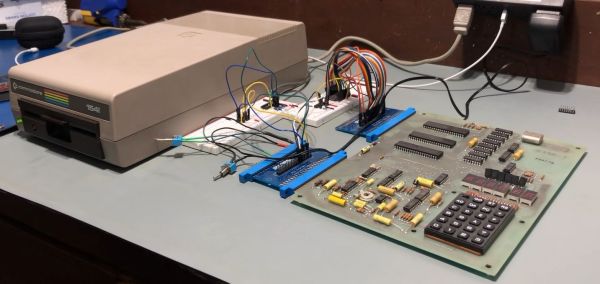
Although the PET is most likely the more well-known of Commodore’s early computer systems, the KIM-1 (Keyboard Input Monitor) single board computer was launched a year prior, in 1976. It featured not only the same MOS 6502 MPU as later Commodore systems, but also an MCS6530 PIO IC that contained the ROM, RAM and programmable I/O, reminiscent of later I/O chips on Commodore systems. As the KIM-1 was only designed to be used with an external tape drive (and a terminal for fancy users), adding a floppy drive like the ubiquitous 1541 with its IEC bus interface was not a first-party accessory. How the IEC bus can be retrofitted to a KIM-1 system is demonstrated in this video by the Commodore History channel.
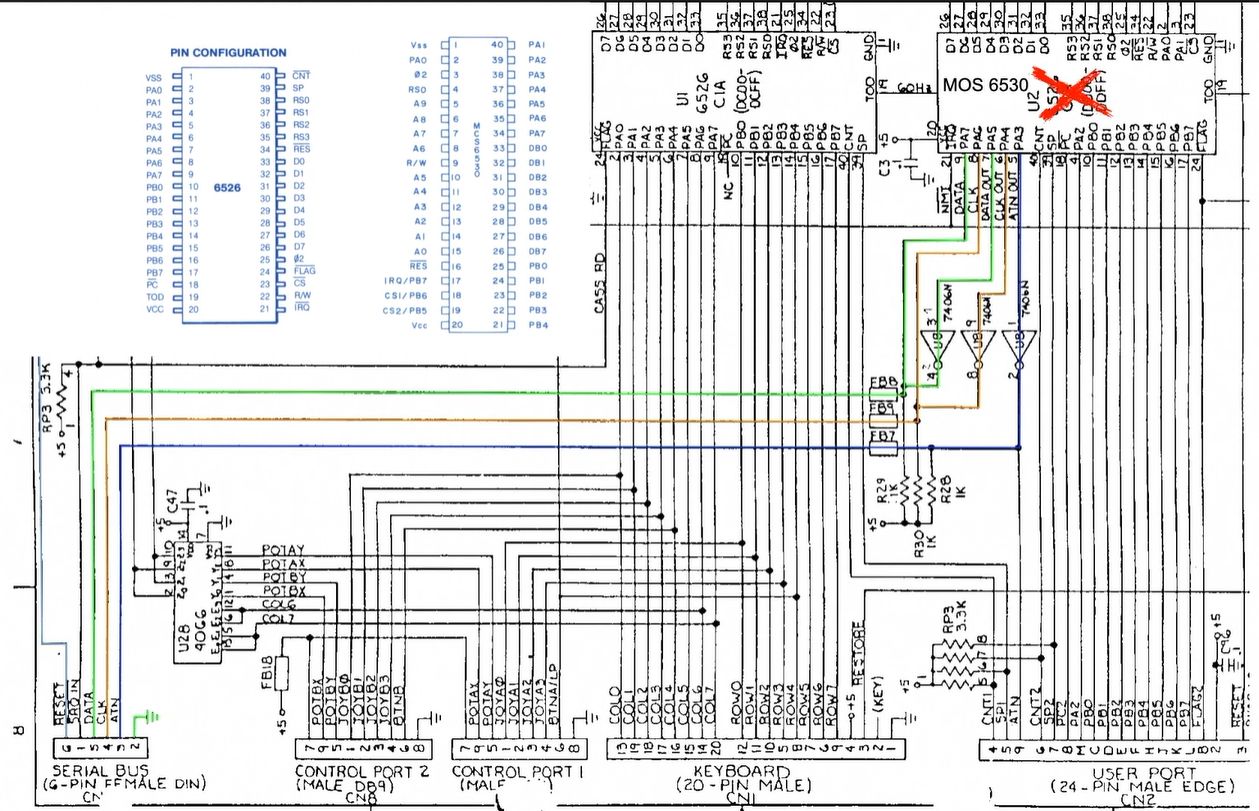
The Commodore KIM-1 hardware is almost directly compatible with the C64 hardware. (Credit: Commodore History on YouTube)
What is most notable is just how similar the KIM-1 hardware is to later PET and VIC hardware, with the CIA and PIO ICs featuring the same requisite pins for this purpose, and requiring only the addition of an inverting (SN7406) IC and an EPROM featuring the new code to support the proprietary Commodore IEC bus protocol, which was mostly pilfered byte-for-byte from a C64 kernal ROM.
With some creative breadboarding in place and using nothing more than the on-board LED display and keyboard matrix, it was then possible to write to the inserted floppy disk, and also to read back from it. What’s interesting here is that this essentially replaces the tape drive as target for the KIM-1, which thus retains a lot of the original functionality, but with a big performance boost. While perhaps only interesting as an academic exercise, it’s definitely an interesting look at the early beginnings of what would blossom into the Commodore 64.
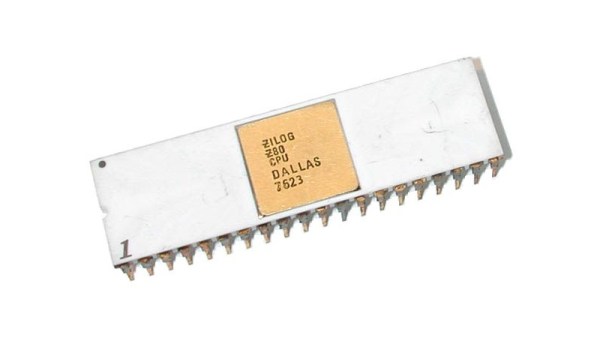
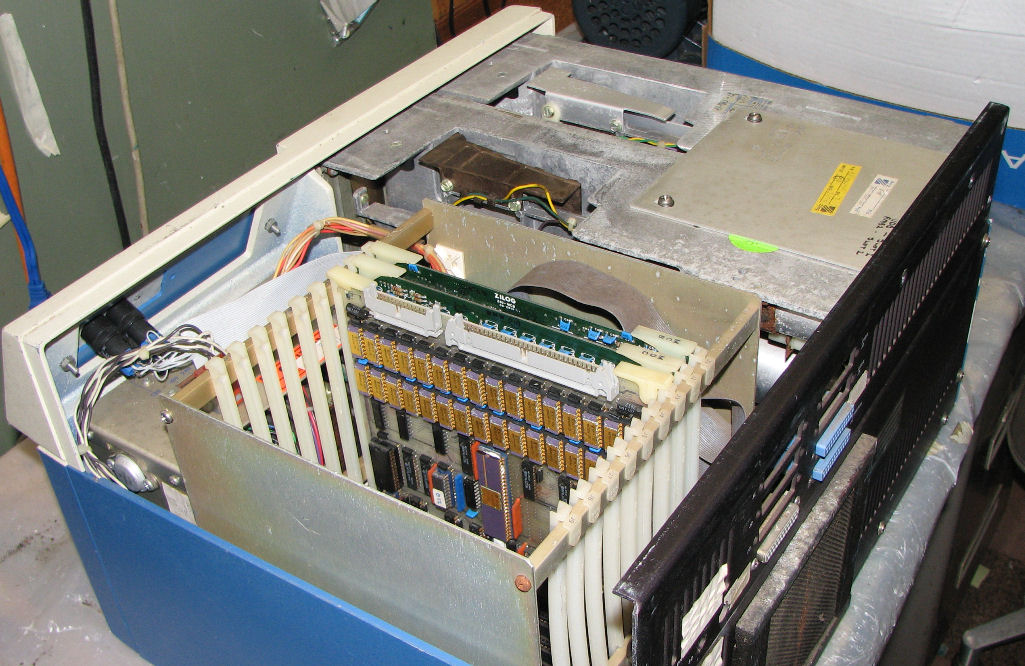
When it comes to famous operating systems for the Z80 and similar Zilog processors, the first and maybe only one to come to mind is CP/M, which was even made its presence known on the dual-CPU (8502 and Z80) Commodore 128. Yet Zilog also developed its own operating system, in the form of the comprehensively titled Z80 Operating System with Relocatable Modules and I/O Management (Z80-RIO for short). With limited documentation having survived, [Ralf-Peter Nerlich] has set out to retain and recover what information he can on RIO and the associated Programming Language Zilog (PLZ) after working with these systems himself when they were new.
A Zilog MCZ 1/20 system from around 1979. (Credit: Herb Johnson)
Perhaps unsurprisingly, neither Z80-RIO nor PLZ were targeting the regular consumer market when they were brought to market in the late 1970s, but were part of Zilog’s focus on industrial markets, as well as laboratories and elsewhere that could benefit from a versatile, programmable computer system for control and automation.
As part of an integrated hardware/software solution, Zilog released a series of computer systems, such as the MCZ 1/20 of which a number of examples survive today. Herb Johnson’s collection and restoration projects provide a good overview of not only the base systems, but also the expansion cards available for these systems. Right along with the Z80-RIO OS providing the ability to customize the system for the target usage, the underlying hardware could also be configured with just the expansion boards required, or conceivably even custom boards.
Of course, it doesn’t take many guesses to figure out what happened to Z80’s RIO OS and related, with the 1980s heralding massive shifts in the computer markets. Although now functionally obsolete for decades, it’s good to see such preservation efforts of 1970s computing systems and related software. These are after all the foundations on which modern day computing is built.
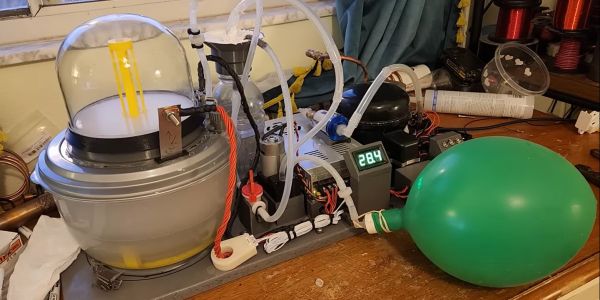
Everyone and their pet hamster probably knows that the most common way to produce hydrogen is via the electrolysis of water, but there are still a number of steps between this elementary knowledge and implementing a (mostly) automated hydrogen generator. Especially if your end goal is to create liquid hydrogen when everything is said and done. This is where [Hyperspace Pirate]’s latest absolutely not dangerous project commences, with the details covered in the recently published video.
Automated hydrogen generator setup, courtesy of [Hyperspace Pirate]’s dog drinking bowl.Since electrolysis cannot occur with pure water, sodium hydroxide (NaOH) is used in the solution to provide the ions. The electrodes are made of 316 stainless steel, mostly because this is cheap and good enough for this purpose. Although the original plan was to use a stacked series of electrodes with permeable membranes like in commercial electrolysers, this proved to be too much of a hassle to seal up leak-tight. Ergo the demonstrated version was attempted, where an upturned glass bell provides the barrier for the produced hydrogen and oxygen. With this system it’s easy to measure the volume of the produced hydrogen due to the displaced water in the bell.
Once enough hydrogen gas is produced, a vacuum pump is triggered by a simple pair of electrodes to move the hydrogen gas to a storage container. Due to hydrogen embrittlement concerns, an aluminium tank was used rather than a steel one. Ultimately enough hydrogen gas was collected to fill a lot of party balloons, and with the provided information in the video it should be quite straightforward to reproduce the system.
Where the automation comes into play is with a control system that monitors for example how long the vacuum pump has been running, and triggers a fail safe state if it’s more than a set limit. With the control system in place, [Hyperspace Pirate] was able to leave the hydrogen generator running for hours with no concerns. We’re hopeful that his upcoming effort to liquify this hydrogen will be as successful, or the human-rated blimp, or whatever all this hydrogen will be used for.
One of the more interesting cultural phenomena is the ‘bleep’ that replaces certain words in broadcasts, something primarily observed in the US. Although ostensibly applied to prevent susceptible minds from being exposed to the unspeakable horrors of naughty words, the applied 1 kHz censoring tone is decidedly loud and obnoxious enough that its entertainment level falls somewhere between ‘truck backing up’ and ‘loud claxon in busy traffic’. There is thus a definite argument to be made to censor the censoring beep to preserve one’s sanity, which is the goal of [Oona Räisänen]’s Bleep-be-gone project on GitHub.
Using a Perl-based wrapper, the versatile ffmpeg framework is used to filter a provided video that was afflicted with bleepitus, before outputting a pristine version where the infernal noise is replaced with blissful silence. This use of silence for censoring naughty words is incidentally becoming more commonplace over an ear-piercing beep, but a tool like Bleep-be-gone can be used to hasten the demise of its terror. Considering that the point of the 1 kHz back-up alarm beep is to draw a person’s attention to a piece of heavy equipment moving about, there is clearly no good reason why the replacement of a naughty word should warrant a similar drawing of attention.

![Automated hydrogen generator setup, courtesy of [Hyperspace Pirate]'s dog drinking bowl.](https://hackaday.com/wp-content/uploads/2023/10/automated_hydrogen_generator_basics.jpg)