Building A Bandwidth Meter

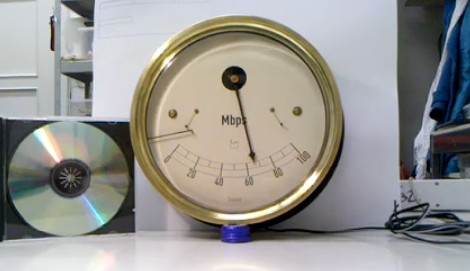
Here’s an analog bandwidth meter made to look like an old pressure gauge. It’s actually new, but the paper showing the graduated scale was stained in a bath of black tea, then dried in an oven to give it an aged appearance. We think it’s quite effective.

The dial itself is a volt meter driven by an Arduino in much the same way as the multimeter clock. Bandwidth data is pulled from a Linux router, filtered down to the target data using ‘grep’, and sent over the serial connection by a Perl script. Since the meter itself is just waiting for serial data, alterations to the router’s scripting make it easy to represent a count of unread emails, tweets, or whatever data your code can scrape.

[Thanks Ben]

Interface Up To 12 Servos Using Arduino

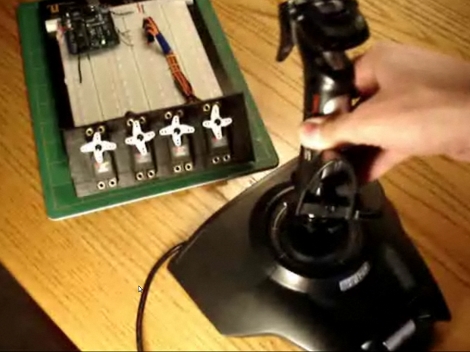
[Brian] is using an Arduino to control multiple servo motors. This is nothing new and has been happening since the earliest days of Arduino. But rather than develop a project and share it, [Brian] did a fantastic job of making the code scalable, readable, and even explained how the different parts work.

His code listens for serial commands and manipulates the motors accordingly. He wrote a Python script using pyserial which talks to the Arduino. As an example, he uses a joystick to send data for X and Y axes as well as pitch and roll. Want to know how those serial communications work? He explains that in detail. He also outlines the process of scaling up from the 4 servo demo to 12 servos on a standard Arduino. Sounds like it might be time to build your own version of a mouse-controlled Lynxmotion arm using the tools [Brian] has put together.

SparkFun Free Day 2011: Now With Gambling

SparkFun has just announced a Free Day for 2011. Last year was the first time they decided to give away $100,000 in the form of $100 credits that melted down their servers and made the rest of the world (you know, the non-geek sort) ask what SparkFun was when it started trending on Twitter, Google, and every other form of digital communication.

Well, they’re doing it again this year, albeit quite differently. Mark your calendar for Thursday, January 13th at 9am Mountain Standard Time. But it’s not as simple as having your cart pre-filled and trying to bum rush the checkout pages. Now you’ve got options; take a loyalty payout of $10 for each year that has passed since you registered an account with them, or gamble for a $100 credit. The latter involves answering ten questions, rewarded with $10 for each correct answer and penalized $3 for each wrong answer. If you don’t finish all ten before the money runs out you get zip.

There’s several bits of good news here. First, they just picked up a new rack of servers which should help keep the website from crashing. Secondly, the prize money has been ramped up by %50 to a total of $150,000. And finally, if you choose to answer the trivia questions, $2 is being donated to charity for each correct answer. So study up on your electronic theory and you can help others while trying to help yourself.

[Thanks Diego]

MeggyCade: When Handheld Pixel Gaming Isn’t Enough

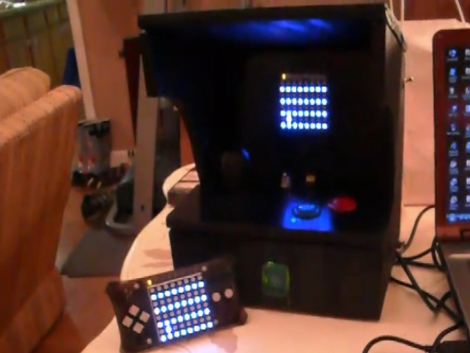
[Bomber Punk] built his own arcade cabinet, but you won’t find any MAME games here. He made the enclosure to house a Meggy Jr. 8×8 pixel graphics game console. Proper coin-op buttons and a joystick replace the stock tactile switches that come with the kit. [Bomber Punk] has also added a lighted coin slot. A three-cell battery pack powers the beast, with a programming port to one side so that different games can be loaded from a PC. We’d like to see a processor upgrade that would allow multiple games to be stored on a stand-alone system.

Take a look at the video after the break, it’ll bring a smile to your face.

Continue reading “MeggyCade: When Handheld Pixel Gaming Isn’t Enough”

Hacking Together A Bedbug Exterminator

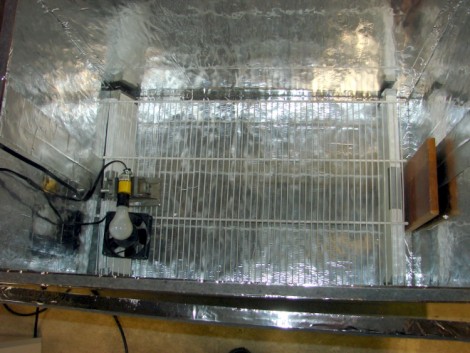
We’ve seen so many stories in the news about the growing plague of bedbugs. It kind of infuriates us because the spin of these “news” pieces is always that we’re going to have to live with these insects and there’s nothing you can do to avoid it. Bullcorn! [Ed Nisley] was dealt a bum hand in the form of a bedbug infestation but instead of losing his mind he used it to get himself out of the mess. One of the steps in the dis-insecting process was to develop a bedbug killing box that raises the contents above the kill temperature for the pests. He built an insulated chamber, with a grate to raise the target material off the bottom and allow for heat exchange around all edges of the item. Light bulb combinations of 60, 100, and 120 Watts were tested along with a fan for air circulation. He graphed the results and plans to use what he learned to build a more efficient heater for the box.

But the hot box isn’t his only defense. His household developed barriers, blocking the insects by height or with a sticky zone. Check out the collection of his bedbug posts and stop being afraid of these things! We can fight back and we can do it using common items and ingenuity.

[Thanks Steven]

Anaglyphic Photography Made Easy

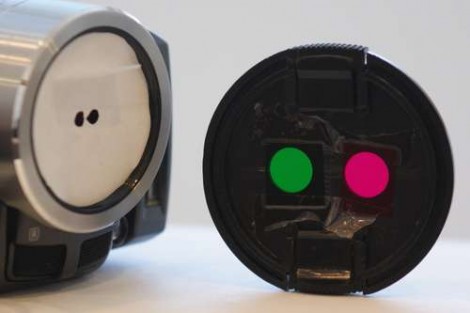
[ProfHankD] came up with a pretty easy way to take 3D photos using a single lens. He’s making Anaglyph images which use color filtering glasses to produce stereoscopic 3D effects. We’ve seen stereoscopic imaging hacks that use two cameras or a clever combination of mirrors, but this one uses a special filter and post-processing. [ProfHankD] drew up a template that can be used to properly align two colored filters, like those in the lens cap seen above. Once installed, just snap all the pictures you want and then hit them with your favorite photo editing software. This involves separating the color channels of the photograph and offsetting them to increase the depth of focus.

It’s a nice little process, and his writeup is easy to understand even if you’re not a hardcore photography guru.

[Thanks Paul]

Mix Your Own Photo Developing Emulsions

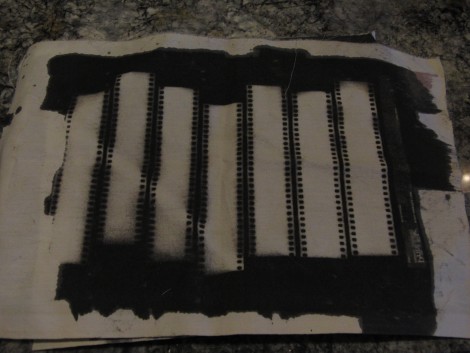
If you’re into developing your own photographs you might try mixing your own emulsion. [Jimmy Hartnett] worked out the chemical reaction necessary to make a photosensitive medium using Silver Chloride. His process lets him manufacture canvas that can be use like photo paper. The gist of it involves coating the back of a canvas with Gesso to prevent the emulsion from passing all the way through. He then floats the canvas face-down to apply the emulsion and skims it with a straight edge before it has time to set. You can see the results of some contact print testing in the image above. If anything, this makes a great piece of art to hang on the wall as it’s visually interesting and [Jimmy] has a personal connection because he not only made it himself, but came up with the process.