DIY Shade Finder Tool Takes The Tedium Out Of Solar Surveys

diy-shadefinder-tool

[Steven Dufresne] does a lot of tinkering with solar-powered applications, a hobby which can be very time consuming if done right. One process he carries out whenever building a solar installation is creating a sun chart to determine how much (or little) sun the target area will get.

The process requires [Steven] to take elevation and Azimuth measurements of many different points, which often consumes about half an hour of his time. While taking measurements recently, he started thinking about how he could improve the process, and came up with a stellar solution that reduces the process down to a one-minute task.

In short, his shade finder tool uses a pulley, a pair of rollerblade wheels, and a pencil to accomplish a full shade survey in under a minute. The science behind the tool is best explained by [Steven], so be sure to check out his site for plenty of details and diagrams.

We have to say that we’re extremely impressed by his shade finder – hopefully his work can help others maximize the efficiency of their solar solutions.

Stick around after the jump to see a short video of the shade finder in action.

Continue reading “DIY Shade Finder Tool Takes The Tedium Out Of Solar Surveys”

Using 555 Timers To Add “free Play” Functionality To Classic Arcade Machines

freeplay-arcade-board

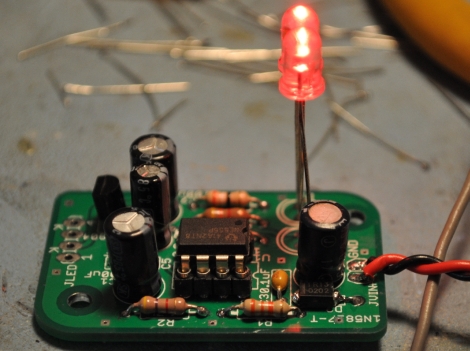
[John Zitterkopf] is in the middle of restoring a vintage Sega Star Trek Captain’s Chair arcade game for the upcoming 2012 Texas Pinball festival, though one prerequisite for the show is that the game supports some sort of free play mode. At this point he doesn’t have the option of tracking down a freeplay ROM for the device, so he had to come up with a solution of his own.

He did not want to alter the machine’s operation in any significant manner, and this meant preserving the functionality of the coin chutes. To do this, he put together a small circuit that uses a pair of cascaded 555 timers to provide the machine with the proper signaling to simulate coin insertion, while still accepting coins. You might initially think that this could be easily accomplished by shorting a pair of contacts in the coin chutes, but as [John] explains, the process is a tad more complex than that.

If you have some old arcade games kicking around and are looking for a non-invasive way to make them free to play, be sure to check out his site for schematics and a complete BoM.

Minimalist RGB LED Cube Has A Very Short BoM

charlieplexed-led-cube

[Asher Glick] wrote in to share a project he has been working on with his friend [Kevin Baker], a 4x4x4 RGB LED cube. The pair are students at Rensselaer Polytechnic Institute and also members of the newly-formed Embedded Hardware Club on campus. As their first collaborative project, they decided to take on the ubiquitous LED cube, trimming down the component count to nothing more than 64 LEDs, a protoboard, some wire, and a single Arduino.

Many cubes we have seen use shift registers or decade counters to account for all the I/O required to drive so many LEDs. Their version of the cube has none of these extra components, solely relying on 16 of the Arduino’s I/O pins for control instead. You might notice something a bit different about the structure of their cube as well. Rather than using a grid of LEDs like we see in most Charlieplexed cubes, they constructed theirs using 16 LED “spires”, tucking the additional wiring underneath the board.

The result looks great, as you can see in the videos below. The cube looks pretty easy to build, and with a cost around $60 it is a reasonably cheap project as well.

Nice job, we look forward to seeing all sorts of fun projects from the Embedded Hardware Club in the future!

Continue reading “Minimalist RGB LED Cube Has A Very Short BoM”

GSM Remote Control With The TiDiGino

tidigino-gsm-remote

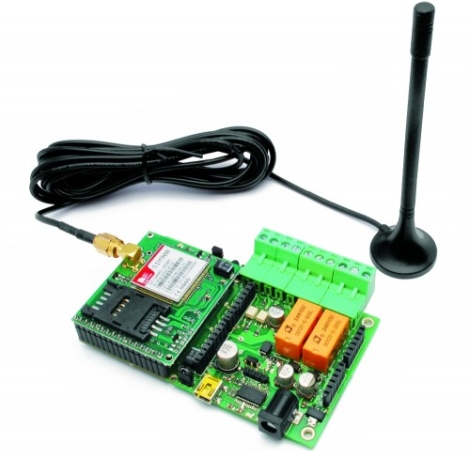
If you’re looking to remotely control things around the house, but can’t do it over the Internet or via WiFi, the TiDiGino just might have what you’re looking for. [Boris Landoni] from Open Electronics sent some information on the TiDiGino our way, and it certainly looks like a useful device if you’re in need of a solid GSM remote control module.

At the heart of the TiDiGino lies an ATmega2560, which is normally used in the Arduino Mega, so there’s plenty of processing power to go around. While the form factor differs just a wee bit from what you would expect from an Arduino, the TiDiGino sports all the proper connectivity to support any standard Arduino shield along with the requisite libraries required for use.

Through a contest/community effort, the TiDiGino supports remote alarm, gate control, remote thermostat control, and DTMF remote control functionality right out of the box. We imagine that our readers can dream up a litany of other uses as well, since GSM remote control tends to be pretty popular around here.

Be sure to check out the Open Electronics site if you’re interested in learning more about the TiDiGino – you’ll find a complete BoM along with code and schematics, making it easy to build your own.

OK, You Might Not Be Paranoid – Perhaps That Priority Mail Box IS Spying On You

rc-box-bot

[Thomas Renck] recently picked up a 1000mW wireless video transmitter that he ultimately planned to mount in an RC plane. Before he strapped it on a plane to potentially kiss it goodbye for good, he wanted to play with it a while to see what it was capable of.

After a friend helped him determine the camera’s maximum range (about 1900 feet on open ground), he thought it would be fun to strap it on his nitro R/C truck. That didn’t work out so well due to some vibration issues, so he constructed a makeshift R/C car from the shipping box the camera arrived in, along with some other odds and ends.

As you can see in the video below, the propeller-driven “Boxmobile” zips along quite nicely. The video feed from the camera is pretty impressive too, allowing him to easily guide the car while it’s well out of sight.

At nearly $350, the self-proclaimed “ghetto-bot” is certainly not cheap, though we hear body repairs are a piece of cake!

Continue reading “OK, You Might Not Be Paranoid – Perhaps That Priority Mail Box IS Spying On You”

Giving The Hexbug Spider Freedom To Explore On Its Own

hexbug-hack

[Eric Gregori] recently spent some time messing around with a Hexbug Spider, and wrote in to share some modifications he made to the toy. In its unaltered form the robot can be controlled remotely, and while it’s fun to play with, the excitement is short lived. Using a TI MSP430 along with a small motor controller kit he put together, he gave the Hexbug a bit more personality.

The kit is really just a simple board used for mounting the MSP430 and FAN8200 motor driver, along with an IR emitter/sensor pair. It would be easy enough to put something similar together yourself, though if you are looking for a protoboard/deadbug/PCB etching-free solution, his Spider Hack kit is a quick and easy solution.

[Eric’s] walkthrough shows how to disassemble the Hexbug, and details which components need alterations before the controller board can be properly mounted. A few soldered wires later, the toy is ready to be reprogrammed, a process [Eric] carries out using the Launchpad board from which he lifted the MSP430.

As you can see in the videos below, calling the robot autonomous might be a bit of a stretch (I don’t see it walking to the kitchen to make me a sandwich), but it can navigate and avoid objects with ease.

Continue reading “Giving The Hexbug Spider Freedom To Explore On Its Own”

Bang-banging Your Way To A Perfect Cake

bang-bang-oven-control

[Rob Spanton’s] house is equipped with a rather cheap oven, which was discovered while his roommate tried using it to bake part of a wedding cake. If someone took a shower during the baking process, a large portion of unit’s gas pressure was diverted to the boiler, causing the oven to shut off completely. This is obviously not a good situation for baking cakes, so the housemates decided to construct a makeshift controller to keep temperatures in line.

They started by installing a pulley on the oven’s knob, which is connected to a small motor via a long rubber belt. The other end of the belt connects to a small motor, which is controlled by a Pololu 18v7 motor controller. A K-type thermocouple monitors the oven’s temp, feeding the data through a MAX6675 converter to (presumably) [Rob’s] computer.

Since they were in a bit of a time crunch, [Rob] and his roommate [Johannes] decided the best way to keep the oven at a steady temperature was via bang-bang control. While you might imagine that cranking the gas knob between its minimum and maximum settings repeatedly wouldn’t be the ideal way to go about things, their solution worked pretty well. The cake came out perfectly, and the maximum temperature swing throughout the entire baking process was only 11.5°C – which is pretty reasonable considering the setup.