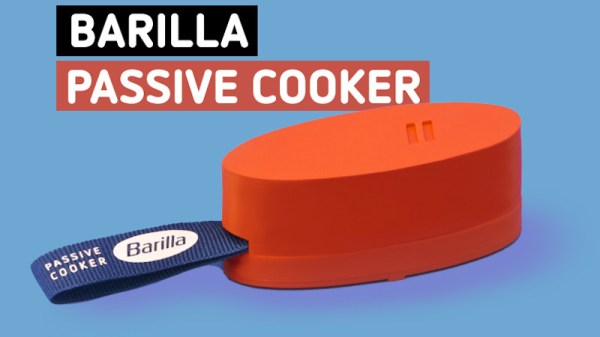
With A Little Heat, Printed Parts Handle Vacuum Duty

We don’t have to tell the average Hackaday reader that desktop 3D printing has been transformative for our community, but what might not be as obvious is the impact the technology has had on the scientific community. As explained in Thermal Post-Processing of 3D Printed Polypropylene Parts for
Vacuum Systems
by [Pierce Mayville], [Aliaksei Petsiuk], and [Joshua Pearce]
, the use of printed plastic parts, especially when based on open source designs, can lead to huge cost reductions in the production of scientific hardware.

More specifically, the authors wanted to examine the use of 3D printing components to be used in a vacuum. Parts produced with filament-based printers tend to be porous, and as such, are not suitable for fittings or adapters which need to be pumped down to below one atmosphere. The paper goes on to explain that there are coatings that can be used to seal the printed parts, but that they can outgas at negative pressures.

The solution proposed by the team is exceptionally simple: after printing their desired parts in polypropylene on a Lulzbot Taz 6, they simply hit them with a standard consumer heat gun. With the temperature set at ~400 °C, it took a little under a minute for the surface of take on a glossy appearance — the result reminds us of an ABS print smoothed with acetone vapor.

As the part is heated, the surface texture visibly changes. The smoothed parts performed far better in vacuum testing.

In addition to the heat treatment, the team also experimented with increasing degrees of infill overlap in the slicer settings. The end result is that parts printed with a high overlap and then heat treated were able to reliably handle pressures as low as 0.4 mTorr. While the paper admits that manually cooking your printed parts with a heat gun isn’t exactly the ideal solution for producing vacuum-capable components, it’s certainly a promising start and deserves further study.

Blue Origin Loses Rocket, Gains Abort System Test

Even if you’re just making a brief hop over the Kármán line to gain a few minutes of weightlessness, getting to space is hard. Just in case any of their engineers were getting complacent, Blue Origin just got a big reminder of that fact this afternoon with the destruction of their New Shepard 3 (NS3) rocket during a suborbital research flight.

But while the rocket itself was lost, the New Shepard’s automated abort systems were able to push the capsule H. G. Wells away from the fireball, saving the dozens of scientific experiments which had been loaded onto the un-crewed vehicle. While there’s been no public word yet on the condition of these experiments, it’s reasonable to assume that at least some portion of them can be re-flown in the future — a fact that will likely come as a great relief to the researchers who designed them. It will be interesting to see who picks up the tab for the do-over flight; while launch insurance is a must-have for billion dollar satellites, it seems unlikely these small suborbital experiments would have been covered under a similar policy.

A spurt of flame can be seen in the otherwise invisible exhaust moments before engine failure.

We’re also still in the dark about what caused the in-flight breakup of NS3, other than the fact that the engine was clearly sputtering in the seconds before it blew apart. This could be a sign that the engine’s nominal fuel-to-oxidizer ratio was faltering, or perhaps even indicative of foreign debris becoming dislodged and burning in the combustion chamber. But really, without official word from Blue Origin, it’s impossible to say what happened.

This is especially true when you consider that we’re talking about a vehicle that’s pushing the envelope to begin with. Remember, the New Shepard is a reusable booster, and NS3 is specifically a veteran of eight flights — with all but one of them taking the booster above the 100 kilometer altitude, which is generally accepted to be the boundary of space.

For those worried that celebrities and assorted millionaires will no longer have access to space, fear not. Blue Origin’s crewed flights have flown exclusively on the newer NS4 and its associated capsule First Step. This does however mean that Blue Origin no longer has a spare booster on which to fly commercial payloads, potentially putting into jeopardy any semblance of scientific value the program may have had.

Continue reading “Blue Origin Loses Rocket, Gains Abort System Test”

The Philly Maker Faire Is Back And Wants Your Hacks

After two years of waiting out the COVID-19 pandemic, the Philadelphia Maker Faire is officially back for 2022. The one-day event will take place on Saturday, the 15th of October, from 10:00 am to 5:00 pm at the Independence Seaport Museum.

We don’t have a schedule or full list of what will be on display this far out, but given what we saw during our 2019 visit, we’re confident you’ll get your tickets worth. While we keenly felt the loss of the flagship Maker Faires in California and New York, we can take some solace in the fact that their absence has given these smaller Faires a chance to move in and grow in ways that might not have been possible before.

For those looking to take an active role in what’s often been called the “Greatest Show & Tell on Earth”, organizers will be accepting proposals until September 15th for individuals, groups, and companies that want to share their creations with attendees. Participation is free, so long as you aren’t trying to sell anything, and offers a fantastic way to show off those pandemic projects. That said, proposals aren’t limited to just hardware projects — artwork, live performances, and workshops will also be considered. Basically, if it’s something the STEAM crowd would be interested in checking out, consider it fair game.

If you can spare some time after seeing everything that will be on display at the Maker Faire, the Independence Seaport Museum itself sounds like a pretty fascinating place to check out. Beyond the exhibits and collection of maritime artifacts, the Seaport also offers the chance to take tours aboard a pair of unique vessels: the USS Olympia saw service in the Spanish–American and First World Wars, and USS Becuna is one of only eight surviving WWII Balao-class submarines currently available for public viewing.

Planning on attending the 2022 Philadelphia Maker Faire? Maybe even presenting? Let us know in the comments. Who knows, you might just run into a Hackaday writer in the wild and score yourself some coveted Wrencher stickers.

The Open Source Rotary Cell Phone, Two Years Later

We know the pandemic has screwed with a lot of people’s sense of time, but we doubled checked, and it has indeed been more than two years since the Internet first laid eyes upon the incredible rotary cell phone put together by [Justine Haupt]. We’re happy to report that not only has she continued to develop and improve the phone since the last time it made the rounds, but that the kits for this open source marvel are currently available for preorder.

A lot has happened since this phone last graced the pages of Hackaday. For one thing, it’s now officially known as the Rotary Un-Smartphone. [Justine] has also spun up a small company for the express purposes of putting these kits into production, which clearly speaks to just how much attention the project picked up in mainstream circles.

The new rotary mechanism is based on modern components.

In terms of hardware, while the phone might look more or less the same externally, [Justine] says that there’s not a single unchanged component from the previous version. The 3D printed case has given way to a beautiful injection molded enclosure offered in several retro colors, and the rather incongruous rubber ducky antenna has been replaced with an articulated aerial that serves as a kickstand.

Speaking of reception, the original 3G cellular modem has been upgraded to a LTE-compatible model from uBlox, so it should still get a signal for a decade or so before your carrier kicks it off the network. When ordering the kit you can choose between a global version using the TOBY-R200 modem, or a North American variant with the TOBY-R202.

Even the user interface has been spruced up — while the previous model featured a simple LED indicator on the front to show when you were in a call, the new version features an OLED display that will show you the currently dialed number as well as status information such as battery life and signal strength. Some may be disappointed to hear that the authentic Western Electric model 10A rotary dial has been deleted in favor of a custom designed mechanism that uses all modern components, but we can certainly understand why the change had to be made from a production standpoint.

Continue reading “The Open Source Rotary Cell Phone, Two Years Later”

Ultra-Thin Rubber Parts Made With A 3D Printed Plug

We generally think of 3D printed components as being hard bits of plastic, because for the most part, that’s what we’ve got loaded up in our desktop machines. But outside of the normal PLA, PETG, and ABS, you can also print with various flexible filaments such as TPU. This can be handy for producing custom seals, or rugged enclosures.

But what if you want to make very thin rubberized parts? In that case, the 0.4 mm nozzle on most desktop machines will be your limiting factor. But not so with the method [Daniel Bauen] demonstrates in his latest Engineerable video. The trick here is that the printer isn’t producing the final product — it’s making a water-soluble plug that has been slightly undersized for the application at hand.

Once the plug has been printed, [Daniel] sprays it with several coats of Plasti Dip. This builds up a rubberized coating on the printed part, and once it’s reached the desired thickness, the whole thing gets tossed into an ultrasonic cleaner to break up the filament. What you’re left with is a silicone-like part that has the same shape as your original print, but is far thinner than anything you could have extruded normally.

So what is [Daniel] looking to accomplish with this technique? We’ll admit the shape of the object is rather suggestive, but in that case, the dimensions just leave us with more questions than answers. Perhaps we’ll learn more in the next video, which we’re told will see the plugs get dipped into latex.

If subtractive manufacturing is more your speed, you can always freeze a sheet of rubber and use a CNC to cut custom parts out of it.

Continue reading “Ultra-Thin Rubber Parts Made With A 3D Printed Plug”

Scroll Through ESPHome With IPod-style Click Wheel

While you’d be hard pressed to find a Hackaday writer that feels any nostalgia for the DRM nonsense the iPod helped to introduce, we’ve got to admit that we miss that click wheel. Spinning your way through long lists was a breeze, and the tactile response made it easy to stop exactly where you wanted. These days, we’re stuck fumbling our way through touch screen interfaces that make simple tasks like seeking to a particular spot in a song or video all but impossible to do with any kind of accuracy.

If you too yearn to once again feel that subtle thumping under your thumb, then check out this project from [landonr]. Technically the handheld gadget is intended to be used as a wireless remote for a home automation system powered by ESPHome, but that’s only one possible application for this particular combination of off-the-shelf components.

If you must, there’s a version with buttons.

Building your own version of the handheld device is a simple as mounting a LILYGO ESP32 T-Display TTGO, an ANO Rotary Navigation Encoder from Adafruit, and a battery pack to a scrap of perfboard. We’d probably look into 3D printing a case to make it a bit less…pokey, but that’s up to you. The result actually bears quite a resemblance to Apple’s iconic media player, but without that pesky walled garden to hold you back.

As mentioned previously, [landonr] wrote the firmware with the intention of controlling a home automation system. So there’s a lot of stuff in there about turning on lights and such. But there are also functions for media playback that look very promising. Whatever software you end up running on it, one thing is for sure: running through the menus is going to feel like a dream.

We’ve covered several other home automation remotes over the years. This handsome wooden model kept things simple with just a few physical buttons, while this somewhat more whimsical approach repurposed Nintendo’s Zapper light gun.

Continue reading “Scroll Through ESPHome With IPod-style Click Wheel”

DIY Fume Extractor With ATtiny13 Speed Control

Let’s be honest, commercially-available soldering fume extractors are cheap enough that you probably don’t need to build one yourself. But it still makes for a good starter project, especially if you go out of your way to really flex your maker muscles like [Arnov Sharma] did with this tidy build.

All the hallmarks of modern hardware making are on display here — you’ve got the 3D printed enclosure, a motor salvaged from a cheap toy quadcopter, and a custom PCB which uses the ATtiny13 and an AO4406 MOSFET to implement a PWM speed control.

The first press of the button starts the motor off at max speed, but keep pushing it, and the motor’s speed will ramp down until it turns off entirely. There’s even a TP4056 charge controller to top off the internal 18650 cell when the fume extractor is connected to a USB power source.

Is it over-engineered? Perhaps. But projects like these are a great opportunity to practice your skills, whether it’s PCB design or creating bespoke 3D printed enclosures. In the era of cheap 32-bit microcontrollers, it’s also refreshing to see hackers still dragging the ATtiny from time to time.

Continue reading “DIY Fume Extractor With ATtiny13 Speed Control”