Squoze Your Data

I have a confession to make. I enjoy the challenge of squeezing software into a tiny space or trying to cut a few more cycles out of a loop. It is like an intricate puzzle. Today, of course, there isn’t nearly as much call for that as there used to be. Today even a “small” microcontroller has a ton of memory and resources.

Even so, there’s still a few cases where you need to squeeze those last few bytes out of memory. Maybe you are trying to maximize memory available for some purpose. Maybe you are anticipating mass production and you are using the smallest microcontroller you can find. Or maybe you’re doing the 1 kB Challenge and just want some advice.

One way to find techniques to maximize resources is to look at what people did “in the old days.” Digital Equipment computers once had a special character set called Squoze (or sometimes DEC Radix-50). This technique can be useful when you need to get a lot of strings into memory. The good news is that you can reliably get 3 characters into 2 bytes (or, as DEC did, 6 characters into 4 bytes). The bad news is that you have to pick a limited character set that you can use. However, that’s not always a big problem.

Continue reading “Squoze Your Data”

Under The (Linux) Hood

We’ve often heard that you don’t need to know how an engine works to drive a car, but you can bet that professional race car drivers know. By analogy, you can build lots of systems with off-the-shelf boards like Raspberry Pis and program that using Python or some other high-level abstraction. The most competent hackers, though, know what’s going on inside that Pi and what Python is doing under the hood down to some low level.

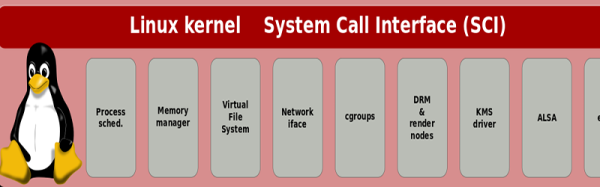
If you’ve been using Linux “under the hood” often means understanding what happens inside the kernel–the heart of the Linux OS that manages and controls everything. It can be a bit daunting; the kernel is simple in concept, but has grown over the years and is now a big chunk of software to approach.

Your first embedded system project probably shouldn’t be a real time 3D gamma ray scanner. A blinking LED is a better start. If you are approaching the kernel, you need a similar entry level project. [Stephen Brennan] has just the project for you: add your own system call to a custom Linux kernel.

Continue reading “Under The (Linux) Hood”

Only One Button? No Problem!

Sometimes less is more. This is especially true when dealing with microcontrollers with limited I/O pins. Even if you have lots of I/O, sometimes you are need to pack a lot into a little space. [Hugatry] was inspired by the simple interface found on a lot of flashlights: one button. Push it and it turns on. Push it again, and it switches modes. You cycle through the modes until you finally turn it back off. One button provides mutliple functions. The question is how can you use a power switch as an I/O device? After all, when you turn the power off, the microprocessor stops operating, right?

[Hugatry’s] answer is quite simple. He connects a resistor/capacitor network to an I/O pin (or multiple pins). When the processor turns on initially, the pin will read low and the capacitor will charge up. If you turn the power off, the CPU voltage will fall rapidly to zero, but the voltage on the capacitor will discharge slower. If you wait long enough and turn the power on, there’s no difference from that first power on event. But if you turn the power on quickly, the capacitor voltage will still be high enough to read as a logic one.

What that means is that the processor as part of its start up can detect that it was recently turned off and take some action. If it remembers the previous state in nonvolatile memory, you can have the code cycle through multiple states, just like a flashlight. You can see a video of the setup, below.

Continue reading “Only One Button? No Problem!”

Partsbox.io Wants To Organize Your Junk Box

There are many ways to divide the hacker community into groups. Tubes vs transistors. Emacs vs VI, microcontroller vs discrete component designers. However, one of the more fundamental divisions in the community is how you organize your parts. We’ve seen giant warehouses with carefully organized bins and cabinets full of components, and we’ve seen storage crates with tangles of wires and bits of electron-bending components scattered among the wires.

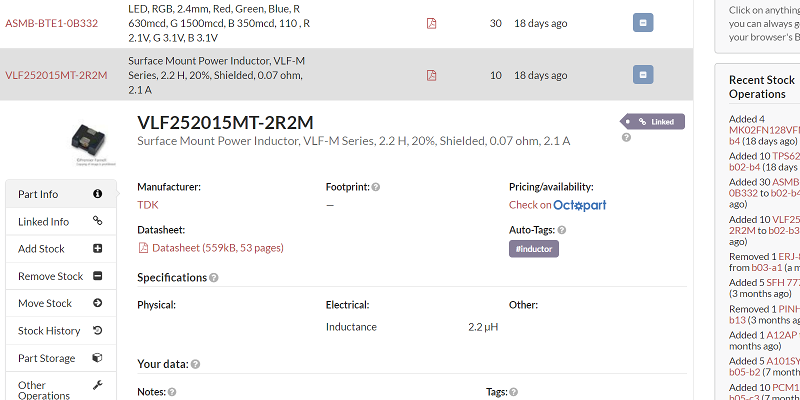
dbIf you are in the former camp, you’d probably enjoy partsbox.io (see image, right). If you are in the latter group, you probably need to check it out even more than the other people. The idea is simple: an online place to keep an inventory of your electronic parts. The implementation is not as simple, though. The web application will work on a mobile device or just about anywhere. You can view your components by type, by location (the shoe box under the bed vs the parts bin in the closet), or by a project’s bill of materials. You can use “known” parts or create private parts for things no one else has (for example, your custom PC boards, or those 3D printed brackets you made to hold a microswitch). If you add data for a component you can make it available to other users.

Continue reading “Partsbox.io Wants To Organize Your Junk Box”

2,000 LEDs On Fire

What’s 18 feet tall, 12 feet wide, has 2,000 LEDs and turbine-driven blast furnaces? Believe it or not, it is a piece of kinetic sculpture created by [Therm] (a collective, not a person) for Burning Man 2016. The project is about 60% salvage, has a Raspberry Pi 3 helping its three human operators, and took a team of 30 about 9 months to complete.

The Raspberry Pi drives LED using fadecandy. You can see a video of the sculpture (three giant moths, to be exact) and a video about fadecandy, below. (We’ve covered a subtler fadecandy project before if you want to see a different take on it.)

Continue reading “2,000 LEDs On Fire”

Documentation? Wave Me!

A lot of hardware and software hackers aren’t all that keen on documentation. The problem is, if you don’t document, it is harder for people to replicate or build on your work. If you aren’t happy writing, keep the old adage in mind: a picture is worth a thousand words.

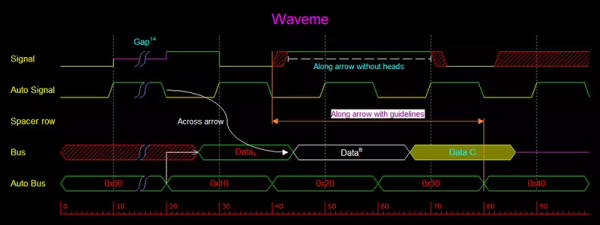
With a digital design, a timing diagram is often a key piece of documentation. WaveMe is a free Windows program that makes it easy to create good-looking timing diagrams. You can run the software on other platforms via Wine.

Continue reading “Documentation? Wave Me!”

Arduino With A… PIC?

Before the Arduino took over the hobby market (well, at least the 8-bit segment of it), most hackers used PIC processors. They were cheap, easy to program, had a good toolchain, and were at the heart of the Basic Stamp, which was the gateway drug for many microcontroller developers.

[AXR AMR] has been working with the Pinguino, an Arduino processor based on a PIC (granted, an 18F PIC, although you can also use a 32-bit device, too). He shows you how to build a compatible circuit on a breadboard with about a dozen parts. The PIC has built-in USB. Once you flash the right bootloader, you don’t need anything other than a USB cable to program. You can see a video of this below.

You will need a programmer to get the initial bootloader, but there’s plenty of cheap options for that. The IDE is available for Windows, Linux, and the Mac. Of course, you might wonder why you would use a PIC device instead of the more traditional Arduino devices. The answer is: it depends. Every chip has its own set of plusses and minuses from power consumption to I/O devices, to availability and price. These chips might suit you, and they might not. That’s your call.  Of course, the difference between Microchip and Atmel has gotten less lately, too.

We’ve covered Pinguino before with a dedicated board. If you never played with a Basic Stamp, you might enjoy learning more about it. If you’re looking for more power than a PIC 18F can handle, you might consider the Fubarino, a PIC32 board you can use with the Arduino IDE.

Continue reading “Arduino With A… PIC?”