Ask Hackaday: Why Do Self Driving Cars Keep Causing Traffic Jams?

Despite what some people might tell you, self-driving cars aren’t really on the market yet. Instead, there’s a small handful of startups and big tech companies that are rapidly developing prototypes of this technology. These vehicles are furiously testing in various cities around the world.

In fact, depending on where you live, you might have noticed them out and about. Not least because many of them keep causing traffic jams, much to the frustration of their fellow road users. Let’s dive in and look at what’s going wrong.

Continue reading “Ask Hackaday: Why Do Self Driving Cars Keep Causing Traffic Jams?” →

Your Guide To Using Amazon’s Sidewalk Network For The Internet Of Things

As the Internet of Things became a mainstream reality, it raised an interesting point about connectivity. We quickly learned it wasn’t ideal to have every light bulb, toaster, and kettle buzzing away on our main WiFi networks. Nor was it practical to sign up for a cellular data plan for every tracker tag or remote sensor we wanted to use.

To solve this issue, various tech companies have developed their own low-power mesh networking solutions. Amazon’s Sidewalk network is one of the widest spread in the US. Now, it’s opening it up for wider use beyond its own products, and you can get in on the action.

Continue reading “Your Guide To Using Amazon’s Sidewalk Network For The Internet Of Things” →

When Your Smart Light Switches Stop Working, Build Your Own

If you want smart light switches in your house, you can buy from any one of hundreds of manufacturers. [Brian Boyle] had kitted out his home with TP Link devices, but after a few years of use, he found they all suddenly failed within a few months of each other. Decrying the state of things, he set about building his own instead.

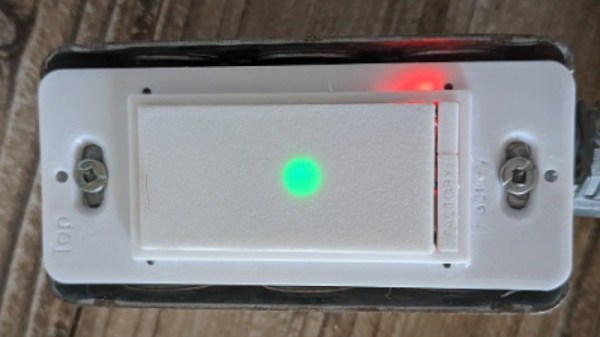
[Brian]’s switches use the ESP32 for its handy in-built WiFi hardware. His aim was to produce smart switches that would fit neatly into standard “Decor” style switch boxes. The design uses two PCBs. One is charged with handling the mains power side of things. It carries an SPDT relay for switching AC power, and a DC power supply to run the ESP32 itself. The controller board holds the microcontroller, a Neopixel as a status indicator, and a pair of buttons — one for switching the lights on and off, the other for resetting to default settings. The physical housing is 3D printed, and looks great with the glowing status indicator in the middle of the switch.

[Brian]’s switches are triggerable via MQTT, a web interface, and the physical button onboard the device itself. Having built the devices on his own, he’ll be well-placed to troubleshoot any usability or reliability issues that crop up in the future. That’s a lot more than we can say about most smart devices on the market!

RP2040 Gets Intellikeys Keyboard Up And Running

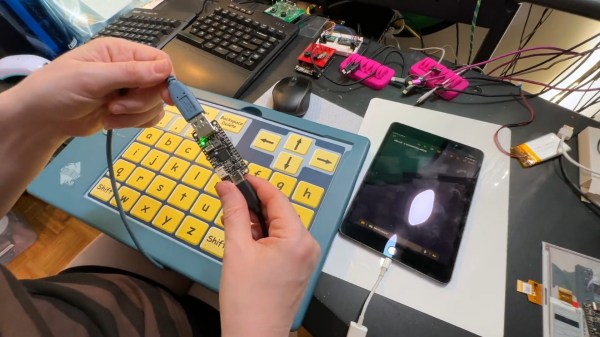
The Spectronic Intellikeys was an innovative keyboard-like accessibility device that used special plastic overlays that change its functionality. While a USB version of the accessible keyboard exists, it doesn’t work like a normal HID device, so it’s not plug and play as you might expect. It’s also no longer in production or supported by the manufacturer. Where industry falls down, the community steps in, right? To that end, Adafruit has built a tool for interfacing with these useful accessibility devices.

The key is the way the Intellikeys was intended to work with a computer. It was designed to download its firmware from the host machine, using special drivers that are only compatible with certain versions of Windows. That means you can’t use it with iPads or Chromebooks, for example.

To get around this, Adafruit used an RP2040 Feather configured as a USB host to talk to the Intellikeys. It queries the device, determines which overlay it currently has installed, and provides it the necessary firmware. On the other end, the Feather enumerates as a regular USB HID device. That allows it to work with a wide variety of tablets, computers, and even smartphones.

If you’ve got an Intellikeys USB device and miss using it, this could be just the thing you need. Meanwhile, you can check out some of the other interesting keyboard designs we’ve featured over the years.

Continue reading “RP2040 Gets Intellikeys Keyboard Up And Running” →

Hackaday Prize 2023: Tiny RC Aircraft Built Using Foam And ESP12

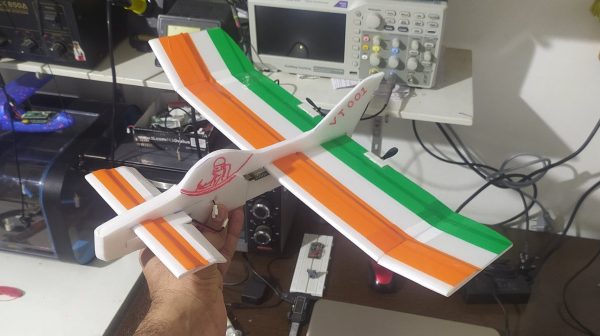
Once upon a time, a radio controlled plane was a hefty and complex thing. They required small nitro engines, support equipment, and relatively heavy RC electronics. Times have changed since then, as this lightweight RC build from [Ravi Butani] demonstrates.

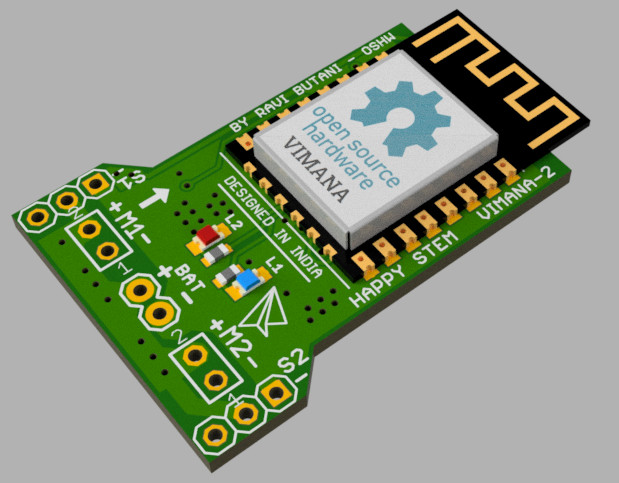
The body of the plane is lightweight foam, and can be assembled in two ways. There’s a relatively conventional layout, using a main wing, tailplane, and rudder, or a pusher model with the main wing at the rear and a canard up front. The open hardware electronics package, which [Ravi] calls VIMANA, consists of an ESP12 module with a pair of MOSFETs to act as two independent motor drivers — allowing the plane to be flown and steered with differential thrust.

For more advanced flight control, it can also command a pair of servos to control ailerons, a rudder, canards, or elevons, depending on configuration. There’s also potential to install an IMU to set the plane up with flight stabilization routines.

Thanks to the low-cost of the VIMANA board, [Ravi] hopes it can be used in STEM education programs. He notes that it’s not limited just to aircraft, and could be used for other motorized projects such as boats and cars. We’ve featured an early version of his work before, but the project has come a long way since then.

Continue reading “Hackaday Prize 2023: Tiny RC Aircraft Built Using Foam And ESP12” →

Building A WiFi Picture Frame With An EInk Display

LCD photo frames never really caught on — by emitting light, they didn’t seamlessly blend in with a home’s decor in the way printed photos do. [Sprite_tm] decided to see if a color e-Ink screen could do any better, and whipped up a WiFi-enabled photo frame using a Waveshare display.

The part in question is a 5.65-inch display with 640 x 448 resolution, and is capable of displaying seven colors. It’s not designed to display photorealistic images, so much as display simple graphics with block colors. However, with some dithering, [Sprite_tm] suspected it might do an okay job. An algorithm that uses Floyd-Steinberg diffusion and the CIEDE2000 color space takes regular RGB images and breaks them down into dithered images that are displayed using the screen’s 7 available colors.

The build relies on an ESP32-C3, which drives the display and fetches new images daily over WiFi. Thanks to the e-Ink screen, which uses zero power when not updating, the whole setup runs off two AA batteries and a Natlinear LN2266 boost converter.

There are some limitations; the screen’s color space is altogether quite limited, and images don’t look very high-fidelity in such low resolution. However, it does an able job of displaying photos for a device that was never designed to do so. It looks rather handsome all wrapped up as a 3D printed picture frame, and [Sprite_tm]’s monkey test photos are very cute.

Files are on GitHub for those that wish to roll their own. We’ve seen similar works before, like this e-Ink wall-hanging newspaper display that keeps up with the times. If you’ve got your own neat e-ink build, hit us up on the tipsline!


Alternatives To Pins And Holes For 3D Printed Assemblies

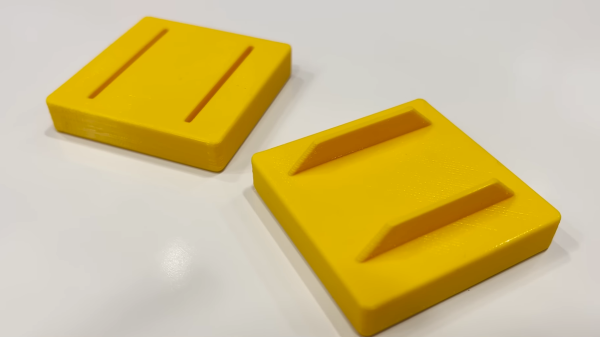
When we have two 3D printed parts that need to fit together, many of us rely on pins and holes to locate them and fix them together. [Slant 3D] has explored some alternative ideas in this area that may open up new avenues for your own designs.

Their first idea was to simply chamfer the pins and holes. This allows the object to be printed in a different orientations without compromising the fit. It also makes the features less brittle and creates a broader surface for gluing. Another alternative is using fins and slots, which again add robustness compared to flimsy pins. By chamfering the edges of the fins, they can be printed vertically for good strength and easy location without the need for support material.

Neither option requires much extra fuss compared to typical pin-and-hole designs. Plus, both are far less likely to snap off and ruin your day. Be honest, we’ve all been there. Meanwhile, consider adding folded techniques to your repertoire, too.

Continue reading “Alternatives To Pins And Holes For 3D Printed Assemblies” →