When we think of electric cars, more often than not we’re drawn to the environmental benefits and the smooth quiet commuter drives they’re so ideally suited for. However, EVs can also offer screaming performance, most notably due to their instant-on torque that gives them a big boost over internal combustion vehicles.
In recent years, this has led to a variety of independent and manufacturer-supported efforts taking on some of motorsport’s classic events. Today, we’re looking at a handful of recent entries that have tackled one of the most gruelling events in motorsport – the Pikes Peak International Hillclimb. Continue reading “Electric Vehicles Do Battle On Pikes Peak”→
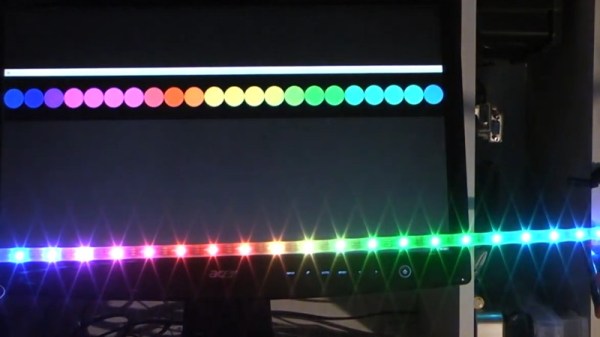
NeoPixels and other addressable LED strings are a technology that have made vibrant, glowing LED projects accessible to all. Of course, it’s nice to be able to simulate your new glowy project in software before you actually set up your LED strings in practice. [Randy Elwin]’s NeoPill simulator can help with that!
The NeoPill consists of an STM32F103 development board, into which one simply hooks up a NeoPixel data line. The microcontroller then decodes the data using a combination of its onboard timers and SPI hardware. This data is then passed to a PC over the onboard USB serial connection, where it’s decoded by a custom Python app. The app takes the data and displays the pixels on screen, so you can verify they operate as expected before you hook up a single real LED.
It’s a great tool, one that costs very little and yet does the job well. It can even be used with LEDs in circuit to verify if problems are related to the data output or the hardware itself. [Randy] demonstrates the software working with strings of up to 256 LEDs at once; we’d love to see how far it can be pushed before breaking. Code is available on Github for those keen to get their own NeoPill operational.
It’s not the only NeoPixel simulator out there, but it is the first one we’ve seen that can be used to debug actual signals from real hardware, and that’s an incredibly useful thing to have in your toolbelt. Video after the break.
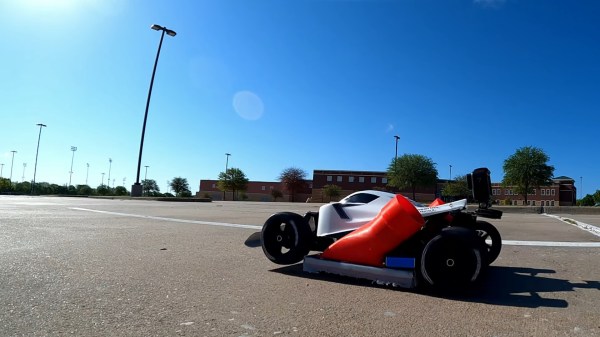
We’ve seen an earlier prototype of this build before, with the first version generating enough downforce to successfully drive upside down. The new build has several modifications to maximise its lateral acceleration capabilities. The new build drives all four wheels, which are fitted with sticky tyres coated in traction compound for maximum grip. The main drive motor, along with the fan and skirt assemblies, are all mounted in the center of the car now to properly balance the aero loads across the axles and provide a stable weight distribution for fast launches.
The results are impressive, with the car posting a 0-60mph time of just 1.825 seconds. There’s likely still time left on the table, too, once the car can be tuned to launch harder off the line. We’d love to see a racing series of fan-equipped RC cars hit the track, too, given the amount of grip available with such hardware.
This cat looks like he plays bassoon in a jazz band.
Emojis are all well and good if you want to add a fun tiny picture to your textual communication to try and add some finer context or zing, but what if the appropriate tiny picture doesn’t accurately represent you or how you feel? Never fear, cowboys, the emoji set you’ve been dreaming of has now been created.
The set was initially created by the appropriately-named [pensivecowboy], by using scripts to place cowboy hats atop existing emojis from the twemoji set automatically. Over time, it was decided to instead just apply these hats to the 300 most-used emojis instead, with some manual fettling in cases where the script-generated result needed a little work.
The fire is coming out of the hat, which is just absolutely fantastic attention to detail.
Is this important, groundbreaking work? Your opinion on that likely depends on how much of a cow or a boy you are. But down at the ranch, it’ll likely bring many a smile to a pensive cowboy’s face. A quick search did note the absence of a :snake_in_my_boot: emoji, however, which could be a safety issue down the line.
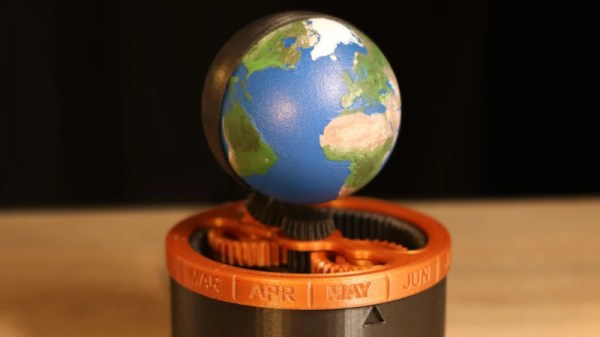
The build consists of an Arduino Nano driving a stepper motor, which turns a 3D printed model of the Earth through 360 degrees each day. The Earth is rotated within a black shroud such that the current portion of the Earth seeing sunlight is the visible section on the clock, while the rest is hidden from view. There’s a three-stage planetary gear reduction which turns a date wheel connected to the black shroud so that the clock remains accurate throughout the year. The gear ratio isn’t perfect — [Simon] calculates its drift to be 20 hours over a year -but it’s close enough for the clock’s given purpose of being a cool thing.
The clock looks great, and a lot of that is down to [Simon]’s careful work painting the Earth to match the real thing based on Google’s satellite maps. Incidentally it’s not the first Earth clock we’ve seen, either. We might just have to get building one for our own coffee table at home. Video after the break.
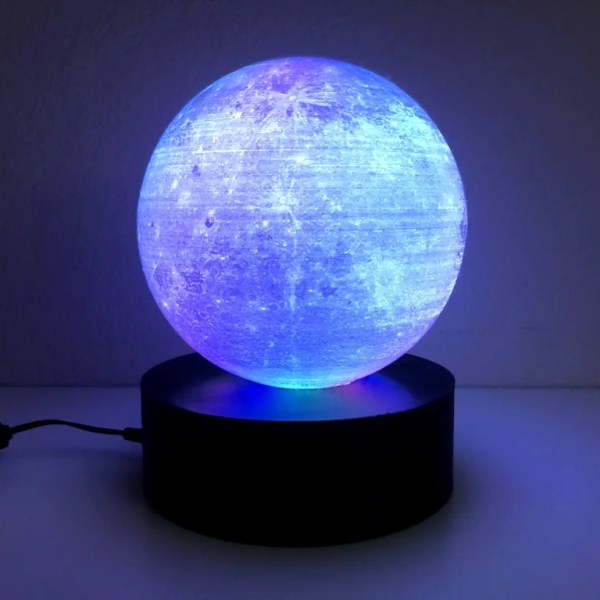
Lithophanes are artistic creations which rely on the varying thickness of a material that is then backlit to reveal an image. While these were often made in porcelain in the past, these days we have the benefit of 3D printing on our side. The principle can be deftly applied to everything from flat planes to spheres, with [Tiffany Lo] demonstrating a great application of the latter with her 3D printed moon lamp.
The basic concept is to take a 2D image of the lunar surface, and then use it to generate a height mapped sphere for 3D printing. When lit from within, the sphere will appear as per the surface of the moon. The sphere geometry was generated with the Lithophane Sphere Maker online tool combined with NASA data of the moon intended for computer graphics purposes. The sphere was then printed on a typical FDM printer before being assembled upon a base with LEDs inside for backlighting.
The result is an attractive moon lamp that both recalls the heavy rock that follows us in a tidally-locked orbit, and yet can be switched off at night to make it easier to sleep. Unfortunately, it’s impractical to turn off the shine from the real moon, and we suspect nobody is working on the problem.
We’ve seen other moon lamps before; they’re a great starting point because the moon’s greyscale tones work well as a lithograph. More advanced techniques are likely necessary for those eager to create lamps of the gas giants; if you’ve done so, be sure to drop us a line.
The mowing itself is done by a typical push-along garden mower with a gasoline engine. However, it’s fitted with twin DC gear motors harvested from a mobility scooter. The mowers original front wheels were also removed, replaced with casters from the same mobility scooter that donated the drive train. Off-the-shelf speed controllers were then used to run the motors, and hooked up to an RC receiver. The mower could then be steered via a radio controller set up with mixing to enable the twin-motor setup to steer and drive.
An FPV camera was then fitted on the front of the mower, sitting on a stack of kitchen sponges that act as a isolator to negate the effects of the engine vibrations on the camera. The result is a relatively smooth video feed, allowing the operator to sit at a comfortable distance and control the mower via radio and goggles.