Interfacing The Dreamcast Controller With Just An Arduino

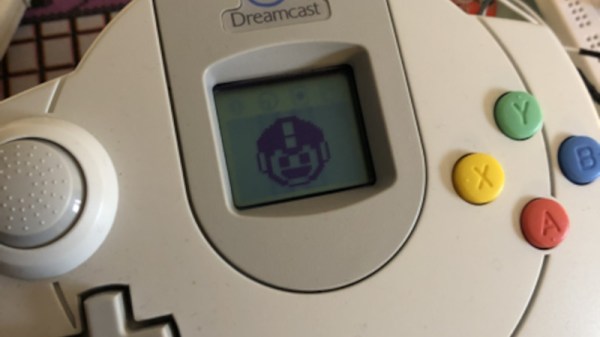
The Dreamcast is a somewhat forgotten console today, but for a shining minute in the late 1990s, it was possible to believe Sega were still in the fight. Regardless, their hardware lives on, lovingly preserved by collectors and enthusiasts. [Nicholas FitzRoy-Dale] is one such enthusiast, and set about interfacing the old console’s controllers to an Arduino.

Initial work involved getting the Arduino (presumably a basic 16 Mhz Uno) to read the controller’s buttons, and spitting the data out over serial. The Dreamcast’s Maple bus is fast, which presented some challenges, but it was simple enough. [Nicholas] then moved on to interfacing the VMU, the Dreamcast’s fancy controller-mounted memory card. After initial attempts were shaky and unstable, he redoubled his efforts. Research indicated that the VMU can vary the speed of the bus when it’s in control, so he updated his code to suit. It’s full of great hacks, like connecting the Dreamcast’s two data pins to four input pins on the Arduino, to save a handful of cycles by not having to shift incoming data.

The work is a great read for anyone into assembly-level optimisation of interfaces, as well as proper use of limited resources. Obviously, it’s easy to just throw a faster, more expensive microcontroller at the problem, but then nobody would have learned anything. We’ve featured a great many Dreamcast hacks over the years; [Nicholas]’s work here builds upon [Dmitry]’s work in 2017. We can’t wait to see what comes next out of the underground Sega hacking scene!

High Speed Flight In A Homebrew FPV Cockpit

First-person view, or FPV, has become hugely popular in RC flying circles. A pair of video goggles lets the pilot fly with vision from the plane itself. To make things even more realistic, the team at [FliteTest] built a replica cockpit with working controls and took it down to the field for testing. (Video, embedded below.)

Since the pilot is wearing video goggles, aesthetics aren’t the key here. A RC transmitter was gutted for its gimbal and potentiometers. The former fitted with a long stick for aileron and elevator control, and the latter hooked up to pedals for the rudder. There’s even a proper throttle handle. It’s a low-budget build, with PVC pipe and bungee straps doing much of the work, but that doesn’t detract from the fun factor one bit. The team later upped the stakes, flying a faster model with the rig at speeds up to 120 mph.

Interesting to note is the somewhat visceral reaction by the pilot when crashing, as the combination of first-person view video and realistic controls gives a powerful sense that one is actually in a real plane. FPV flying actually has a longer history than you might expect, with roots as far back as the 1980s. Continue reading “High Speed Flight In A Homebrew FPV Cockpit” →

Wireless 360 Controllers Now On The Dreamcast

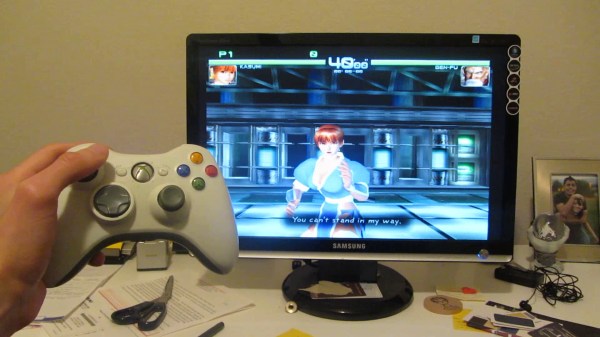
Perhaps the greatest convenience feature of modern consoles is the wireless controller. Eliminating the risk of tripping over cords and enabling play in all manner of poorly ergonomic positions, they added huge comfort to the console gaming experience. [ismell] was no fan of the Dreamcast’s original controller, and the cable was too short to boot. It was time to bring the 360 Wireless controller to Sega’s swansong.

Early attempts by [ismell] involved a Windows computer acting as a USB host for the 360 controller, which would then send out commands back to the Dreamcast via a Cypress EZ-USB FX2 microcontroller. If this sounds esoteric and messy, that’s because it is. It was also too slow to reliably work, as the Dreamcast’s Maple controller bus expects updates every millisecond, else it considers the controller disconnected.

Instead, a dedicated USB host was needed to speak to the 360 controller and also the Dreamcast. [ismell] landed on the MicroZed 7010, a System on Chip that also packs an FPGA on board. With Petalinux running on the board, it interfaces with the Xbox 360 USB wireless controller interface, and then sends the data out over a custom “network” driver that sends packets to the Dreamcast over the Maple bus.

It’s by no means a simple hack, and the MicroZed is far from cheap, but it works and works well as shown in the video below. We’ve seen other wireless controller adapters over the years, too – like the wild BlueRetro build. We always love to see a good retro console hack, so don’t be shy about sending in your own!

Continue reading “Wireless 360 Controllers Now On The Dreamcast” →

Industrial-Grade Storage Built With Laser-Cut Steel

A tidy workshop is much more likely to be a happy workshop, and one that better supports the practice of making. Organisation is key to maintaining tidiness over time, and for that, you need storage. [Wesley Treat] needed some more space recently, and set about building a serious storage unit using laser-cut parts.

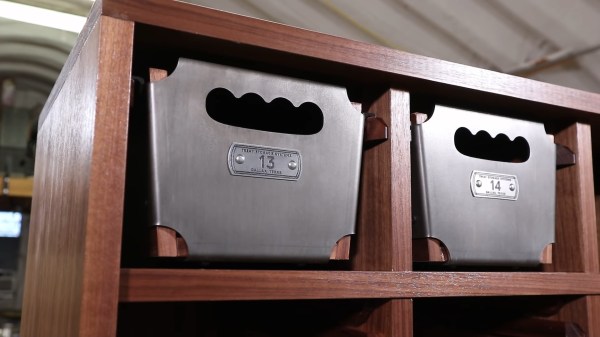
The key to the build lies in the elegant steel flanges used to make the drawers. These were designed in CAD, with a DXF cutting file exported and sent off to OSH Cut for laser cutting and bending, in much the same way one would send 3D printed parts off to Shapeways or PCB files to JLCPCB. The drawer flanges are then joined with steel angle and fitted with plywood bases and sides. The drawers are then given CNC-engraved nameplates for a nice aesthetic touch. Once finished, the heavy duty drawers slide on wooden rails built into the walnut frame.

It’s a great example of how farming out a single piece of a larger project can lead to a quicker build and better final results. Producing 12 flanges by hand in the home shop would take longer and likely have far more variability. For those that only have a 3D printer at home, farming out production for metal parts is a good way to do heavy-duty projects without having to invest in an entire machine shop.

[Wesley] has graced these pages before, too – with a great guide on reproducing knobs for vintage hardware. Video after the break.

Continue reading “Industrial-Grade Storage Built With Laser-Cut Steel” →

Visualise ESC Problems With LEDs

For many in the RC community, blowing up an Electronic Speed Controller (ESC) means one thing: throwing it away and buying another one. However, if you’re regularly pushing the limits or simply hate waste, fixing failed units is an option. To assist in this task, [LouD] built an ingeniously simple ESC tester.

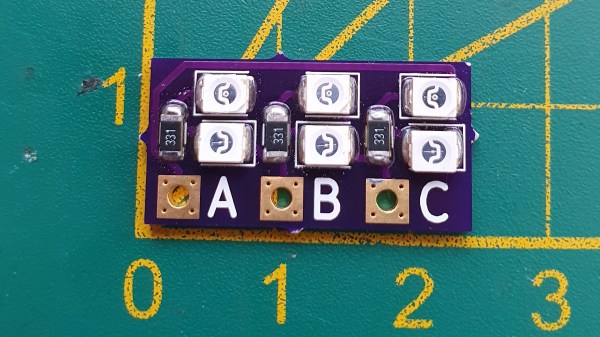
The board is designed to be wired in parallel with a brushless DC motor when hooked up to an ESC. The board packs two LEDs per phase, wired in opposite directions. Thus, current flow in both directions can be visualised on a phase-by-phase basis. If everything is operational, the red and green LEDs on each phase should glow evenly as the throttle is ramped up. However, if there are problems, it will be readily apparent as the blinking becomes erratic or one or more LEDs fails to light at all.

It’s a nifty little device that would prove useful when testing  a pile of possibly-defective units. It’s also a quick way to verify a fix. The project is up on OSHPark should you wish to order your own.

Continue reading “Visualise ESC Problems With LEDs” →

Cassette Lamp Is A Throwback To The Pencil-Winding Glory Days

The audio cassette was the first music format that truly championed portability. It was robust, compact, and let people take music on the go to soundtrack their very lives. It was later supplanted by the higher-quality CD and then further digital technologies, but the format remains a nostalgic highlight for many. It also inspired this excellent lamp build from [Fab].

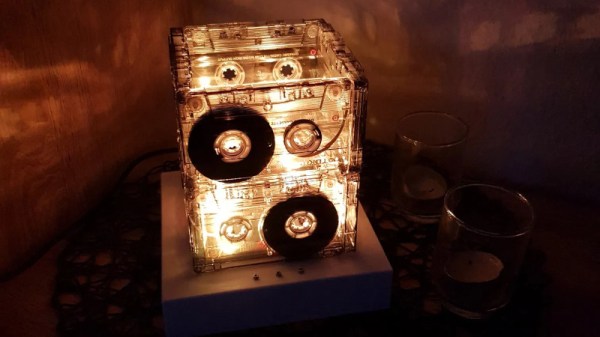
The lamp consists of 8 clear cassettes assembled into a rough cube-like shape on a 3D printed frame. The cassettes are edge-lit from below by a set of WS2812B LEDs, letting them glow in full-color splendour. The real magic of the lamp is the interface, however. A pencil can be inserted to turn the tape reels, just like rewinding a real cassette. However, in this case, they’re attached to a pair of rotary encoders, which are used to vary the color of the LEDs. As a bonus, the entire lamp runs off a Wemos D1, making it possible to update the lamp remotely over the Internet.

It’s a stylish build that would make an excellent conversation piece in any hip maker’s loungeroom. It’s a great nod to the creator of the compact cassette, [Lou Ottens], who passed away earlier this month. Video after the break.

Continue reading “Cassette Lamp Is A Throwback To The Pencil-Winding Glory Days” →

Running 57 Threads At Once On The Arduino Uno

When one thinks of the Arduino Uno, one thinks of a capable 8-bit microcontroller platform that nonetheless doesn’t set the world alight with its performance. Unlike more modern parts like the ESP32, it has just a single core and no real multitasking abilities. But what if one wanted to run many threads on an Uno all at once? [Adam] whipped up some code to do just that.

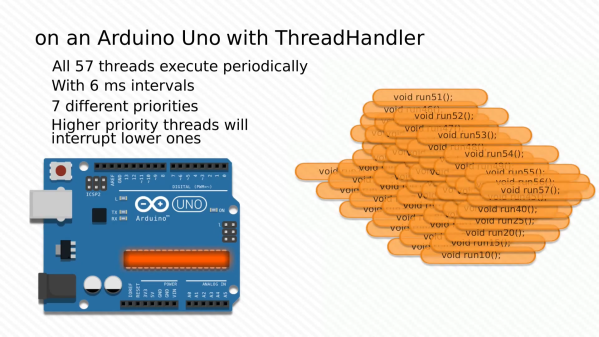
Threads are useful for when you have multiple jobs that need to be done at the same time without interfering with each other. The magic of [Adam]’s ThreadHandler library is that it’s designed to run many threads and do so in real time, with priority management as well. On the Arduino Uno, certainly no speed demon, it can run up to 57 threads concurrently at 6ms intervals with a minumum timing error of 556 µs and a maximum of 952 µs. With a more reasonable number of 7 threads, the minimum error drops to just 120 µs.  Each thread comes with an estimated overhead of 1.3% CPU load and 26 bytes of RAM usage.

While we struggle to think of what we could do with more than a handful of threads on an Arduino Uno, we’re sure you might have some ideas – sound off in the comments. ThreadHandler is available for your perusal here, and runs on SAMD21 boards as well as any AVR-based boards that are compatible with TimerOne. We’ve seen other work in the same space before, such as ChibiOS for the Arduino platform. Video after the break.

Continue reading “Running 57 Threads At Once On The Arduino Uno” →