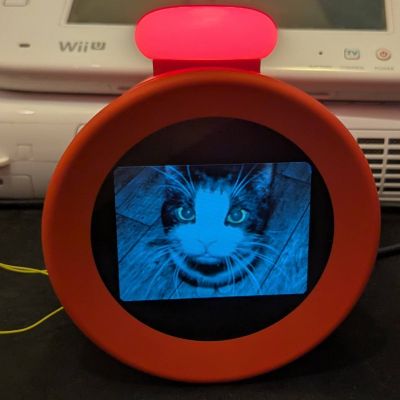
Video Killed The Radio Alarm Clock

For decades now, MTV has been on a bizarre trajectory given its original name was an acronym for Music Television. In the original days in the 80s and 90s it kept mostly true to its name, but starting around two decades ago they expanded into reality and other non-musical television programming and have now left it largely behind. Plenty of those who grew up in its heyday have an understandable amount of nostalgia for the channel as a cultural touchstone, and [Derf] used MTV archival footage to build a video alarm clock which helps him keep in tune with the past.

To keep the appropriate 80s aesthetic, the build uses a portable TV from the late 80s with its original CRT. The video files are hosted on more modern technology though, in this case a Raspberry Pi. The Pi is set up to run a python script which launches the VLC media player with a playlist loaded with video files, in this case a long list of MTV shows. Some configuration needs to be done to get it to output to the old CRT properly which depends on the hardware used, but once that’s in place it’s ready to be used as an alarm. [Derf] is using a smart outlet to power the TV at the appropriate time, and a cron job which starts the video player simultaneously at a somewhat random point in the playlist.

As far as retro TVs go, having one as an alarm clock is certainly a novel idea. We have seen a few others in the past, though, one to play the golden age of The Simpsons, and another that recreates the nostalgia of 90s cable television complete with a preview channel and era-appropriate commercials.

Continue reading “Video Killed The Radio Alarm Clock”

Tiny Motion Detection Alarm Does The Trick

If you have mischievous children or forgetful elderly in your life, you might want to build a couple of these tiny motion detection alarms to help keep them out of harm’s way. Maybe you want to keep yourself out of the cookie jar. We say good for you.

But you could always put one of these alarms on a window, a drawer, or anything else you don’t want opened or moved. The MPU6050 3-axis IMU makes sure that any way the chosen item gets jostled, that alarm is going off.

As you may have guessed, there isn’t much more to this build — the brain is a Seeed Xiao ESP32-C3, and there’s a buzzer, a battery, a switch, and a push button to program it.

The cool thing about using an ESP32-C3 is that [gokux] can use these for other things, like performing a task when motion is detected. If you do want to build yourself a couple of these, here are step-by-step instructions.

If you’d rather detect motion in the vicinity, here’s a PIR-based solution.

Alarm Panel Hack Defeats Encryption By Ignoring It

As frustrating as it may be for a company to lock you into its ecosystem by encrypting their protocols, you have to admit that it presents an enticing challenge. Cracking encryption can be more trouble than it’s worth, though, especially when a device gives you all the tools you need to do an end-run around their encryption.

We’ll explain. For [Valdez], the encrypted communication protocols between a DSC alarm panel and the control pads on the system were serious impediments to integration into Home Assistant. While there are integrations available for these alarm panels, they rely on third-party clouds, which means that not only is your security system potentially telling another computer all your juicy details, but there’s also the very real possibility that the cloud system can either break or be shut down; remember the Chamberlain MyQ fiasco?

With these facts in mind, [Valdez] came up with a clever workaround to DSC encryption by focusing on physically interfacing with the keypad. The device has a common 16×2 LCD and a 25-key keypad, and a little poking around with a multimeter and a $20 logic analyzer eventually showed that the LCD had an HD44780 controller, and revealed all the lines needed to decode the display with an ESP32. Next up was interfacing with the keypad, which also involved a little multimeter work to determine that the keys were hooked up in a 5×5 matrix. Ten GPIOs on the ESP32 made it possible to virtually push any key; however, the ten relays [Valdez] originally used to do the switching proved unwieldy. That led to an optocoupler design, sadly not as clicky but certainly more compact and streamlined, and enabling complete control over the alarm system from Home Assistant.

We love this solution because, as [Valdez] aptly points out, the weakest point in any system is the place where it can’t be encrypted. Information has to flow between the user and the control panel, and by providing the electronic equivalents to eyes and fingers, the underlying encryption is moot. Hats off to [Valdez] for an excellent hack, and for sharing the wealth with the HA community.

ESP32 Freezer Alarm Keeps Tabs On Tricky Door

Leaving your freezer door open accidentally is a great way to make a huge mess in the kitchen. [Guy Dupont] had a freezer that would regularly fail to close properly, and was sick of the regular meltdown events. Thus, he whipped up a very digital solution.

The build combines an ESP32 with a reed switch, which is activated by a magnet on the freezer door. If the freezer door is open, the reed switch similarly remains open. The ESP32 checks the switch status every few minutes, and if the door remains open for two consecutive checks, it raises the alarm. A notification is sent to [Guy] via WiFi so that he can rectify the situation. The rig runs off a 400 mAh battery, which lasts for just over three weeks running door checks at two minuteĀ  intervals.

Based on [Guy]’s YouTube video, it appears the freezer door is jamming up against the wall. Perhaps shoving the freezer into a better position would help, though we suspect he would have thought of that first. And, in his own words, “That would be a very boring YouTube video, wouldn’t it?”

It’s not the first fridge alarm we’ve featured, and it won’t be the last, refrigeration gods willing.

Continue reading “ESP32 Freezer Alarm Keeps Tabs On Tricky Door”

Smart Pants Sound Alarm When Your Fly Is Undone

It’s always embarrassing to be told your fly is down. Even moreso when you realize it’s been that way since you returned from the bathroom an hour ago. [Guy Dupont] has built a device to solve this awkward issue once and for all. (Nitter)

Pictured: The Hall effect sensor and magnet attached to the zipper.

The pants contain a Hall effect sensor which has been attached inside the fly of the jeans, at the bottom of the zipper. The zipper pull itself was then fitted with a strong magnet, which triggers the sensor when the zipper is in the open position. An ESP32 in the pocket of the jeans is tasked with monitoring the sensor. If it detects that the zipper has been down for too long, it sends a notification to the wearer’s smartphone to zip up. We kind of wish they’d sound an ear-splitting klaxon, but that might draw undesired attention to the wearer.

Zipper position monitoring seems like a nightmare at first, but [Guy]’s hack shows us that it’s actually trivial with this method. The system does, however, add significant complication to what was previously a totally-analog pair of pants. Don’t expect “Big Jeans” to jump on this tech, as maintenance and waterproofing issues would likely make the hardware a pain to deal with in real life.

Plus, just imagine the frustration every morning. “Sorry, mate, not ready to head out yet – I’ve gotta pair my jeans with my smartphone.”

Continue reading “Smart Pants Sound Alarm When Your Fly Is Undone”

Two hands holding a 3d printed alarm clock with an LCD display, snooze button and knob on top

IO Connected Radio Alarm Clock

[CoreWeaver] creates an alarm clock that includes features one might expect in such a project, including an FM radio, snooze button inputs and a display, but goes beyond the basic functionality to include temperature sensing and a PC connection, opening the way for customizable functionality.

Block diagram for the IO connected Alarm Clock

An Atmega328 is used for the main microcontroller which communicates via I2C both to a DS1307 real time clock (RTC) and a TEA5767 FM module. The main power comes from a 9V power source with an LM317 and LM7805 linear regulators providing a 3.3V and 5V power rail, respectively. Most of the electronics are powered using 5V except for the TEA5767, which is powered from the 3.3V rail and has its I2C communication levels shifted from 5V to 3.3V. The audio output of the TEA5767 feeds directly into the TDA7052 audio amplifier to drive the speakers. Since the RTC has an auxiliary coin cell battery for power, the alarm clock can keep accurate time even when not plugged in. Continue reading “IO Connected Radio Alarm Clock”

An alarm clock with a Nixie tube display

Retro Alarm Clock With Nixies Is Thoroughly Modern Inside

We feature a lot of clocks here at Hackaday, but alarm clocks seem to be less popular for some reason. Maybe that’s because no-one enjoys being woken up in the morning, or simply because everyone uses their smartphone for that purpose already. In any case, we’re delighted to bring you [Manuel Tosone]’s beautiful Nixie tube alarm clock that cleverly combines modern and classic technologies in a single package.

An alarm clock with a Nixie tube display, openedThe clock and alarm functionalities are implemented by a PIC24 microcontroller on a custom mainboard. It keeps track of time through its real-time clock with battery backup, and plays a song from an SD card when it’s time to wake up. A 2 x 3 W class D audio amplifier plus a pair of stereo speakers should be able to wake even the heaviest sleepers.

Of course, the real party piece is the clock’s display: four IN-4 Nixie tubes show the time, with neon tubes indicating the day of the week. The 180 V needed for the Nixies is generated by an MC34063A-based boost converter, which also powers the neon tubes.

Instead of using the standard current-limiting resistor for each Nixie tube, [Manuel] designed an array of transistor-based current sources: this enables linear control of the tubes’ brightness, and should keep the amount of light constant even as the tubes age. The individual segments are switched by SN75468 Darlington arrays, with no need for those hard-to-find SN74141 drivers.

The mainboard and the display are housed inside a 3D-printed case that mimics the style of 1980s digital alarm clocks, but with a nice 1970s twist courtesy of those Nixie tubes. [Manuel]’s GitHub page has all the schematics as well as extensive documentation describing the circuit’s operation — an excellent resource if you’re planning to build a Nixie project yourself. If Nixies aren’t your thing, you can also make an alarm clock with a VFD tube, or even roll your own luminous analog dial.

Continue reading “Retro Alarm Clock With Nixies Is Thoroughly Modern Inside”