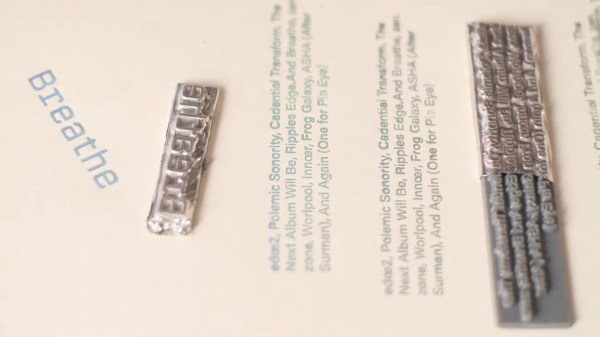
[This Designed That] does a lot of hot foil stamping. That’s the shiny embellishment you’ll see on wedding invitations and your fancier letterheads. They wanted a way to quickly see if the process is right for a given design, and how it might come together if so. Many of the designs involve letter forms, which they have tried milling out of brass in the past, but the process is fiddly and takes a while. Seeking a faster way to test designs, [This Designed That] turned to 3D printing.
 They achieved good results with an Elegoo Mars Pro, but the the most important thing here is the resin needs to withstand at least 130 C, which is the max that [This Deigned That] usually runs it at. The answer was in Phrozen TR300 resin, which can handle temps up to 160 C.
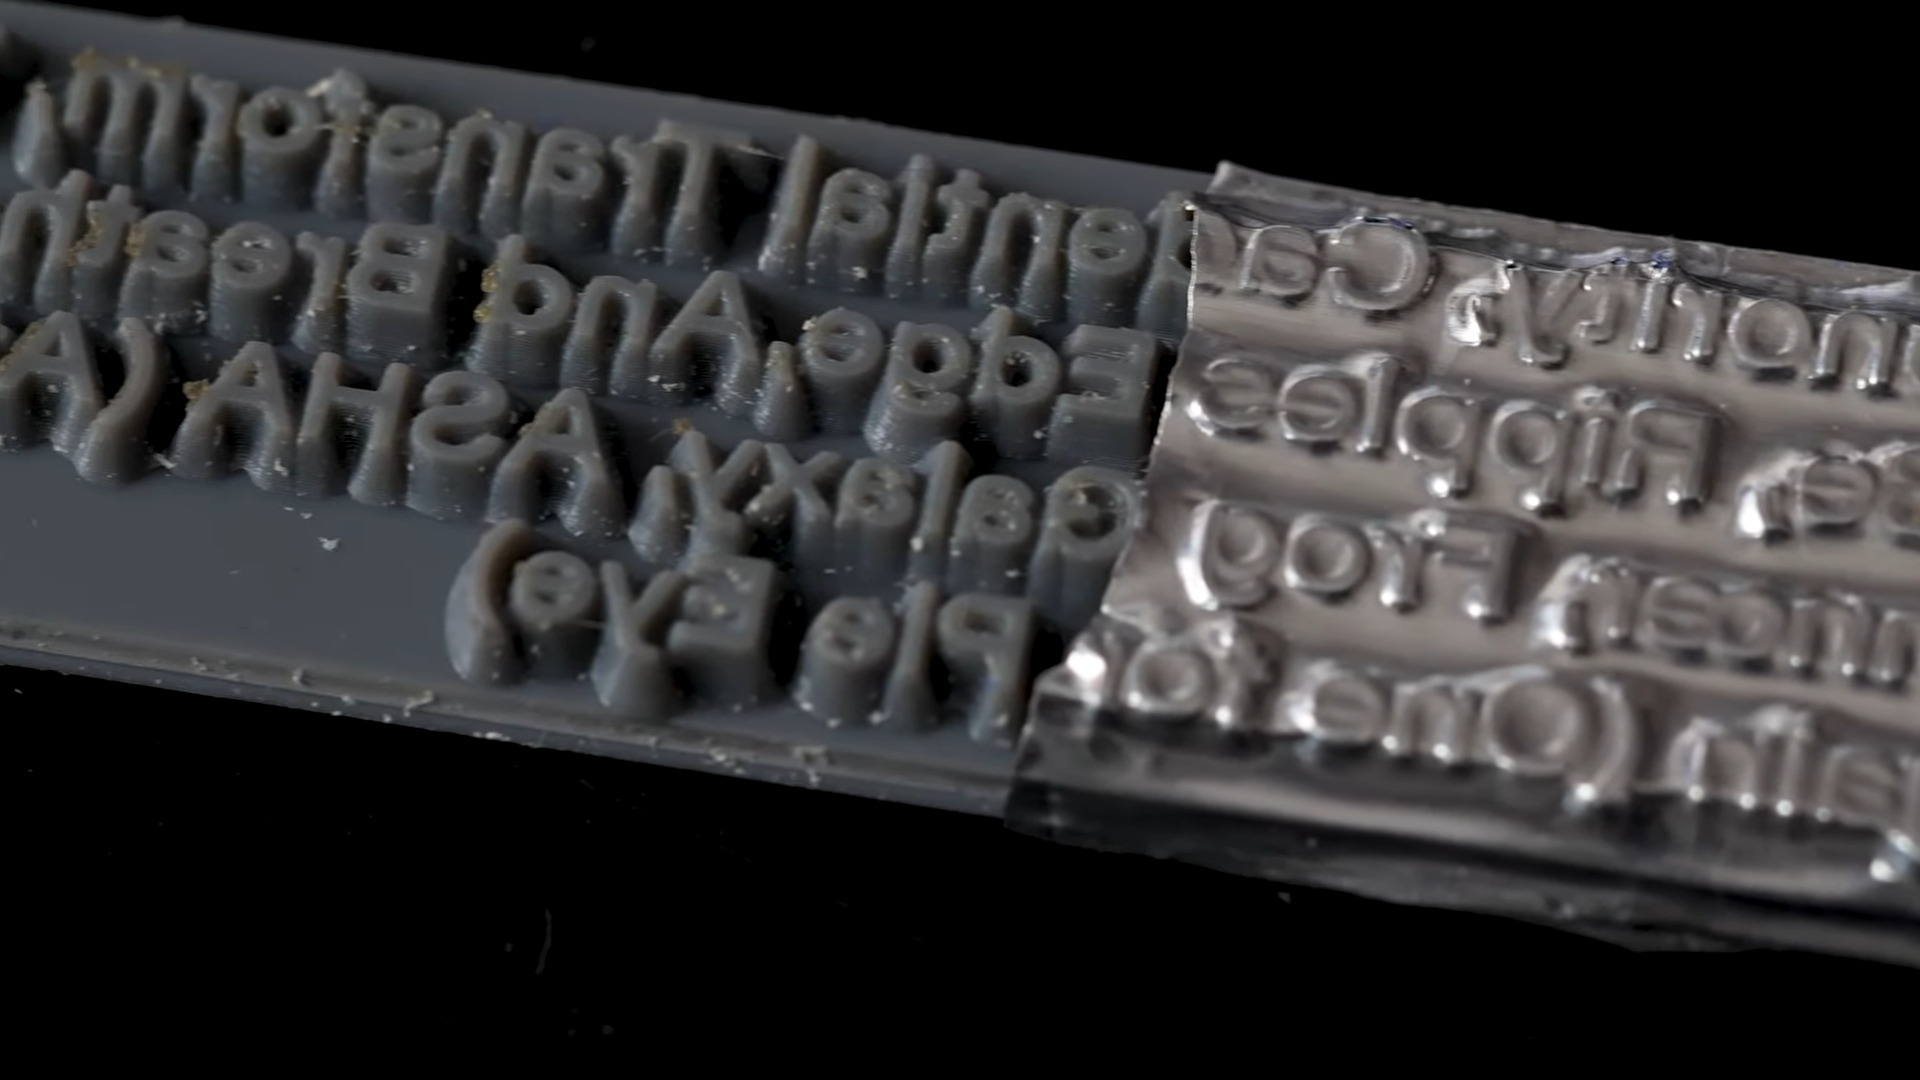
In trials, the stamp heat measured roughly 30 C lower on average than the press, so [This Designed That] kept turning up the heat, but it just wasn’t conductive enough. So they started experimenting with ways to increase heat transfer. First they tried molding metal powder, but it didn’t work. After briefly flirting with electroplating them, [This Designed That] finally tried some aluminum tape, wrapped tight and burnished to the design.
Now the hot foil machine stamps perfectly at only 120 C — the lower end of the standard temperature that [This Designed That] typically runs the thing. They are chuffed at the results, and frankly, so are we. Be sure to check out the process video after the break.
Curious about hot foil stamping machines? Check out this retrofit job.
Continue reading “High Temp Resin Means Faster Hot Foil Stamping”