Tiny RC Truck And Trailer Motors Around Tabletop

Most RC cars replicate real-world race cars or fantastical off-road buggies for outdoor escapades. [diorama111] is an expert at building tiny desk-roaming models, though, and built this exquisite micro semi-truck and trailer.

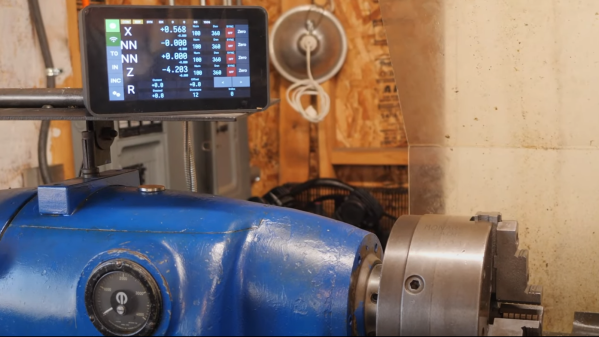
Based on a 1/150 scale truck and trailer model, the build starts with the tractor unit. It’s disassembled, and its plastic wheels are machined on a tiny lathe so they can be fitted with grippy rubber tires carved out of O-ring material. The front wheels are given hubs and mounted to a motor-driven screw-type steering assembly. A photodetector is used to aid in self-centering. The rear axle is fitted with a geared drivetrain, running off a small DC motor. Multiple gear stages are used to give the build plenty of torque for pulling the trailer. Remote control of the model is achieved over Bluetooth, with an ATtiny3217 tucked inside with motor drivers to run the show.

The microcontroller also runs a full set of driving, tail, and indicator lights. The trailer is fitted with an infrared receiver and a battery of its own. It receives signals from an infrared LED on the tractor unit, which tell the trailer when to turn on the taillights and indicators.

There aren’t too many modelers working in the RC space at the 1:150 scale. [diorama111] has form here, though, and we’ve featured a previous Toyota Crown build before.

Continue reading “Tiny RC Truck And Trailer Motors Around Tabletop”

A wooden table with a puzzle on top of it sits in an off white room with a light wood floor. A red chair sits behind the table and the slats of the rolled away tambour top are visible.

Tambour Table With A Puzzling Secret

Some people really like puzzles. [Simone Giertz] is one of these serious puzzle lovers and built a transforming table (YouTube) to let her easily switch between puzzles and more mundane tasks, like eating.

While there are commercial solutions out there for game tables with removable tops and simpler solutions like hinged lids, [Giertz] decided to “make it more complicated and over-engineered than that.” A tambour top that rolls out of the way makes this a unique piece of furniture already, but the second, puzzle table top that can be raised flush with the sides of the table really brings this to the next level.

If that wasn’t already enough, the brass handles on the table are also custom made. In grand maker tradition, [Giertz] listened to her inner MYOG (Make Your Own Gnome) and got a lathe to learn to make her own handles instead of just buying some off the shelf.

If you’re less enamored of puzzles, you may want to see how Jigsaw Puzzles are Defeated. If you’re worried about losing pieces, check out these 3D Printed Sliding Puzzles.

Continue reading “Tambour Table With A Puzzling Secret”

A segmented lamp made of circular slices of plywood. They are arranged as shutters around a long, skinny LED bulb in the center that gives off an incadescent-looking glow. A cord trails off to the left against the grey background.

Plywood Lamp Has Customizable Light Output

There’s something about light fixtures that attracts makers like moths to a flame. [danthemakerman] wanted something with a more configurable light output and built this Sculptural and Customizable Plywood Lamp.

In his detailed build log, [danthemakerman] describes how he wanted something “sort of like an analog dimmable light.” By using a stack of split plywood donuts hinged on a brass rod, he can vary the output and shape of the lamp. These shutters allow the lamp to go from bright to nightlight without using any electrical dimming components.

The plywood was rough cut on a bandsaw before being turned on a lathe. The light cover sections were then hollowed out with a Forstner bit and split in half. The tricky bit is the overlap of the cut on the hinge side of the shutters. Cutting the piece exactly in half would’ve required a lot more hardware to make this lamp work than what was achieved by patient woodworking.

If you’d like to see more ways to make light fixtures with plywood, check out this Hexagonal Lamp, these Upcycled Plywood and Glass Lamps, or this Laser-cut Sphere Lampshade that Packs Flat.

Moving Big Stuff Without The Tears

It’s something that has probably happened to more than one of us over the years, there’s an unmissable opportunity at the machinery auction or on eBay, with the small snag that it weighs a ton and requires a flatbed truck to transport. A big lathe, a bandsaw, or the like.

The sensible option would be to hire a crane or a forklift to do the job, but cash is tight so at the appointed hour the truck turns up at the end of your driveway to meet you and as big a group of your friends as you could muster. You’re going to shift this thing with pure muscle power! If you grow up around any form of workshop-based small business it’s something you’ll no doubt be familiar with. Craftsmen seem to have a network for such moments, so just as the blacksmith might find himself helping the woodworker unload a huge saw bench, so might they both spend an unexpected afternoon at the engineering shop manhandling a lathe.

It came as a shock in a casual hackerspace conversation to realise how many times I’d been involved in such maneuvers at home, for friends, or at hackerspaces, and how that experience in doing so safely isn’t necessarily something that’s universal. Maybe it’s time to tell the story of moving big machines on limited resources. This is something that starts by thinking ahead and planning what you’ll need and where you’ll need it. Continue reading “Moving Big Stuff Without The Tears”

A Homemade Tube Amplifier Featuring Homemade Tubes

With the wealth of cheap and highly integrated audio amplifier modules on the market today, it takes a special dedication to roll your own from parts. Especially when those parts include vacuum tubes, and doubly so when you make the vacuum tubes from scratch too.

Now, we get it — some readers are going to find it hard to invest an hour in watching [jdflyback] make a pair of triodes to build his amplifier. But really, you’ve got to check this out. Making vacuum tubes with all the proper equipment — glassblower’s lathe, various kinds of oxy-fuel torches, all the right hand tools — is hard enough. But when your lathe is a cordless drill, and you’re using a spot welder that looks like it’s cobbled together from junk, your tube-making game gets a lot harder. Given all that, you’d expect the tubes to look a lot rougher than they are, but even with plain tungsten wire heaters and grids made from thick copper wire, they actually work pretty well. Sure, the heaters glow as bright as light bulbs, but that’s all part of the charm.

Speaking of charm, we just love the amp these tubes went into. Built in 1920s breadboard-style, the features some beautiful vintage mica capacitors and wirewound resistors, plus a variable resistor the likes of which we’ve never seen. The one nod to modernity is the clever use of doorbell transformers, one for a choke and one for the speaker transformer. They don’t sound great, but there’s no doubt they work.

We may have seen other homemade vacuum tubes before — we even recently featured a DIY X-ray tube — but there’s something about [jdflyback]’s tubes that really gets us going.

Continue reading “A Homemade Tube Amplifier Featuring Homemade Tubes”

DIY Bike Wheels Welded With Rebar

[Liebregts] is working on a trike design, and needed a pair of wheels to go up front. Regular bicycle wheels wouldn’t do, as they’re not designed to work with a single-sided support. They also wanted to be able to mount disc brakes. Thus, they set about building a set of custom wheels to do the job.

The build began with a regular set of 20″ bike wheel rims with all the spokes taken out. A ring of steel rebar welded on the inner perimeter gave the rims more strength. A set of hubs and axles were then fabbed up with a welder and lathe, with provisions for bolting on disc brake components. Lengths of rebar were then welded in as non-adjustable spokes. Next, it was time for a coat of paint. Finally [Liebregts] mounted the tires and brakes, and called the job done.

Obviously, it is possible to buy wheels specifically for trike builds. However, [Liebregts] found it difficult to find exactly what they wanted, particularly where the disc brake option was concerned. The best option was a custom build.  The resulting wheels are obviously much heavier than traditional bike wheels, but they’re also likely a fair bit stronger, too. If you need to weigh down a tarpaulin, for example, these wheels might just do the trick.

We’ve seen some other crazy wheels on trikes before, too! Oh, and who says wheels need to be a full circle, anyway? Creativity will never cease to amaze!

How To Achieve Knurling On A Flat Surface

Knurling is a popular way to finish handles of tools and other hardware, with a pattern of crossed lines rolled into metal to provide better grip and an attractive finish. It’s most commonly done on a lathe to round stock, but it can also be achieved on flat surfaces if you have the right tool. Of course, you can make one yourself.

The build is simple, and is based around by creating a special carrier out of a solid piece of steel. It’s a long bar has a space milled out to hold two wheels in the middle. A pair of off-the-shelf knurling wheels are then installed in the bar, with socket head bolts serving as axles.

With the tooling complete, it’s then a simple matter of installing the carrier bar in a lathe and running it back and forth over a flat workpiece. The workpiece is rolled back and forth to allow the wheels to do their work, while also being shifted horizontally to allow the entire flat surface to be worked over.

A nice knurled finish really can elevate the form and function of any tool or other piece of metal craftsmanship. We’ve explored how to create your own knurled knobs before, too.

Continue reading “How To Achieve Knurling On A Flat Surface”