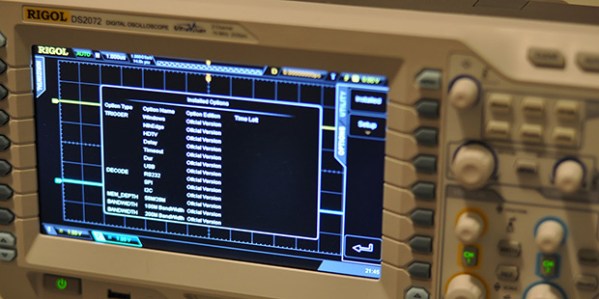
A few weeks ago it came to our attention that Rigol’s DS2000-series oscilloscopes were easily unlocked with a few USB commands. We had expected a small microcontroller device would be developed to send these bits to a scope automatically, and we never imagined the final version of this tool hack would be so elegant. Now it’s possible to unlock a DS2072 o’scope using just a serial number and a great encryption hack.
The engineers over a Rigol (bless their hearts) used the same hardware for the $800, 70MHz DS2072 and the $1600, 200MHz DS2202. The only difference between the two are a few bits in the scope’s memory that are easily unlocked if you have the right key. A few folks over on the EEV Blog forum figured out the private key for the scope’s encryption and the user [cybernet] wrote a keygen.
The upgrade process is extremely simple: get the serial number of your DS2072, put it in the keygen, and enter the resulting key into the scope. Reboot, and you have a $1600 scope you bought for half price.
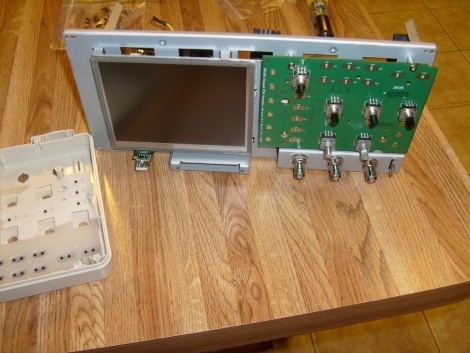
[Hotsolder] encountered a bad encoder in his Rigol Oscilloscope, so he opened it up in order to replace the damaged part. According to him, it was quite an adventure, so he documented the disassembly and component swap for the benefit of anyone else out there that might have to do the same.
The teardown is in the form of a slideshow, which is available on his site. The images are all pretty well annotated, so you should be able to follow along quite easily if you happen to be tearing one apart yourself. There’s not a ton of exotic things to see inside the scope, it pretty much contains what you would expect to see if you cracked one open.
The encoder replacement went off without a hitch, and he even took pictures of the defective one to discuss how it works.
It’s definitely a quick and interesting read if you are simply curious about oscilloscopes, or if you happen to need to dismantle yours.
Imagine an electronics lab. If you grew up in the age of tubes, you might envision a room full of heavy large equipment. Even if you grew up in the latter part of the last century, your idea might be a fairly large workbench with giant boxes full of blinking lights. These days, you can do everything in one little box connected to a PC. Somehow, though, it doesn’t quite feel right. Besides, you might be using your computer for something else.
I’m fortunate in that I have a good-sized workspace in a separate building. My main bench has an oscilloscope, several power supplies, a function generator, a bench meter, and at least two counters. But I also have an office in the house, and sometimes I just want to do something there, but I don’t have a lot of space. I finally found a very workable solution that fits on a credenza and takes just around 14 inches of linear space.
How?
How can I pack the whole thing in 14 inches? The trick is to use only two boxes, but they need to be devices that can do a lot. The latest generation of oscilloscopes are quite small. My scope of choice is a Rigol DHO900, although there are other similar-sized scopes out there.
If you’ve only seen these in pictures, it is hard to realize how much smaller they are than the usual scopes. They should put a banana in the pictures for scale. The scope is about 10.5″ wide (265 mm and change). It is also razor thin: 3″ or 77 mm. For comparison, that’s about an inch and a half narrower and nearly half the width of a DS1052E, which has a smaller screen and only two channels.
A lot of test gear in a short run.
If you get the scope tricked out, you’ve just crammed a bunch of features into that small space. Of course, you have a scope and a spectrum analyzer. You can use the thing as a voltmeter, but it isn’t the primary meter on the bench. If you spend a few extra dollars, you can also get a function generator and logic analyzer built-in. Tip: the scope doesn’t come with the logic analyzer probes, and they are pricey. However, you can find clones of them in the usual places that are very inexpensive and work fine.
There are plenty of reviews of this and similar scopes around, so I won’t talk anymore about it. The biggest problem is where to park all the probes. Continue reading “The Short Workbench”→
This week Hackaday Editors Elliot Williams and Tom Nardi start things off with a traffic report from the Moon, which has suddenly become a popular destination for wayward robots.
Anonymizing an ATtiny85 via laser
From there, they’ll go over a fire-tending contraption that’s equal parts madness and brilliance, two decades of routers being liberated by OpenWRT, impressive feats of chip decapping, and USB-C’s glorious rise to power.
You’ll also hear about the latest developments in laptop RAM, exploits against the flash encryption used on the ESP32, and Android powered oscilloscopes. The duo will wrap things up with horror stories from the self-checkout aisle, and a look at the fantastical rolling power station that Dan Maloney has been building in his driveway.
Check out the links below if you want to follow along, and as always, tell us what you think about this episode in the comments!
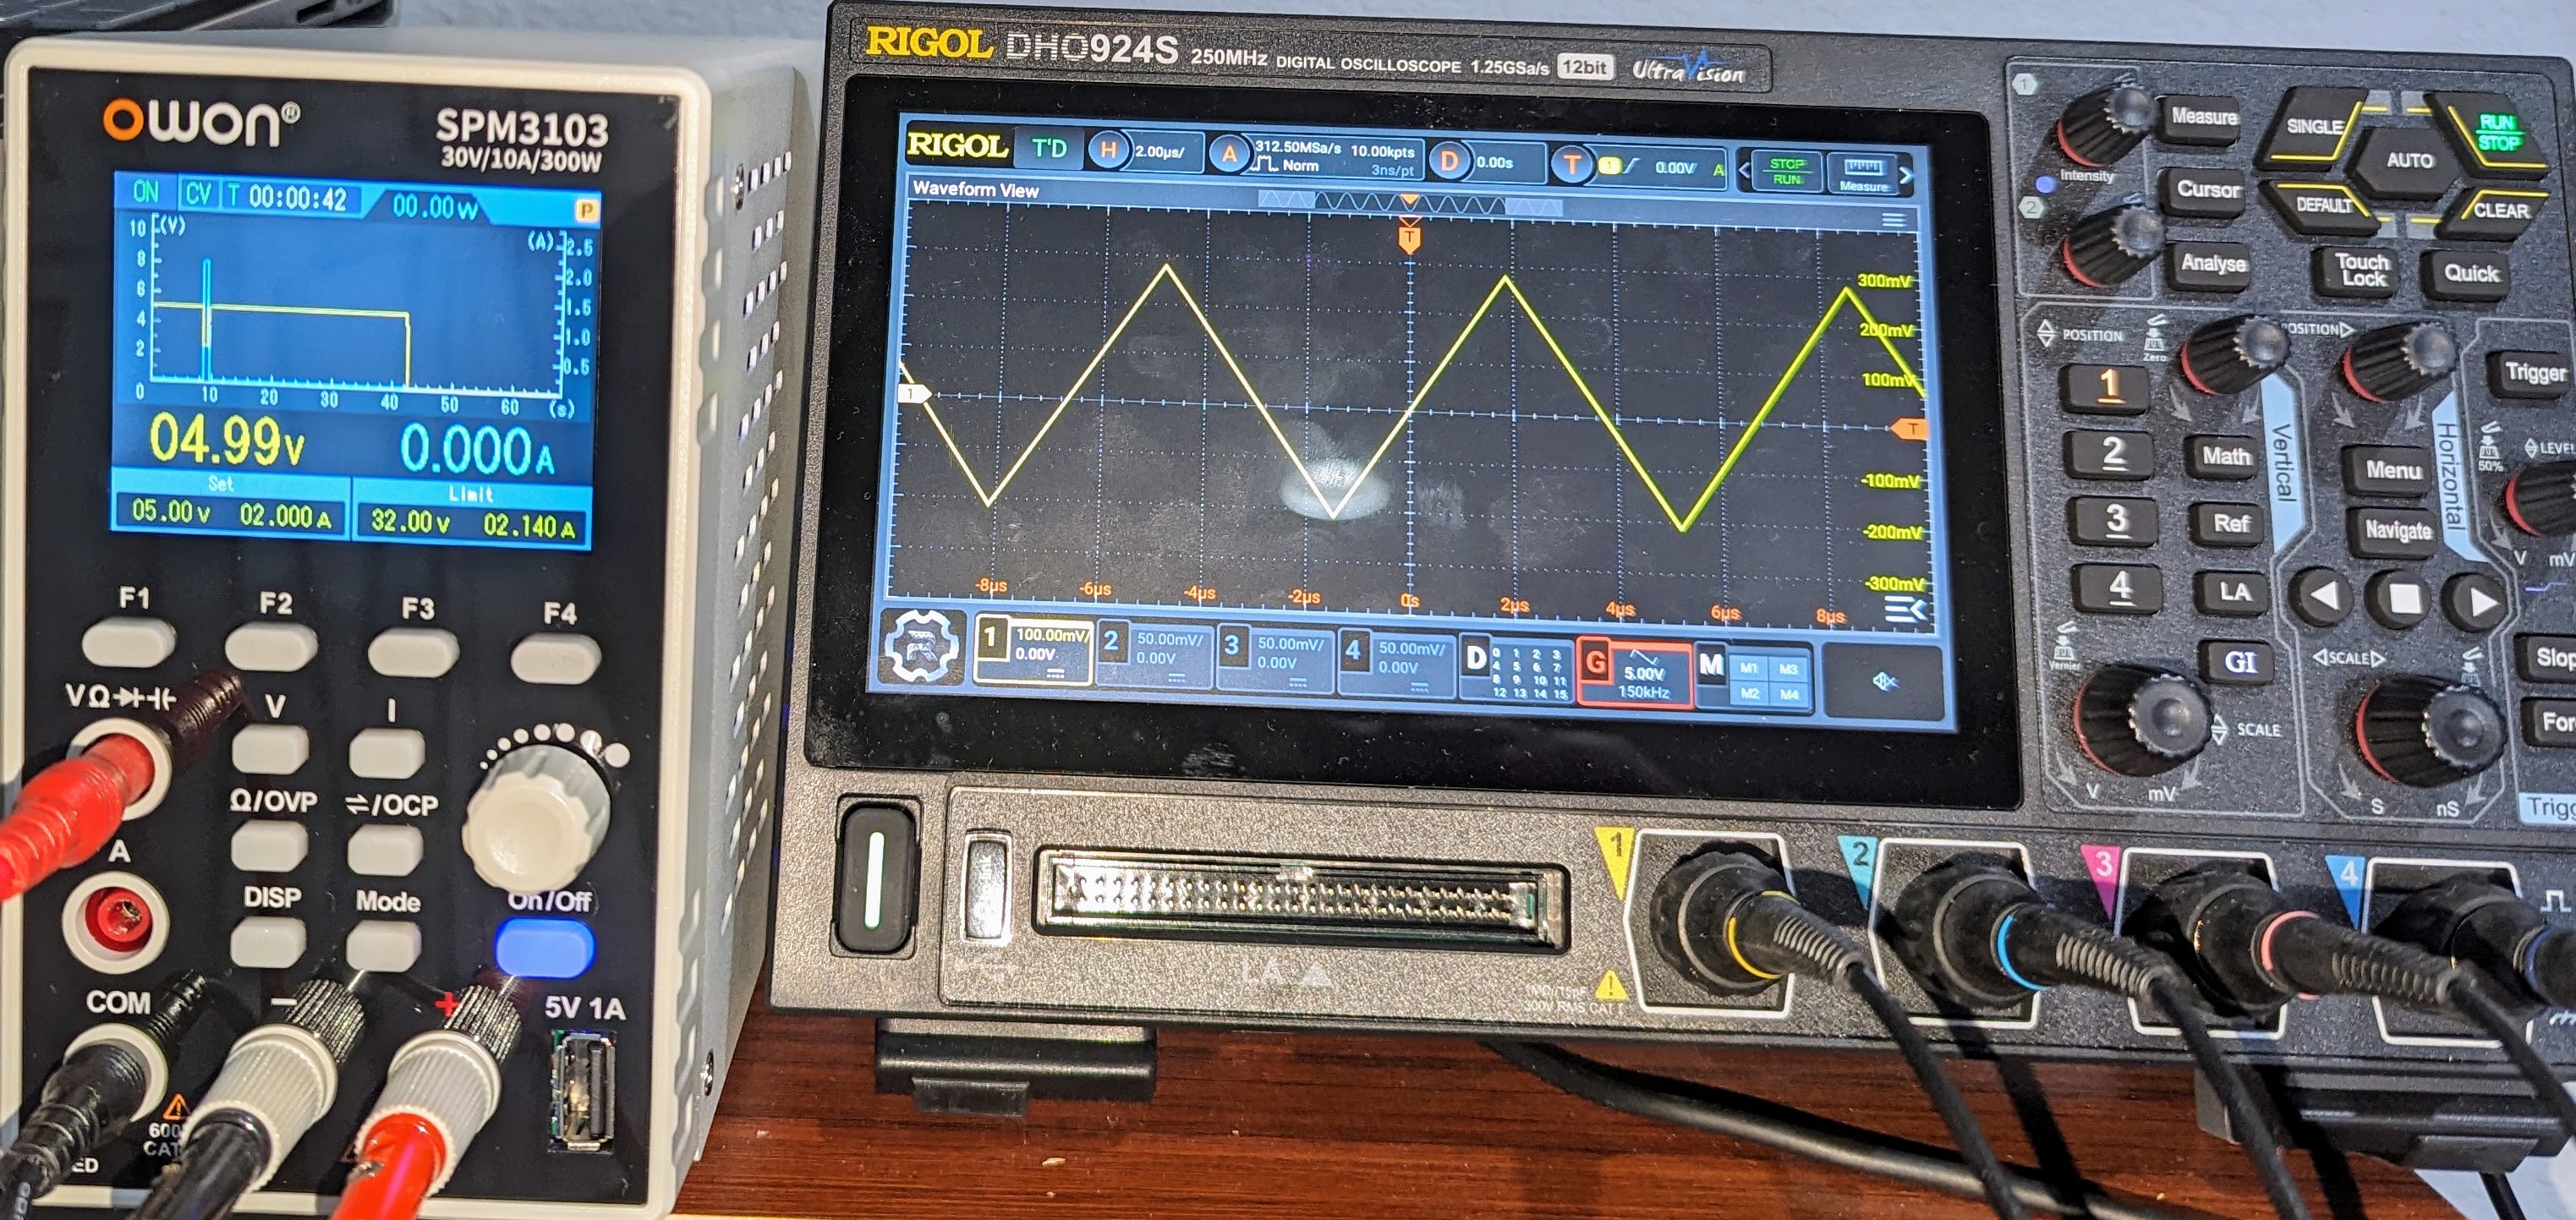
Will Rogers once said that veterinarians are the best doctors because their patients can’t tell them where it hurts. I’ve often thought that electronic people have a similar problem. In many cases, what’s wrong with our circuits isn’t visible. Sure, you can visually identify a backward diode, a bad solder joint, or a blown fuse. But you can’t look at a battery and see that it is dead or that a clock signal isn’t reaching some voltage. There are lots of ways to look at what’s really going on, but there is no substitute for a scope. It used to be hard for the average person to own a scope, but these days, it doesn’t require much. If you aren’t shopping for the best tech or you are willing to use it with a PC, oscilloscopes are quite affordable. If you spend even a little, you can now get scopes that are surprisingly capable with features undreamed of in years past. For example, many modern scopes have a dizzying array of triggering options. Do you need them? What do they do? Let’s find out.
I’ll be using a relatively new Rigol DHO924S, but none of the triggering modes are unique to that instrument. Sometimes, they have different names, and, of course, their setup might look different than my pictures, but you should be able to figure it out.
What is Triggering?
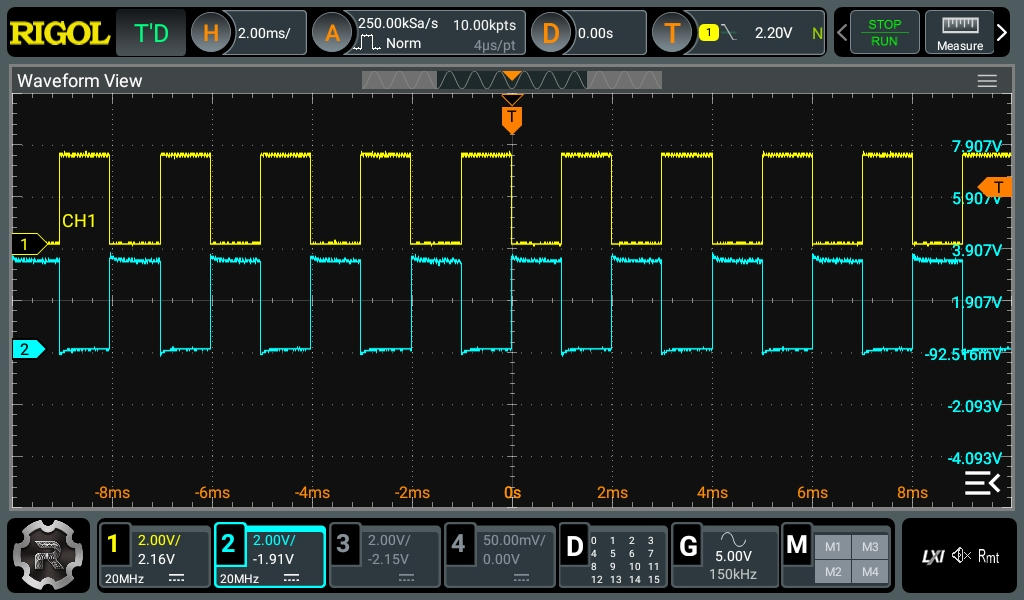
In simple terms, an oscilloscope plots time across the X-axis and voltage vertically on the Y-axis. So you can look at two peaks, for example, and measure the distance between them to understand how far apart they are in time. If the signal you are measuring happens repeatedly — like a square or sine wave, for example — it hardly matters which set of peaks you look at. After all, they are all the same for practical purposes.
Pretty square waves all in a row. Channel 2 is 180 degrees out of phase (inverted). But is that all there is?
The problem occurs when you want to see something relative to a particular event. Basic scopes often have level triggering. They “start” when the input voltage goes above or below a certain value. Suppose you are looking at a square wave that goes from 0 V to 5 V. You could trigger at about 2.5 V, and the scope will never start in the middle of a cycle.
Digital scopes tend to capture data before and after the trigger, so the center of the screen will be right on an edge, and you’ll be able to see the square waves on either side. The picture shows two square waves on the screen with the trigger point marked with a T in the top center of the display. You can see the level in the top bar and also marked with a T on the right side of the screen.
What happens if there are no pulses on the trigger source channel? That depends. If you are in auto mode, the scope will eventually get impatient and trigger at random. This lets you see what’s going on, but there’s no reference. If you are in normal mode, though, the scope will either show nothing or show the last thing it displayed. Either way, the green text near the top left corner will read WAIT until the trigger event occurs. Then it will say T’D.
There’s no shortage of cheap digital oscilloscopes available today from the usual online retailers, but that doesn’t mean the appeal of building your own has gone away — especially when we have access to powerful microcontrollers that make it easier than ever to spin up custom gear. [mircemk] is using one of those microcontrollers to build an improved, pocket-sized oscilloscope.
The microcontroller he’s chosen is the STM32F103C8T6, part of the 32-bit STM family which has tremendous performance compared to common 8-bit microcontrollers for only a marginally increased cost. Paired with a small 3-inch TFT color display, it has enough functions to cover plenty of use cases, capable of measuring both AC and DC signals, freezing a signal for analysis, and operating at an impressive 500 kHz at a cost of only around $15. The display also outputs a fairly comprehensive analysis of the incoming signal as well, with the small scope capable of measuring up to 6.6 V on its input.
This isn’t [mircemk]’s first oscilloscope, either. His previous versions have used Arduinos, generally only running around 50 kHz. With the STM32 microcontroller the sampling frequency is an order of magnitude higher at 500 kHz. While that’s not going to beat the latest four-channel scope from Tektronix or Rigol, it’s not bad for the form factor and cost and would be an effective scope in plenty of applications. If all you have on hand is an 8-bit microcontroller, though, we have seen some interesting scopes built with them in the past.
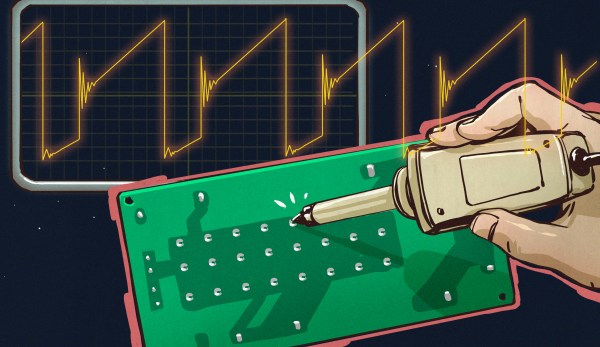
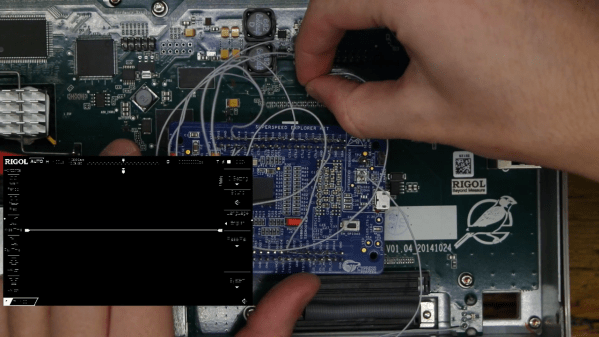
Modern oscilloscopes are often loaded with features, but every now and then you run into a feature that seems easy to implement yet isn’t available. [kgsws] wanted to use his Rigol DS1074 to show live measurements in his YouTube videos, but found out that this scope doesn’t support video output. Not to be deterred, [kgsws] decided to add this feature himself. In the video embedded below, he describes in detail the process of adding a USB Video Capture (UVC) interface to his oscilloscope.
The basic idea was to find the signals going into the scope’s display and read them out using a Cypress EZ-USB board. This is a development board that can be used to design USB devices, and supports the UVC mode. However, with no documentation of any of the Rigol’s internal circuitry [kgsws] had to probe the display connector to find out which pin carried which signal. And since he had no other scope available than this Rigol, he hooked up the various bits of the disassembled instrument so that it could (awkwardly) probe its own internal signals.
After mapping out its own display signals, it was time to hook them up to the EZ-USB board. [kgsws] achieved this by soldering about two dozen tiny wires to SMD pads on the motherboard. The EZ-USB board itself was placed in the back of the scope’s case, but had to be stripped of unneeded components in order to save space and power. A very clever trick was the addition of a reed switch, which allowed [kgsws] to set the EZ-USB board to programming mode without having to open the scope’s case, by simply holding a magnet near the switch.