Creating A Joule-Thomson Cryocooler And A Little Bit Of History At Home

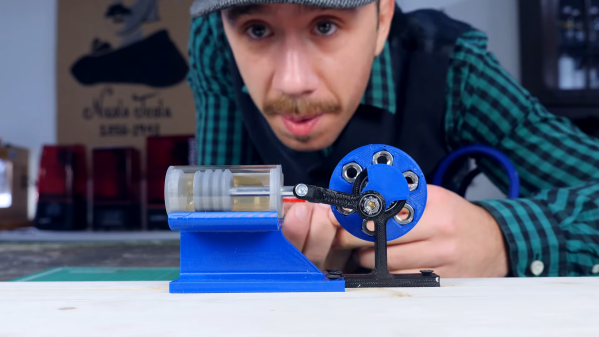
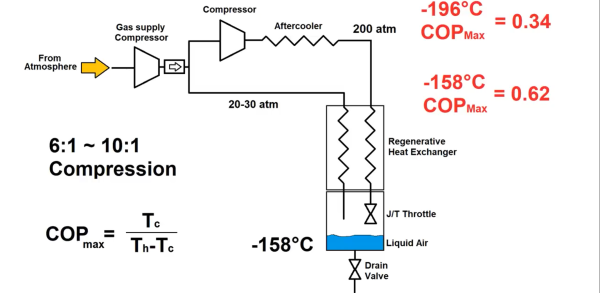
The fun part about crycoolers is that there are so many different and exciting ways to make stuff cold, based on a wide variety of physics. This is why after first exploring the Stirling/GM cycle and vapor-compression to create a cryocooler that he could liquefy nitrogen with, [Hyperspace Pirate] is exploring a Joule-Thomson cooler, which is also misspelled as ‘Joule-Thompson’ by those who don’t mind take some liberties with history. Either way, the advantage of the adiabatic Joule-Thomson effect is that it is significantly simpler than the other methods — having been invented in the 19th century and used for the earliest forms of refrigeration.

This is what peak Joule-Thomson prototype cooler performance looks like.

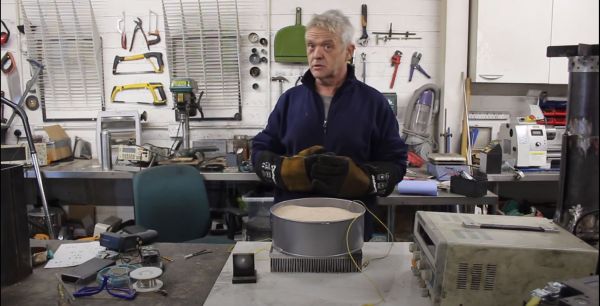
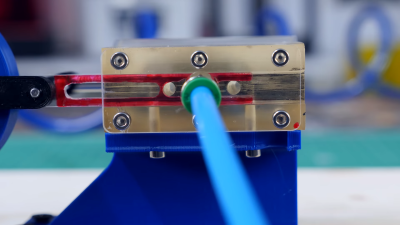
The big difference between it and other technologies is that the effect is based on throttling the flow of a gas as it seeks to expand, within specific temperature and pressure ranges to ensure that the temperature change effect is positive (i.e. the temperature of the gas decreases). The net result is that of a cooling effect, which as demonstrated in the video can be used with successive stages involving different gases, or a gas mixture, to reach a low enough temperature at which nitrogen (contained in the same gas mixture) liquefies and can be collected.

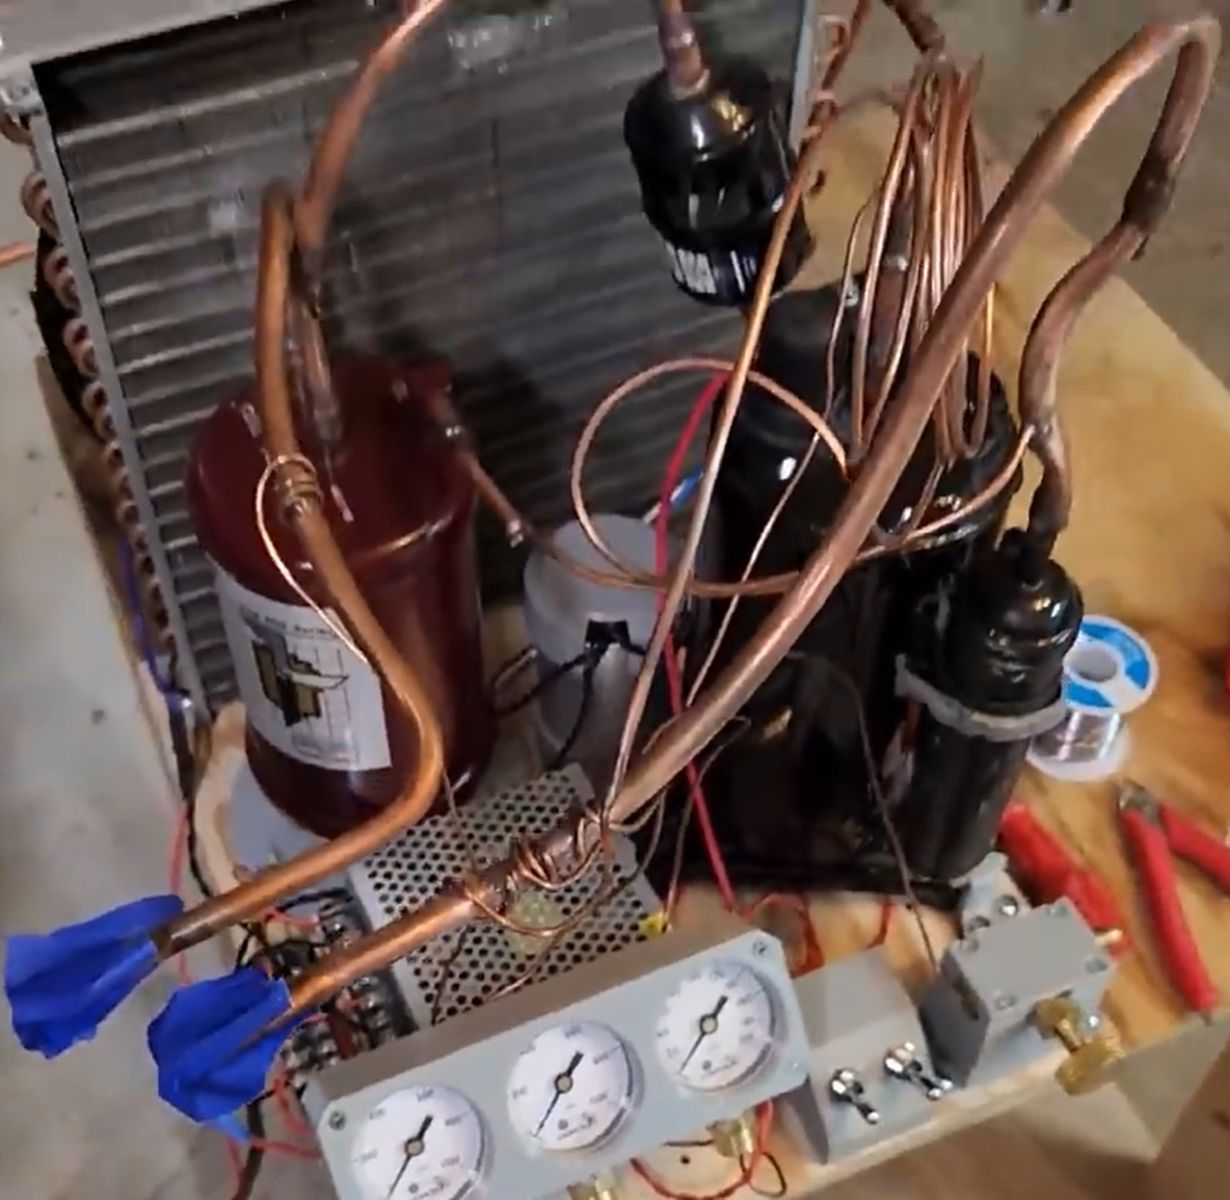
Although not a very efficient process, if your local electricity costs allow it, running the compressor in a closed loop version isn’t that expensive and worth it for the science alone. Naturally, as with any experimental setup involving a range of gases, a compressor and other components, getting it to run perfectly on the first try is basically impossible, which is why this is so far Part 1 of another series on cryocoolers at home (or in the garage).

If you’re interested in the previous work [Hyperspace Pirate] has done with DIY cyrocoolers, take a look at our coverage from earlier this year.

Continue reading “Creating A Joule-Thomson Cryocooler And A Little Bit Of History At Home”

NASA’s Voyager Space Probe’s Reserve Power, And The Intricacies Of RTG-Based Power Systems

Launched in 1977, the Voyager 1 and 2 space probes have been operating non-stop for over 45 years, making their way from Earth to our solar system’s outer planets and beyond. Courtesy of the radioisotope thermoelectric generators (RTGs) which provided 470 W at launch, they are able to function in the darkness of Deep Space as well as they did within the confines of our Sun-lit solar system. Yet as nothing in the Universe is really infinite, so too do these RTGs wear out over time, both from natural decay of their radioactive source and from the degradation of the thermocouples.

Despite this gradual drop in power, NASA recently announced that Voyager 2 has a hitherto seemingly unknown source of reserve power that will postpone the shutdown of more science instruments for a few more years. The change essentially bypasses a voltage regulator circuit and associated backup power system, freeing up the power consumed by this for the scientific instruments which would otherwise have begun to shut down years sooner.

While this is good news in itself, it’s also noteworthy because the Voyager’s 45+ year old Multi-Hundred Watt (MHW) RTGs are the predecessor to the RTGs that are still powering the New Horizons probe after 17 years, and the Mars Science Laboratory (Curiosity) for over 10 years, showing the value of RTGs in long-term exploration missions.

Although the basic principle behind an RTG is quite simple, their design has changed significantly since the US put a SNAP-3 RTG on the Transit 4B satellite in 1961.

Continue reading “NASA’s Voyager Space Probe’s Reserve Power, And The Intricacies Of RTG-Based Power Systems”

A DIY Pulse Tube Cryocooler In The Quest For Home-Made Liquid Nitrogen

What if you have a need for liquid nitrogen, but you do not wish to simply order it from a local supplier? In that case you can build your very own pulse tube cryocooler, as [Hyperspace Pirate] is in the process of doing over at YouTube. You can catch part 1 using a linear motor and part 2 using a reciprocating piston-based version also after the break. Although still very much a work-in-progress, the second version of the cryocooler managed to reduce the temperature to a chilly -75°C.

The pulse tube cryocooler is one of many types of systems used for creating a cooling effect. Commercially available refrigerators and freezers tend to use Rankine cycle coolers due to their low cost and effectiveness at (relatively) warmer temperatures. For cryogenic temperatures, Stirling engines are commonly used, although they find some use in refrigeration as well. All three share common elements, but they differ in their efficiency over a larger temperature range.

In this video series, the viewer is taken through the physics behind these coolers and the bottlenecks which prevent them from simply cooling down to zero Kelvin. Despite the deceptive simplicity of pulse tube cryocoolers — with just a single piston, a regenerator mesh, and some tubing — making them work well is an exercise in patience. We’re definitely looking forward to the future videos in this series as it develops.

Continue reading “A DIY Pulse Tube Cryocooler In The Quest For Home-Made Liquid Nitrogen”

Making A Do-It-Yourself Sand Battery

Storing energy can be done in many ways, with the chemical storage method of a battery being one of the most common. Another option is a thermal battery, which basically means making something hot, and later extracting that heat again. In this video by [Robert Murray-Smith] the basic concept of a thermal battery that uses sand is demonstrated.

By running a current through a resistive wire that’s been buried inside a container with sand, the sand is heated up to about 200 °C. As [Robert] points out, the maximum temperature of the sand can be a 1000 °C or more. Because sand doesn’t boil like water, the total amount of energy stored in sand is correspondingly higher.

Extracting the thermal energy can be done rather inefficiently using the demonstrated Peltier element. A Stirling engine, or steam generator and turbine, would get a lot more energy out. Either way, the thermal battery itself is made using just plain sand, which makes it an attractive DIY target to tinker with.

Continue reading “Making A Do-It-Yourself Sand Battery”

You Can 3D Print A Working Reciprocating Steam Engine

3D prints aren’t typically known for their heat resistance. However, [Integza] noted that using the right techniques, it was possible to 3D print parts that could handle steam heat without failing. Thus, the natural progression from there was to build a piston-type steam engine.

The sliding valve alternately feeds steam to each side of the piston.

Resin prints are key here, as the melting point of such parts is much higher than that of those turned out by typical FDM printers. Try this same build using PLA for the hot parts, and you’ll quickly end up with a pile of molten goo.

To make such an engine work, valves are required to allow steam to flow into alternating sides of the piston to let it reciprocate continuously. A simple slide valve is used, allowing steam to flow to one side of the piston and the other alternately, as driven by an arm coming off the flywheel attached to the engine’s output shaft.

Tested on compressed air and steam, the engine ran continuously, chugging away enthusiastically. However, steam performance was compromised by the low pressure output of just 1.5 bar from [Integza]’s pressure cooker. Similarly, the cooker’s steam capacity was low, so the engine ran for just 15 seconds.

However, it suggests that with a better supply of steam, the printed steamer could indeed run for some time. If you’re not into the wetter engines out there, though, consider extruding a Stirling engine instead. Video after the break.

Continue reading “You Can 3D Print A Working Reciprocating Steam Engine”

Hackaday Podcast 113: Python Switching To Match, A Magnetic Dyno, A Flying Dino, And A Spinning Sequencer

Hackaday editors Mike Szczys and Elliot Williams recap a week of great hacks. You won’t want to miss the dynamometer Leo Fernekes built to measure the power output of his Sterling engine, which is also DIY. In this age of lithium-powered multirotors, it’s nice to step back and appreciate a hand-built rubberband-powered ornithopter.

We have a surprising amount to say about Python’s addition of the match statement (not be be confused with switch statements). And when it comes to electromechanical synth gear, it’s hard to beat a spinning tape-head sequencer.

Take a look at the links below if you want to follow along, and as always, tell us what you think about this episode in the comments!

Direct download (~60 MB)

Places to follow Hackaday podcasts:

Continue reading “Hackaday Podcast 113: Python Switching To Match, A Magnetic Dyno, A Flying Dino, And A Spinning Sequencer”

A Clock From An Electricity Meter

Electric utilities across the world have been transitioning their meters from the induction analog style with a distinctive spinning disc to digital “smart” meters which aren’t as aesthetically pleasing but do have a lot of benefits for utilities and customers alike. For one, meter readers don’t need to visit each meter every month because they are all networked together and can download usage data remotely. For another, it means a lot of analog meters are now available for projects such as this clock from [Monta].

The analog meters worked by passing any electricity used through a small induction motor which spun at a rate proportional to the amount of energy passing through it. This small motor spun a set of dials via gearing in order to keep track of the energy usage in the home or business. To run the clock, [Monta] connected a stepper motor with a custom transmission to those dials for the clock face because it wasn’t possible to spin the induction motor fast enough to drive the dials. An Arduino controls that stepper motor, but can’t simply drive the system in a linear fashion because it needs to skip a large portion of the “minutes” dials every hour. A similar problem arises for the “hours” dials, but a little bit of extra code solves this problem as well.

Once the actual clock is finished, [Monta] put some finishing touches on it such as backlighting in the glass cover and a second motor to spin the induction motor wheel to make the meter look like it’s running. It’s a well-polished build that makes excellent use of some antique hardware, much like one of his other builds we’ve seen which draws its power from a Stirling engine.

Continue reading “A Clock From An Electricity Meter”