Time Vs Money, 3D Printer Style

A few months ago, Hackaday’s own Al Williams convinced me to buy a couple of untested, returned-to-manufacturer 3D printers. Or rather, he convinced me to buy one, and the incredible success of the first printer spurred me on to the second. TL;DR: Lightning didn’t strike twice, but I’d still rate it as worth my time. This probably isn’t a good choice for your first printer, but if you’ve done the regular maintenance on your first printer already, I’d recommend it for your second or twelfth.

As background, Al has been volunteering with local schools to teach a 3D printing summer class, and this means outfitting them with a 3DP lab on the dirt cheap. His secret is to buy last year’s model which has all of the features he needs – most importantly for the kids, automatic bed height probing – but to buy it from the scratch-and-dent shelf at Creality. Why? Because they are mid-grade printers, relatively new, but on deep discount.

How deep? I found an essentially endless supply of printers that retail for $300 on discount for $90 each. The catch? It might work, it might not. I bought my son one, because I thought that it would at least make a good project for us to work on together. Those plans were spoiled – it worked absolutely flawlessly from the moment we bolted it together, and he runs 24-hour jobs on the thing without fear. From the look of the build plate, it had been used exactly once and returned for whatever reason. Maybe the owner just didn’t want a 3D printer?

The siren song of straightforward success was too much for me to resist, and I picked another up to replace my aging A8 which was basically a kit for a 3D printer, and not a particularly good one at that, but could be made to work. My scratch-and-dent Creality came with a defective bed-touch sensor, which manifest itself as a random absolute refusal to print.

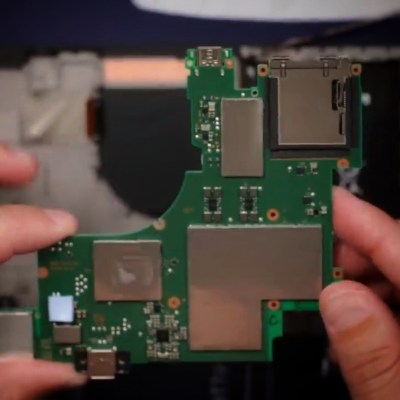
I took it apart, but the flaw is in the design of the V1 touch sensors – the solenoid requires more current to push down than the 3DP motherboard can reliably deliver. It works 100% of the time on my bench power supply, but in situ it fails about 30% of the time, even after hitting it with graphite and making sure everything is mechanically sound. Creality knows this and offers a free trade-in, just not for me. The new version of the Creality probe costs $50 new, but you can get cheap knock-off BL Touch models for $14. Guess what I did?

And guess what bit me? The cheapo touch probe descends a bit slower than the Creality version should, and the firmware is coded to time-out in an extra-short timeframe. Thankfully, Creality’s modifications to Marlin are all open source, and I managed to tweak and flash a new firmware that made it work 100% of the time, but this was at a cost of probably eight hours of bug-hunting, part-ordering, and firmware-compiling. That said, I got some nice extra features along the way, which is the advantage of a printer running open-source firmware.

So my $300 printer cost me $105, plus eight hours of labor. I only charge one coffee per hour for fun hardware debugging tasks, but you may have a different valuation. Taken together with my son’s printer, we have $600 worth of printer for under $200 plus labor, though, which starts to sound a little better.

Is gambling on an untested return 3D printer worth it? For us, I would say it was, and I’d do it again in a few years. For now, though, we’ve got three printers running and that’s all we need. Have you gone down this perilous path?

Casio Calculator Gets New Keyboard

What do you do with a circa 1985 Casio FX-451 calculator with a bad keyboard? Well, if you are [Poking Technology], you transplant the inside of the calculator to a new custom keyboard. There are two videos that cover the process in detail, which you can watch below.

The calculator has a unique design. It looks like a simple calculator in a wallet. But the wallet opens to reveal an extended keyboard with all the scientific features onboard. Unsurprisingly, the membrane keys didn’t survive over four decades. Disassembling the unit was a challenge. Soldering wires to the keyboard lines was further complicated by the fact that some of the lines are on the back of the PCB and pass through to the top under the main IC.

The new keyboard is quite a bit larger than the original, making this more of a desk calculator, but that also means you can use high-quality keys. We’d love to see a 3D printed case to wrap it all up, but the bare PCB look has its charms, too.

If you can’t understand how [Poking] can love a calculator so much, you probably never owned an HP-41C, either. Of course, our retro calculator dreams also include Star Trek.

Continue reading “Casio Calculator Gets New Keyboard”

Antique-Style GPS Looks Like Steampunky Fun

These days, turn-by-turn GPS navigation isn’t considered special anymore. It’s in every smartphone and most cheap rental cars, and thus everybody expects you to figure out where you’re going. If you want a simpler and less robust navigation experience, you might like to try the rather fancy RadioScout.

The RadioScout is a build from [hardlyhumanfx]—a group of engineers and artists that collaborate on fun and whimsical projects. It looks like some kind of steampunk compass, and it kind of is—but at heart, it’s powered by GPS.

You program the RadioScout using the buttons on the front panel and a rotary phone dial to enter the latitude and longitude of your destination. It then uses an internal GPS receiver to compare that with your current location, and calculates a direct bearing to where you want to go. This bearing is displayed with a large compass-like needle run by a stepper motor, and you you can use it to guide yourself onwards.

It’s an attractive build that uses lots of neat parts. The team interfaced a microcontroller with a GPS receiver, a rotary dial, and 7-segment LEDs for the latitude and longitude display. The very real bell is neat, too. The whole thing is wrapped up in a brass and wooden case that would make you a star at just about any sci-fi convention. The build video is a little vague on the finer details, but experienced makers will be able to figure out how it all works.

You can actually buy a RadioScout if it’s something you must have, but one suspects the Hackaday set would probably prefer the homebrew route.

Continue reading “Antique-Style GPS Looks Like Steampunky Fun”

A New Case And Keyboard For The Timex Sinclair 1000

The Timex Sinclair 1000 was a sleek and compact machine, and the US counterpart to the more well-known Spectrum ZX-81. Timex may not have come to dominate the computer market, but the machine still has its fans today, with [skidlz] being one of them. That inspired them to craft a new case and keyboard for their beloved machine, putting a slimline twist on the old classic.

The new case finds some economies of size by eliminating the bulky RF modulator in favor of hacking in a cleaner composite out feed. In turn, this enabled the elimination of the channel switch that freed up more room. [skidlz] then designed a simple case using 2D laser-cut parts and dovetail joints, using superglue to assemble the individual pieces into a cohesive whole.

Meanwhile, the keyboard swap is obvious to anyone that ever used one of these things. The original was particularly unpleasant. In order to upgrade, [skidlz] decided to look to the compact Redragon K603 as an inspiration, giving the new build a longer travel and a nicer mechanical feel under one’s fingers.

The final result look great, and files are on Github for the curious. We’ve seen great work from [skidlz] before, too, in the form of this microcassette storage project. Meanwhile, if you’ve been cooking up your own retrocomputing projects, don’t hesitate to let us know!

Electroplating DIY PCB Vias At Home Without Chemical Baths

Although DIY PCB making has made great strides since the early days of chemical etching, there’s one fly in the ointment: vias. These connect individual layers of the board with a conductive tube, and are essential for dual-layer PCBs, never mind boards with a larger layer stack. The industry standard way of producing them is rather cumbersome and doesn’t scale well to a hobby or prototyping context. Might there be a better way? This is the question that [Levi Janssen] set out to answer with a new home PCB manufacturing project.

The goal here is to still electroplate the vias as with the commercial solution, just without having to use chemical baths. This way it should be suitable for an automated setup, with a tool head that performs the coating of the via with a high-resistance conductive ink before the electroplating step, all without submerging the entire PCB. After an initial experiment showed promising results, [Levi] committed to a full prototype.

This turned out to be a bridge too far, so the prototype was scaled down to a simpler machine. This is where the main issue with electroplating one via at a time became clear, as a standard 0.3 mm via takes easily 10 minutes to electroplate, even with an increase in voltage. At that point ordering a PCB from China becomes the faster option if you have enough vias in the design. Fortunately [Levi] figures he may have some solutions there, so we’ll have to wait and see what those are in the next installment. The video is below the break.

Continue reading “Electroplating DIY PCB Vias At Home Without Chemical Baths”

Automating The Process Of Drawing With Chalk

Chalk is fun to draw with, and some people even get really good at using it to make art on the sidewalk. If you don’t like tediously developing such skills, though, you could go another route. [MrDadVs] built a robot to scrawl chalk pictures for him, and the results speak for themselves.

The robot is known as AP for reasons you’ll have to watch the video to understand. You might be imagining a little rover that crawls around on wheels dotting at the pavement with a stick of chalk, but the actual design is quite different. Instead, [MrDadVs] effectively built a polar-coordinate plotter to make chalk pictures on the ground. AP has a arm loaded with a custom liquid chalk delivery system for marking the pavement. It’s rotated by a stepper motor with the aid of a 3D-printed geartrain that helps give it enough torque. It’s controlled by an ESP32 running the FluidNC software which is a flexible open-source CNC firmware. [MrDadVs] does a great job of explaining how everything works together, from converting cartesian coordinates into a polar format, to getting the machine to work wirelessly.

Building a capable sidewalk chalk robot seems like a great way to spend six months. Particularly when it can draw this well. Video after the break.

Continue reading “Automating The Process Of Drawing With Chalk”

Why Not Build Your Quadcopter Around An Evaluation Board?

Quadcopters are flying machines. Traditionally, that would mean you’d optimize the design for lightweight and minimum drag, and you’d do everything in a neat and tidy fashion. The thing is, brushless motors and lithium batteries are so power-dense that you really needn’t try so hard. A great example of that is this barebones quadcopter build from [hebel23] all the way back in 2015.

The build is based around the STM32F4 Discovery Board, which [hebel23] scored as a giveaway at Electronica in Munich way back when. It’s plopped on top of a bit of prototyping board so it can be hooked up to the four controllers driving the motors at each corner. The frame of the quadcopter similarly uses cheap material, in the form of alloy profiles left over from an old screen door. Other equipment onboard includes a GY-273 electronic compass module, a MPU6050 3-axis gyroscope and accelerometer to keep the thing on the straight and level, and the Fly Sky R9B RC receiver for controlling the thing.

It might look crude, but it gets off the ground just fine. We’ve seen quadcopters using the STM32 in more recent years with more refined designs, but there’s something amusingly elegant about lacing one together with an evaluation board and some protoboard in the middle. If you’re working on your own flying projects, don’t hesitate to notify the tipsline!